Why Repotting is Essential for Anthurium Plants
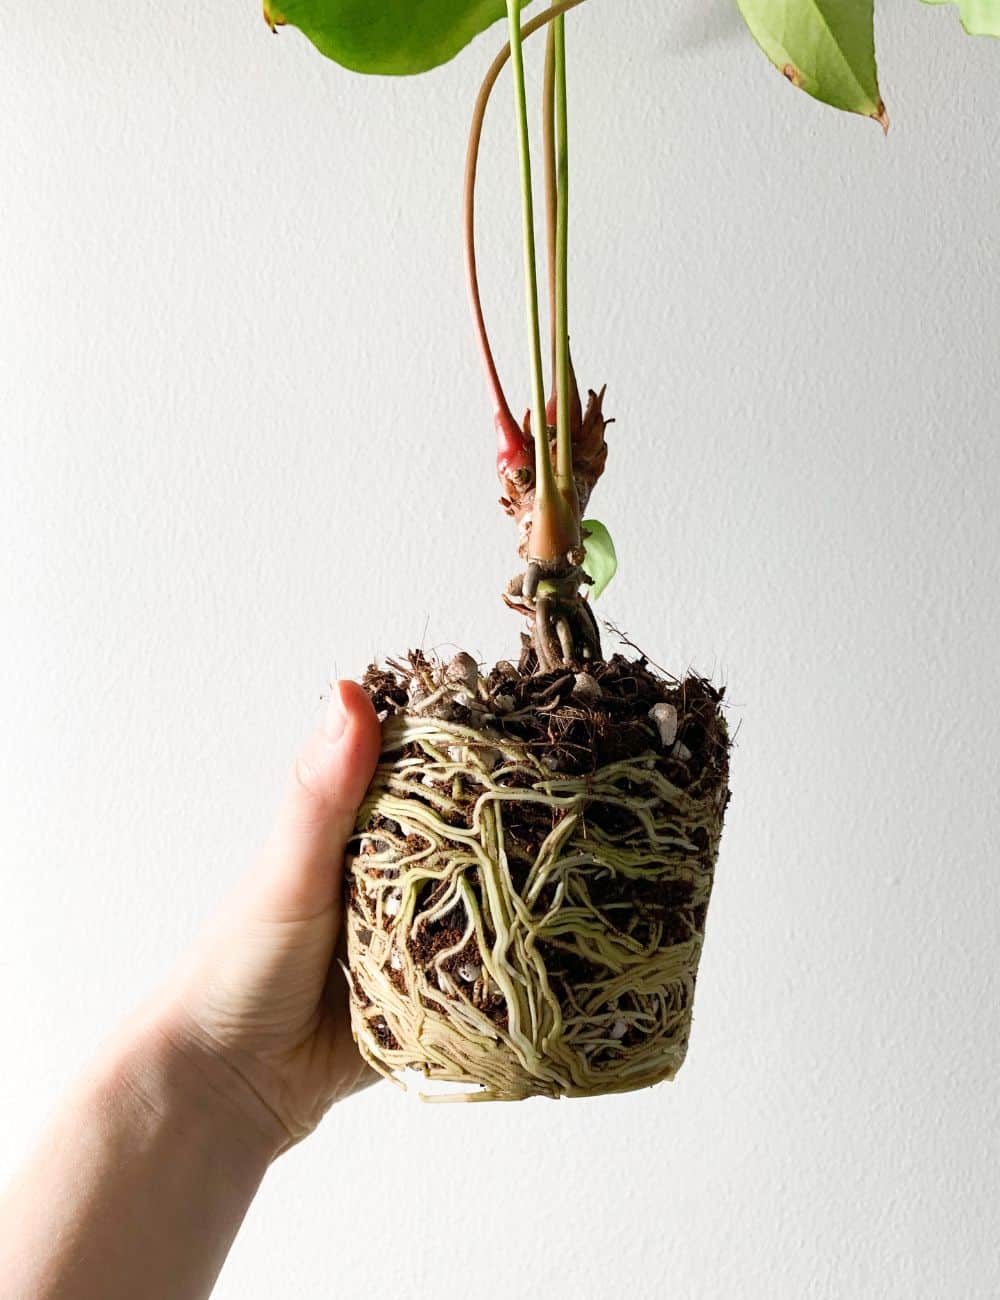
Anthurium plants require regular repotting to maintain their health and vigor. As the plant grows, its roots outgrow the container, leading to a decrease in soil quality and oxygen availability. Repotting provides an opportunity to refresh the soil, prune the roots, and give the plant a larger pot to accommodate its growth. This process is crucial for preventing root bound, a common issue that can lead to stunted growth, yellowing leaves, and reduced flowering. By learning how to repot an anthurium plant correctly, you can prevent these problems and create an ideal environment for your plant to thrive.
Choosing the Right Pot and Soil for Your Anthurium
When it comes to repotting an anthurium plant, selecting the right pot and soil is crucial for its success. A pot that is too small can restrict the plant’s growth, while one that is too large can cause the soil to become too wet. A good rule of thumb is to choose a pot that is only one to two sizes larger than the current one. Additionally, consider the material of the pot, as anthurium plants prefer well-draining pots to prevent waterlogged soil. Terra cotta or ceramic pots are good options, as they allow for better air circulation and moisture evaporation. When it comes to soil, look for a well-draining mix that is specifically designed for tropical plants like anthuriums. A mix with a pH between 6.0 and 7.0 is ideal, as it will provide the necessary nutrients for healthy growth. By choosing the right pot and soil, you’ll be well on your way to learning how to repot an anthurium plant successfully.
Preparing Your Anthurium for Repotting
Before diving into the repotting process, it’s essential to prepare your anthurium plant to ensure a smooth transition. One week prior to repotting, prune any dead or damaged leaves and stems to prevent the spread of disease and encourage healthy growth. Water your anthurium plant thoroughly the day before repotting to make the soil easier to handle. Acclimate your plant to its new environment by placing it in a bright, indirectly lit area with temperatures between 65-75°F (18-24°C). This will help reduce stress and shock during the repotting process. Additionally, inspect your plant’s roots for any signs of root bound, such as circling or tangling, and gently tease them apart to encourage growth. By following these steps, you’ll be well-prepared to learn how to repot an anthurium plant successfully and give your plant the best chance at thriving in its new pot.
The Repotting Process: A Step-by-Step Guide
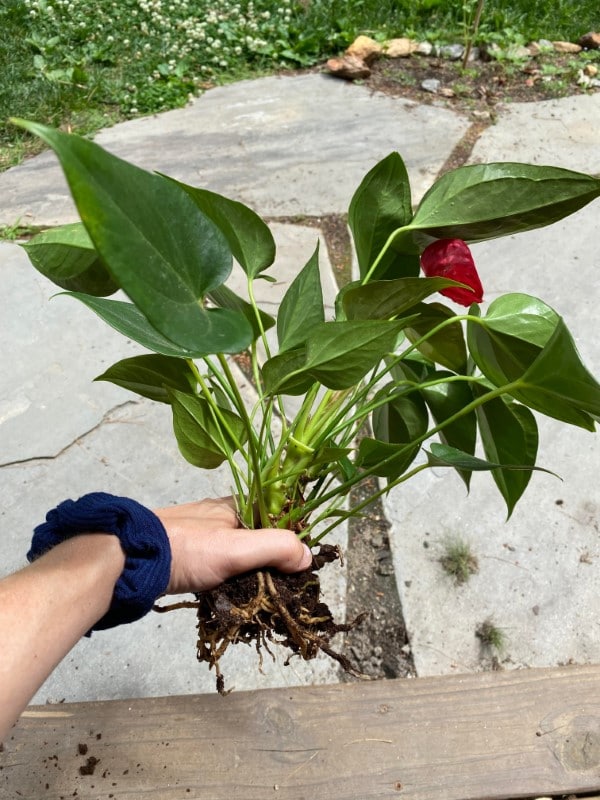
Now that you’ve prepared your anthurium plant and chosen the right pot and soil, it’s time to begin the repotting process. Start by gently removing the plant from its old pot, taking care not to damage the roots or disturb the soil. If the plant is stuck, gently rock it back and forth to loosen the soil. Once the plant is out of its pot, inspect the roots to see if they have become root bound. If so, gently tease them apart with your fingers or a blunt instrument to encourage growth. Next, place a layer of fresh soil in the bottom of the new pot, followed by the anthurium plant. Add more soil around the roots, gently firming it in place as you go. Make sure to leave enough space between the soil and the top of the pot for watering. Finally, water your anthurium plant thoroughly to settle the soil and provide enough moisture to support establishment. By following these steps, you’ll be well on your way to learning how to repot an anthurium plant successfully and giving your plant the fresh start it needs to thrive.
Troubleshooting Common Repotting Issues
While repotting an anthurium plant can be a straightforward process, there are some common issues that may arise. One of the most common problems is root bound, where the roots have become tangled and circling. To address this, gently tease the roots apart with your fingers or a blunt instrument to encourage growth. Another issue is soil compaction, which can occur when the soil is packed too tightly around the roots. To prevent this, make sure to leave enough space between the soil and the top of the pot for watering, and gently firm the soil in place as you go. Transplant shock is another common issue, where the plant experiences stress and shock after being moved to a new pot. To minimize this, make sure to acclimate your anthurium plant to its new environment before repotting, and provide it with plenty of water and light after the process. By being aware of these common issues and taking steps to prevent them, you can ensure a successful repotting process and give your anthurium plant the best chance at thriving. Remember, learning how to repot an anthurium plant requires patience and attention to detail, but with the right techniques and care, you can enjoy a healthy and vibrant plant for years to come.
Post-Repotting Care: Tips for a Smooth Transition
After repotting your anthurium plant, it’s essential to provide it with the right care to ensure a smooth transition. One of the most critical aspects of post-repotting care is watering. Make sure to water your anthurium plant thoroughly, but avoid overwatering, which can lead to root rot. Check the soil daily, and only water when the top inch of soil feels dry to the touch. Fertilizing is also crucial, as it provides your anthurium plant with the necessary nutrients for growth. Use a balanced, water-soluble fertilizer, and apply it according to the manufacturer’s instructions. Additionally, monitor your anthurium plant for pests and diseases, such as mealybugs, spider mites, and root rot. By keeping a close eye on your plant’s condition, you can catch any potential issues early on and take corrective action. By following these tips, you can help your anthurium plant thrive in its new pot and enjoy a healthy and vibrant plant for years to come. Remember, learning how to repot an anthurium plant is just the first step – providing the right care after repotting is essential for long-term success.
Common Mistakes to Avoid When Repotting Anthurium Plants
When it comes to repotting an anthurium plant, there are several common mistakes to avoid. One of the most critical mistakes is over-handling the roots. Anthurium roots are delicate and can be easily damaged, so it’s essential to handle them gently and minimize disturbance. Another mistake is using too much fertilizer, which can cause more harm than good. Start with a small amount of fertilizer and gradually increase as needed. Neglecting to monitor the plant’s condition is also a common mistake. Keep a close eye on your anthurium plant’s health, and take action quickly if you notice any signs of stress or disease. Additionally, failing to acclimate the plant to its new environment can lead to transplant shock. By avoiding these common mistakes, you can ensure a successful repotting process and give your anthurium plant the best chance at thriving. Remember, learning how to repot an anthurium plant requires attention to detail and a willingness to learn from common mistakes. By following these tips and avoiding common pitfalls, you can enjoy a healthy and vibrant anthurium plant for years to come.
Conclusion: Giving Your Anthurium a Fresh Start
By following the steps outlined in this guide, you can give your anthurium plant a fresh start and provide it with the care it needs to thrive. Remember, learning how to repot an anthurium plant is a process that requires patience, attention to detail, and a willingness to learn. With the right techniques and care, your anthurium plant can flourish and provide you with beautiful blooms and lush foliage for years to come. Don’t be discouraged if you encounter setbacks or mistakes along the way – instead, use them as opportunities to learn and improve your skills. By repotting your anthurium plant with care and attention, you can revitalize its growth and enjoy a healthy, vibrant plant that brings joy and beauty to your home or office. So why not give your anthurium plant the fresh start it deserves? With these simple steps and a little practice, you can master the art of how to repot an anthurium plant and enjoy a thriving, beautiful plant for years to come.


