The Magic of Rose Propagation: Is it Possible?
Rose propagation is a fascinating process that allows gardeners to share their favorite rose bushes with friends and family, while also creating new varieties. But can you propagate a rose bush? The answer is yes, and it’s easier than you think. With a little patience and practice, anyone can learn to propagate rose bushes and enjoy the many benefits that come with it.

Click Image to Find Garden Products
One of the main advantages of rose propagation is the ability to share plants with others. Whether you’re looking to give a thoughtful gift to a fellow gardener or simply want to spread the beauty of your rose bushes, propagation makes it possible. Additionally, propagating rose bushes allows you to create new varieties, which can be a fun and rewarding experience for gardeners of all levels.
So, how does rose propagation work? In simple terms, it involves taking a cutting from a mature rose bush and using it to grow a new plant. This can be done through a variety of methods, including stem cuttings, layering, and grafting. Each method has its own unique benefits and challenges, but with the right techniques and a little practice, anyone can become a successful rose propagator.
Before we dive into the specifics of rose propagation, it’s essential to understand the basics of rose bush anatomy. A rose bush consists of several key components, including the stems, leaves, and roots. Understanding how these components work together is crucial for successful propagation, as it allows you to identify the best cutting material and provide the right conditions for growth.
In the next section, we’ll take a closer look at the different parts of a rose bush and explore how they contribute to successful propagation. But first, let’s summarize the benefits of rose propagation and why it’s worth trying. By propagating rose bushes, you can share plants with others, create new varieties, and enjoy the many rewards that come with growing your own roses.

Understanding Rose Bush Anatomy: The Key to Successful Propagation
To successfully propagate a rose bush, it’s essential to understand the different parts of the plant and how they work together. A rose bush consists of several key components, including the stems, leaves, and roots. Each of these parts plays a crucial role in the propagation process, and understanding their functions can help you identify the best cutting material and provide the right conditions for growth.
The stems of a rose bush are the long, woody structures that support the leaves and flowers. They are typically divided into two types: canes and branches. Canes are the main stems that grow from the base of the plant, while branches are the smaller stems that grow from the canes. When taking cuttings, it’s best to use sections of stem that are around 6-12 inches long and have at least two nodes (the joint where a leaf meets the stem).
The leaves of a rose bush are the green, flat structures that grow from the stems. They are responsible for photosynthesis, which provides the plant with the energy it needs to grow. When propagating rose bushes, it’s essential to leave at least two sets of leaves on the cutting to ensure the new plant has enough energy to grow.
The roots of a rose bush are the underground structures that absorb water and nutrients from the soil. They are typically divided into two types: taproots and fibrous roots. Taproots are the main roots that grow straight down into the soil, while fibrous roots are the smaller roots that grow out from the taproot. When propagating rose bushes, it’s essential to provide the new plant with a well-draining potting mix and adequate water to encourage root growth.
By understanding the different parts of a rose bush and how they work together, you can increase your chances of successful propagation. In the next section, we’ll explore the best methods for taking rose cuttings and provide a step-by-step guide on how to do it.
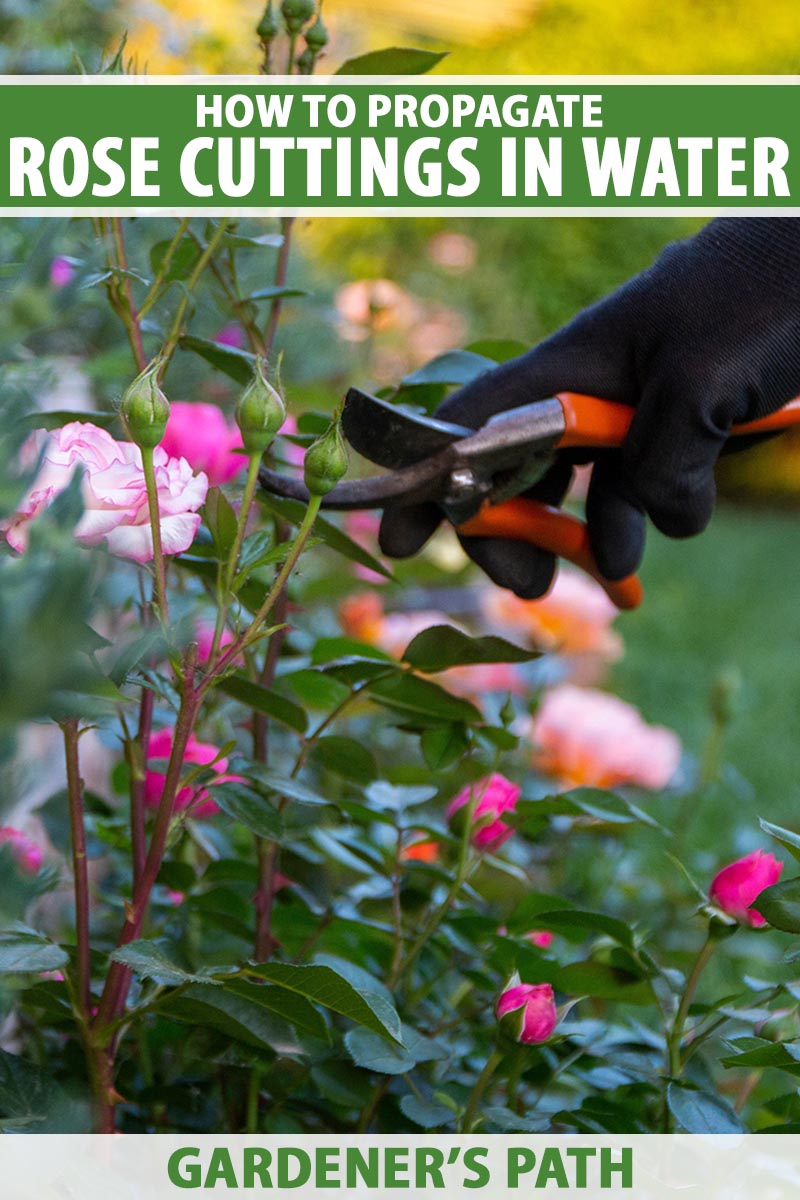
How to Take Rose Cuttings: A Step-by-Step Guide
Taking rose cuttings is a straightforward process that requires some basic tools and a little patience. To increase your chances of success, it’s essential to take cuttings at the right time of year and use the right techniques. Here’s a step-by-step guide on how to take rose cuttings:
**Best Time of Year:** The best time to take rose cuttings is in the spring or fall, when the plant is actively growing. Avoid taking cuttings in the summer, as the heat can cause the cutting to dry out and reduce the chances of successful propagation.
**Right Tools:** You’ll need a few basic tools to take rose cuttings, including a sharp, clean knife or pruning shears, a pot or container filled with a well-draining potting mix, and a clear plastic bag or cloche.
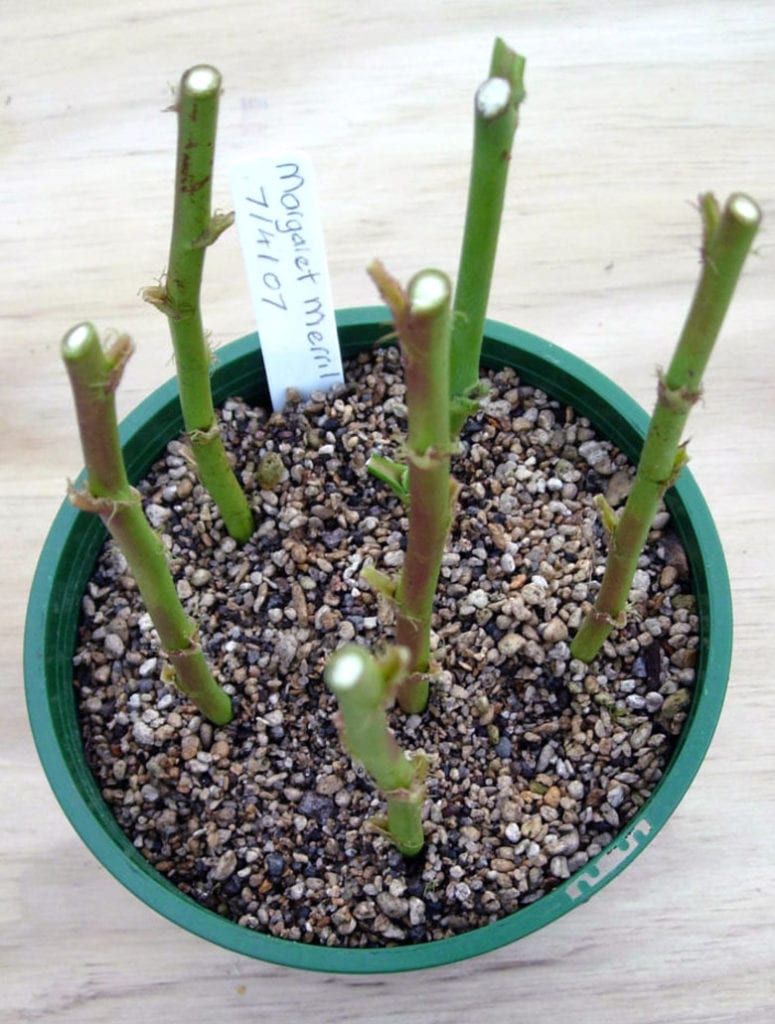
**Ideal Cutting Size:** The ideal cutting size for rose propagation is around 6-12 inches long, with at least two nodes (the joint where a leaf meets the stem). Cut the stem just above a node, using a 45-degree angle cut. This will help the cutting to absorb water and nutrients more easily.
**Step-by-Step Instructions:**
1. Choose a healthy, vigorous stem with plenty of leaves and no signs of disease or pests.
2. Cut the stem just above a node, using a 45-degree angle cut.
3. Remove lower leaves, leaving only two or three sets of leaves at the top of the cutting.
4. Dip the cut end of the stem into a rooting hormone powder or liquid, following the manufacturer’s instructions.
5. Plant the cutting in a pot or container filled with a well-draining potting mix, firming the soil gently around the stem.
6. Water the cutting thoroughly, and then cover the pot or container with a clear plastic bag or cloche to maintain humidity and promote rooting.
By following these steps and using the right techniques, you can increase your chances of successful rose propagation. In the next section, we’ll explore the best methods for rooting rose cuttings and provide tips and tricks for success.
Rooting Rose Cuttings: Tips and Tricks for Success
Once you’ve taken your rose cuttings, the next step is to root them. This can be a challenging process, but with the right techniques and conditions, you can increase your chances of success. Here are some tips and tricks for rooting rose cuttings:
**Use Rooting Hormones:** Rooting hormones can help stimulate root growth and increase the chances of successful propagation. You can purchase rooting hormones at most gardening stores or online. Follow the manufacturer’s instructions for application and dosage.
**Maintain Humidity:** Rose cuttings need high humidity to root successfully. You can cover the pot or container with a clear plastic bag or cloche to maintain humidity and promote rooting.
**Provide Adequate Temperature:** Rose cuttings prefer temperatures between 65-75°F (18-24°C) to root successfully. Avoid placing the cuttings in direct sunlight or extreme temperatures.
**Role of Light:** Rose cuttings need light to root successfully, but direct sunlight can be too intense. Place the cuttings in a bright, indirectly lit area, such as an east- or west-facing window.
**Watering:** Water the cuttings thoroughly after planting, and then keep the soil consistently moist but not waterlogged. Avoid getting water on the leaves or crown of the plant, as this can cause rot and reduce the chances of successful propagation.
**Monitoring:** Monitor the cuttings regularly for signs of rooting, such as new growth or roots emerging from the soil. It can take anywhere from 2-6 weeks for rose cuttings to root, so be patient and don’t get discouraged if you don’t see results right away.
By following these tips and tricks, you can increase your chances of successful rose propagation. Remember to be patient and monitor the cuttings regularly for signs of rooting. In the next section, we’ll explore alternative methods for rose propagation, such as layering and grafting.
Layering and Grafting: Alternative Methods for Rose Propagation
While taking rose cuttings is a popular method for propagating rose bushes, there are other alternative methods that can be used to achieve success. Two of these methods are layering and grafting. In this section, we’ll explore the benefits and challenges of these methods and provide examples of when to use them.
**Layering:** Layering involves bending a stem of the rose bush down to the ground and securing it with a rock or a U-shaped wire. This method allows the stem to produce roots while still attached to the parent plant. Once roots have developed, the stem can be cut from the parent plant and transplanted to a new location.
**Grafting:** Grafting involves joining a piece of a stem (called a scion) from one rose bush to the root system of another rose bush (called a rootstock). This method allows for the combination of desirable traits from different rose bushes, such as disease resistance or improved flowering.
**Benefits and Challenges:** Both layering and grafting offer several benefits, including increased success rates and the ability to combine desirable traits. However, these methods can also be more challenging than taking rose cuttings, requiring more skill and patience.
**When to Use:** Layering and grafting are best used when you want to propagate a specific variety of rose bush that is difficult to root from cuttings. They can also be used to combine desirable traits from different rose bushes or to create new varieties.
**Tips and Tricks:** When using layering or grafting, make sure to follow proper techniques and provide adequate care to the newly propagated plants. This includes providing sufficient water, nutrients, and light, as well as monitoring for signs of stress or disease.
By understanding the alternative methods of rose propagation, such as layering and grafting, you can increase your chances of success and create new and exciting varieties of rose bushes. In the next section, we’ll discuss common mistakes to avoid when propagating rose bushes.

Common Mistakes to Avoid When Propagating Rose Bushes
While rose propagation can be a rewarding experience, there are several common mistakes to avoid in order to ensure success. By understanding these mistakes, you can take steps to prevent them and increase your chances of propagating healthy, thriving rose bushes.
**Taking Cuttings at the Wrong Time:** One of the most common mistakes when propagating rose bushes is taking cuttings at the wrong time. Rose bushes typically go dormant during the winter months, and taking cuttings during this time can reduce the chances of successful propagation. Instead, take cuttings in the spring or fall when the plant is actively growing.
**Using Poor Quality Cuttings:** Another mistake to avoid is using poor quality cuttings. Cuttings that are too old, too young, or damaged can reduce the chances of successful propagation. Instead, use fresh, healthy cuttings that are around 6-12 inches long and have at least two nodes.
**Neglecting to Provide Adequate Care:** Neglecting to provide adequate care to newly propagated rose bushes is another common mistake. Make sure to provide sufficient water, nutrients, and light to the newly propagated plants, and monitor for signs of stress or disease.
**Not Monitoring for Pests and Diseases:** Failing to monitor for pests and diseases can also reduce the chances of successful propagation. Regularly inspect the newly propagated plants for signs of pests or diseases, and take action promptly if you notice any issues.
**Not Providing Enough Humidity:** Rose bushes prefer high humidity, especially when they are newly propagated. Failing to provide enough humidity can reduce the chances of successful propagation. Use a clear plastic bag or cloche to maintain humidity and promote rooting.
By avoiding these common mistakes, you can increase your chances of successful rose propagation and enjoy the many benefits of growing your own rose bushes. In the next section, we’ll discuss the importance of aftercare for newly propagated rose bushes.

Aftercare for Newly Propagated Rose Bushes
Once you’ve successfully propagated a new rose bush, it’s essential to provide the right aftercare to ensure it thrives. With proper care, your new rose bush will grow strong and healthy, producing beautiful blooms for years to come.
**Watering:** Water your newly propagated rose bush regularly, but make sure not to overwater. Rose bushes prefer well-draining soil, so avoid getting waterlogged soil. Water at the base of the plant, avoiding the leaves to prevent fungal diseases.
**Fertilizing:** Feed your newly propagated rose bush with a balanced fertilizer once a month. This will provide the necessary nutrients for healthy growth and blooming. Avoid overfertilizing, as this can damage the plant.
**Pruning:** Prune your newly propagated rose bush regularly to promote healthy growth and encourage blooming. Remove any dead or damaged branches, and shape the plant to maintain its desired form.
**Monitoring for Signs of Stress or Disease:** Keep an eye out for signs of stress or disease, such as yellowing leaves, black spots, or powdery mildew. Take action promptly if you notice any issues, and treat the plant with the appropriate fungicides or pesticides.
**Patience:** Remember that newly propagated rose bushes need time to establish themselves. Be patient and don’t expect immediate results. With proper care and attention, your new rose bush will thrive and produce beautiful blooms for years to come.
By following these aftercare tips, you can ensure your newly propagated rose bush grows strong and healthy. In the next section, we’ll discuss how to divide and transplant established rose bushes.

Sharing Your Success: How to Divide and Transplant Established Rose Bushes
Once you’ve successfully propagated a rose bush, you may want to share it with friends and family or expand your own rose garden. Dividing and transplanting established rose bushes is a great way to do this. Here’s a step-by-step guide on how to divide and transplant established rose bushes:
**Best Time of Year:** The best time to divide and transplant established rose bushes is in the early spring or fall, when the plant is dormant. Avoid transplanting in the summer, as this can cause stress to the plant.
**Right Tools:** You’ll need a few basic tools to divide and transplant established rose bushes, including a sharp, clean knife or pruning shears, a garden fork, and a wheelbarrow or bucket.
**Handling the Roots with Care:** When dividing and transplanting established rose bushes, it’s essential to handle the roots with care. Gently dig around the plant, taking care not to damage the roots. Use a garden fork to loosen the soil and lift the plant out of the ground.
**Dividing the Plant:** Once you’ve lifted the plant out of the ground, use a sharp, clean knife or pruning shears to divide it into sections. Make sure each section has at least one “eye” or growing point, as this is where new growth will emerge.
**Transplanting:** Plant the divided sections in a new location, making sure to provide enough space for the plant to grow. Water thoroughly and provide adequate care, including fertilizing and pruning.
By following these steps, you can successfully divide and transplant established rose bushes, sharing your success with friends and family or expanding your own rose garden. Remember to handle the roots with care and provide adequate care to the newly transplanted plants.
