Choosing the Perfect Calla Lily Variety for Your Garden
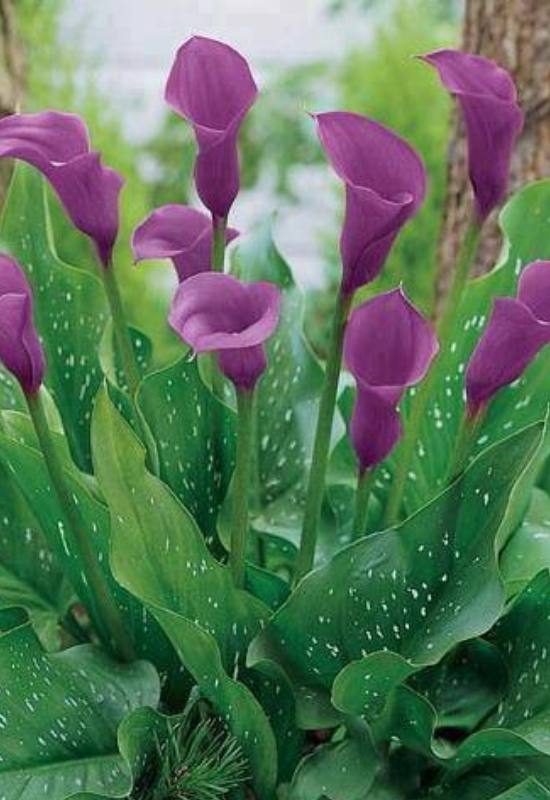
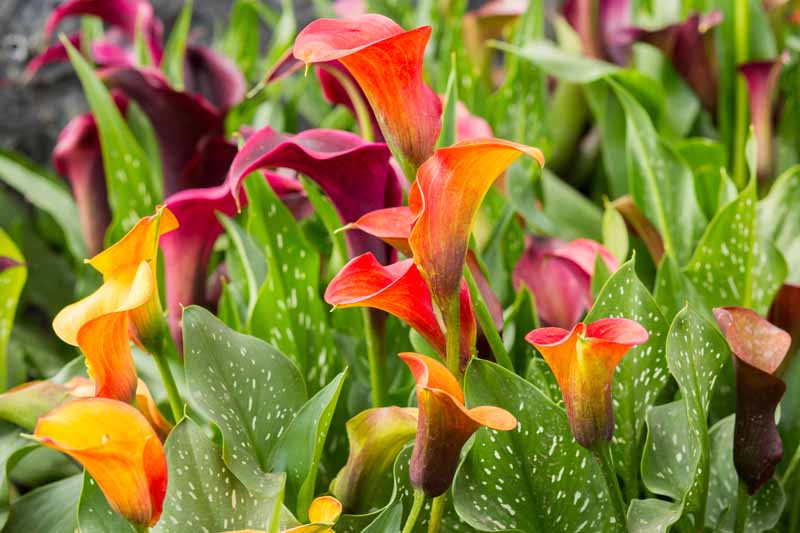
With over 20 species of calla lilies, selecting the right variety for your garden can be a daunting task. However, by understanding the unique characteristics, growth habits, and blooming periods of each type, you can make an informed decision. When it comes to calla lily how to plant, choosing the right variety is crucial for optimal growth and blooming. Some popular varieties include ‘Crystal Blanca’, ‘Odessa’, and ‘Captain Reno’, each with its own distinct features and growing conditions.

Click Image to Find Garden Products
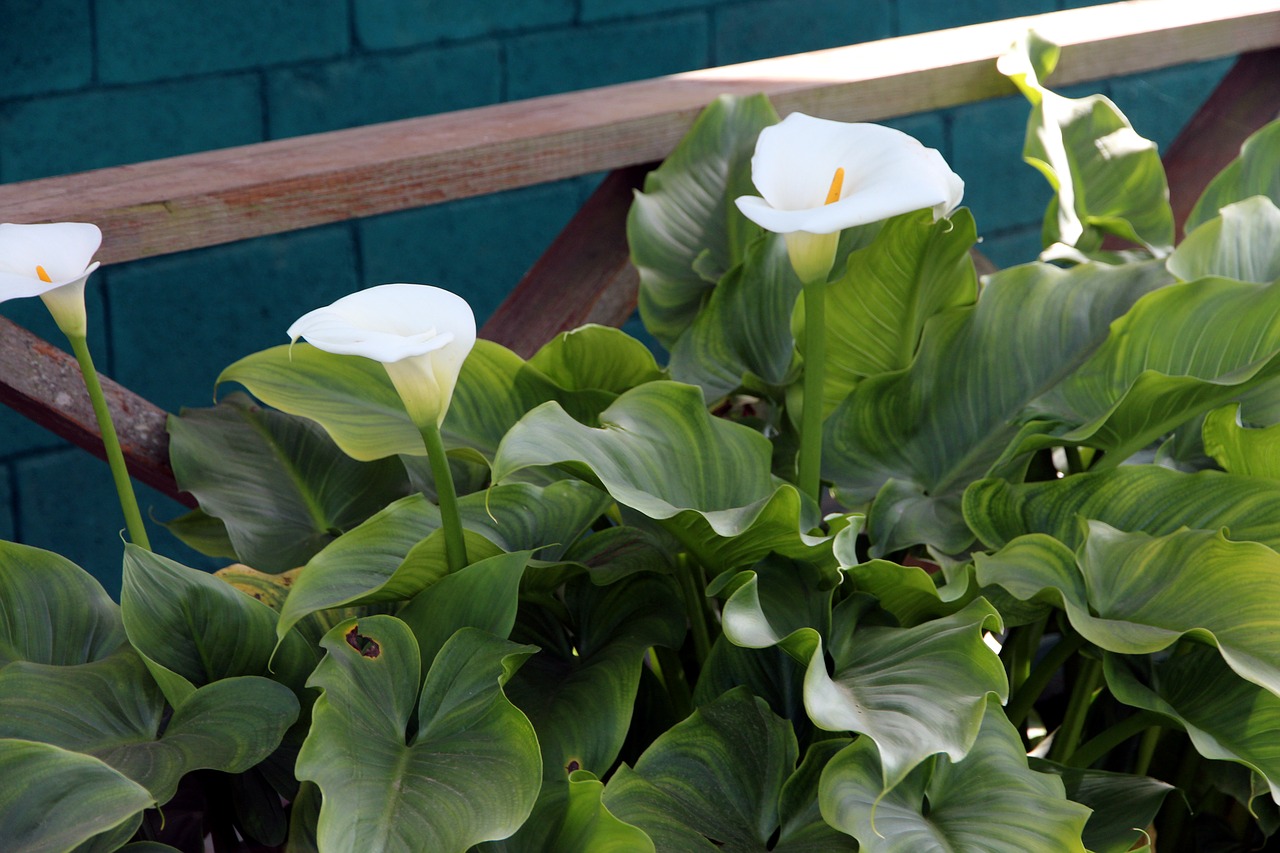
For example, ‘Crystal Blanca’ is a popular variety known for its pure white blooms and compact growth habit, making it ideal for small gardens or containers. On the other hand, ‘Odessa’ is a taller variety with large, fragrant blooms that thrive in warmer climates. By considering factors such as climate, soil type, and desired bloom color, you can select the perfect calla lily variety for your garden.
In addition to considering the specific needs of each variety, it’s also essential to think about the overall aesthetic you want to achieve in your garden. Calla lilies come in a range of colors, including white, yellow, pink, and bi-colored, allowing you to create a unique and visually striking display. By choosing a variety that complements your existing garden design, you can create a beautiful and cohesive look that showcases your calla lilies.
Ultimately, the key to successful calla lily how to plant is selecting a variety that is well-suited to your specific climate and garden conditions. By doing your research and choosing the right variety, you can enjoy beautiful blooms and a thriving garden for years to come.
Preparing the Soil for Optimal Calla Lily Growth
When it comes to calla lily how to plant, preparing the soil is a crucial step that can make all the difference in the health and success of your plants. Calla lilies require well-draining soil that is rich in organic matter to thrive. To achieve this, start by testing the pH level of your soil. Calla lilies prefer a slightly acidic to neutral soil pH, ranging from 6.0 to 7.0.
If your soil is heavy clay or sandy, amend it with organic matter such as compost or well-rotted manure. This will help improve the soil’s structure and fertility, allowing your calla lilies to grow and bloom optimally. Additionally, remove any weeds or debris from the planting area, as these can compete with your calla lilies for water and nutrients.
To prepare the soil for planting, dig a hole that is about 12-18 inches deep and 2-3 times wider than the calla lily rhizome. Add a 2-inch layer of compost or well-rotted manure to the bottom of the hole, followed by a layer of soil. This will provide your calla lilies with a nutrient-rich environment that promotes healthy growth and blooming.
It’s also essential to ensure good drainage in the soil. Calla lilies are susceptible to root rot if the soil is too wet, so make sure the planting area is well-draining and not prone to waterlogging. You can improve drainage by adding a layer of perlite or sand to the soil, or by raising the planting bed slightly.
By preparing the soil properly, you can create an optimal environment for your calla lilies to grow and thrive. This will help ensure that your plants receive the necessary nutrients and water to produce beautiful blooms, and will also help prevent common problems such as root rot and pests.
How to Plant Calla Lilies: A Step-by-Step Process
Now that you have prepared the soil and selected the perfect calla lily variety for your garden, it’s time to plant. Planting calla lilies is a relatively straightforward process, but it does require some care and attention to detail. Here’s a step-by-step guide on how to plant calla lilies:
Step 1: Plant the calla lily rhizome 2-3 inches deep and 3-4 inches apart, depending on the variety. Make sure the “eyes” or growing points are facing upwards.
Step 2: Cover the rhizome with a thin layer of soil and gently firm it in place. Make sure not to compact the soil too much, as this can prevent proper drainage.
Step 3: Water the soil gently but thoroughly after planting. Make sure the soil is moist but not waterlogged.
Step 4: Apply a thin layer of mulch around the plants to retain moisture and suppress weeds.
When planting calla lilies, it’s essential to handle the rhizomes with care. Calla lily rhizomes are sensitive to damage, so make sure to handle them gently and avoid bruising or cutting them. If you’re planting multiple calla lilies, space them 3-4 inches apart to allow for proper growth and air circulation.
After planting, make sure to keep the soil consistently moist but not waterlogged. Calla lilies prefer well-draining soil, so avoid overwatering, which can lead to root rot and other problems.
By following these steps and tips, you can successfully plant your calla lilies and enjoy beautiful blooms in your garden. Remember to provide the right amount of sunlight, temperature, and humidity for your calla lilies to thrive, and don’t hesitate to reach out if you have any questions or concerns.
Caring for Your Calla Lilies After Planting
After planting your calla lilies, it’s essential to provide them with the right care to ensure they thrive and produce beautiful blooms. Proper care includes watering, fertilizing, and deadheading, as well as monitoring for pests and diseases.
Watering is crucial for calla lilies, especially during the first few weeks after planting. Make sure to keep the soil consistently moist but not waterlogged. Overwatering can lead to root rot and other problems, while underwatering can cause the plants to become stressed and produce fewer blooms.
Fertilizing is also important for calla lilies. Use a balanced fertilizer that is high in phosphorus to promote blooming. Apply the fertilizer once a month, following the manufacturer’s instructions.
Deadheading is another important aspect of calla lily care. Remove the spent blooms as soon as they start to fade, as this will encourage the plant to produce more flowers. Cut the stem at an angle, just above a node, to promote new growth.
Monitoring for pests and diseases is also crucial. Keep an eye out for signs of pests, such as aphids, whiteflies, and spider mites. Regularly inspect the plants for signs of disease, such as yellowing leaves, black spots, or powdery mildew. Take action immediately if you notice any problems, using organic or chemical controls as needed.
In addition to these care tips, it’s also important to provide your calla lilies with the right environment. Make sure they receive the right amount of sunlight, temperature, and humidity. Most calla lilies prefer full sun to partial shade, depending on the variety. Keep the temperature between 65-75°F (18-24°C) during the day and around 55-65°F (13-18°C) at night. Maintain a humidity level of 50-60% to promote healthy growth and blooming.
By following these care tips, you can enjoy beautiful blooms from your calla lilies and keep them healthy and thriving. Remember to be patient, as calla lilies can take time to establish and produce flowers.
Providing the Right Environment for Calla Lilies to Thrive
Calla lilies are sensitive to their environment and require specific conditions to thrive. Providing the right amount of sunlight, temperature, and humidity is crucial for healthy growth and blooming. When it comes to calla lily how to plant, understanding the environmental needs of these plants is essential.
Lighting is one of the most critical factors in calla lily care. Most calla lilies prefer bright, indirect light, but some varieties can tolerate full sun. Placing calla lilies in a spot that receives direct sunlight for 4-6 hours a day can promote healthy growth and blooming. However, avoid placing them in areas with intense sunlight, as this can cause the leaves to become scorched.
Temperature is another essential factor in calla lily care. Most calla lilies prefer daytime temperatures between 65-75°F (18-24°C) and nighttime temperatures around 55-65°F (13-18°C). Avoid placing calla lilies in areas with extreme temperatures, as this can cause stress and affect blooming.
Humidity is also crucial for calla lily growth and blooming. Calla lilies prefer a humid environment, typically between 50-60% relative humidity. To create a humid microclimate, you can place the pot on a tray filled with water and pebbles or use a humidifier nearby.
In addition to providing the right environmental conditions, it’s also essential to create a microclimate that promotes healthy growth and blooming. This can be achieved by using a combination of techniques, such as mulching, shading, and wind protection.
Mulching around the base of the calla lily can help retain moisture, suppress weeds, and regulate soil temperature. Use a thin layer of organic mulch, such as bark chips or straw, and keep it a few inches away from the plant’s base.
Shading can also be used to create a microclimate that promotes healthy growth and blooming. Use a sheer curtain or shade cloth to filter the sunlight and reduce heat stress.
Wind protection is also essential, especially in areas with strong winds. Use a windbreak, such as a row of plants or a screen, to protect the calla lily from wind damage.
By providing the right environmental conditions and creating a microclimate that promotes healthy growth and blooming, you can enjoy beautiful calla lily blooms and keep your plants thriving.

Common Mistakes to Avoid When Planting Calla Lilies
When it comes to calla lily how to plant, there are several common mistakes to avoid. These mistakes can lead to poor growth, reduced blooming, and even plant death. By understanding these common mistakes, you can take steps to avoid them and ensure the success of your calla lily plants.
One of the most common mistakes is overwatering. Calla lilies prefer well-draining soil and can be susceptible to root rot if the soil is too wet. Make sure to check the soil moisture regularly and avoid watering if the soil is already moist.
Another common mistake is underwatering. Calla lilies need consistent moisture, especially during the growing season. Make sure to water your calla lilies regularly, but avoid overwatering.
Poor soil preparation is also a common mistake. Calla lilies prefer well-draining soil that is rich in organic matter. Make sure to add compost or well-rotted manure to the soil before planting, and avoid using soil that is too dense or heavy.
Incorrect planting depth is another mistake to avoid. Calla lilies should be planted at a depth of 2-3 inches, depending on the variety. Planting too deeply can cause the rhizome to rot, while planting too shallowly can cause the plant to become unstable.
Not providing enough sunlight is also a common mistake. Calla lilies prefer bright, indirect light, but some varieties can tolerate full sun. Make sure to provide your calla lilies with the right amount of sunlight for their specific needs.
Not fertilizing regularly is another mistake to avoid. Calla lilies benefit from regular fertilization, especially during the growing season. Use a balanced fertilizer that is high in phosphorus to promote blooming.
Not deadheading is also a common mistake. Deadheading involves removing the spent blooms to encourage the plant to produce more flowers. Make sure to deadhead your calla lilies regularly to promote blooming and prevent seed production.
By avoiding these common mistakes, you can ensure the success of your calla lily plants and enjoy beautiful blooms for years to come.
Calla Lily Planting Tips for Specific Regions and Climates
When it comes to calla lily how to plant, it’s essential to consider the specific region and climate you’re in. Different regions and climates have unique conditions that can affect the growth and blooming of calla lilies. Here are some region-specific and climate-specific tips for planting calla lilies:
For gardeners in areas with extreme temperatures, such as the desert or tropical regions, it’s essential to provide calla lilies with protection from the heat. Use a shade cloth or a trellis to provide shade, and water regularly to keep the soil moist.
In areas with high humidity, such as the southeastern United States, it’s essential to provide calla lilies with good air circulation. Use a fan or a blower to circulate the air, and avoid watering too frequently to prevent root rot.
In areas with poor soil quality, such as heavy clay or sandy soil, it’s essential to amend the soil with organic matter. Add compost or well-rotted manure to the soil to improve its structure and fertility.
In areas with cold winters, such as the northeastern United States, it’s essential to provide calla lilies with protection from the cold. Mulch the soil heavily to keep it warm, and bring the plants indoors during the winter months.
In areas with mild winters, such as California or Florida, it’s essential to provide calla lilies with regular watering and fertilization. Water regularly to keep the soil moist, and fertilize with a balanced fertilizer to promote blooming.
By following these region-specific and climate-specific tips, you can ensure the success of your calla lily plants and enjoy beautiful blooms for years to come.
Enjoying Your Beautiful Calla Lily Blooms
After following the steps outlined in this guide on calla lily how to plant, you’ll be rewarded with beautiful blooms that can add a touch of elegance to any room. Here are some tips on how to enjoy your calla lily blooms:
Cutting and arranging calla lily blooms is an art form in itself. To cut the blooms, use a sharp knife or pruning shears and cut the stem at an angle. This will help the bloom absorb water better and prevent it from sitting too deeply in the vase.
To arrange the blooms, start by selecting a vase that complements the color and shape of the calla lilies. Fill the vase with fresh water and add a floral preservative to extend the life of the blooms.
Next, trim the stems of the calla lilies to the desired length and place them in the vase. You can arrange the blooms in a single stem or create a bouquet with multiple stems.
To extend the vase life of your calla lily blooms, make sure to change the water in the vase every few days. You can also add a few drops of floral preservative to the water to help prevent bacterial growth.
In addition to enjoying your calla lily blooms in a vase, you can also use them in floral arrangements or as a decorative element in your home. Calla lilies can add a touch of elegance to any room, and their unique shape and color make them a popular choice for wedding bouquets and centerpieces.
By following these tips, you can enjoy your beautiful calla lily blooms for weeks to come. Remember to take care of the plants after they finish blooming, and you’ll be rewarded with another bloom cycle in the future.
