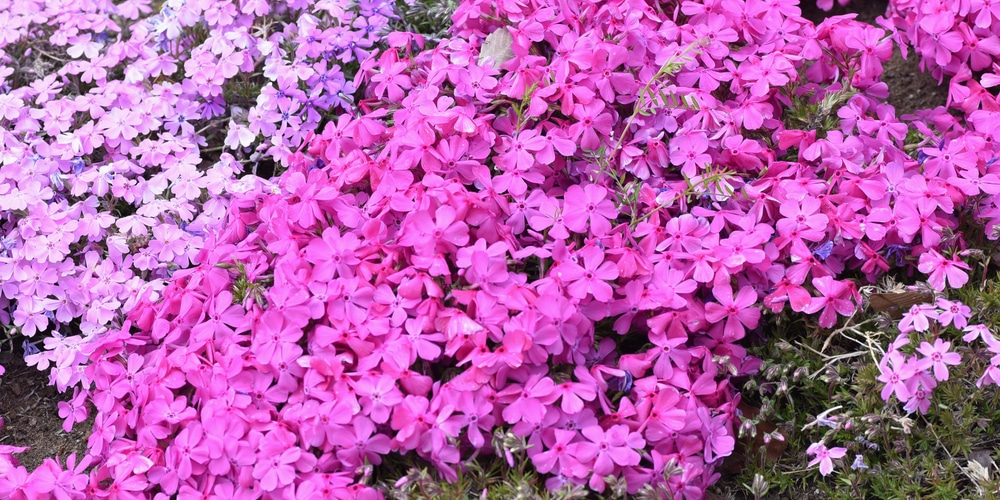
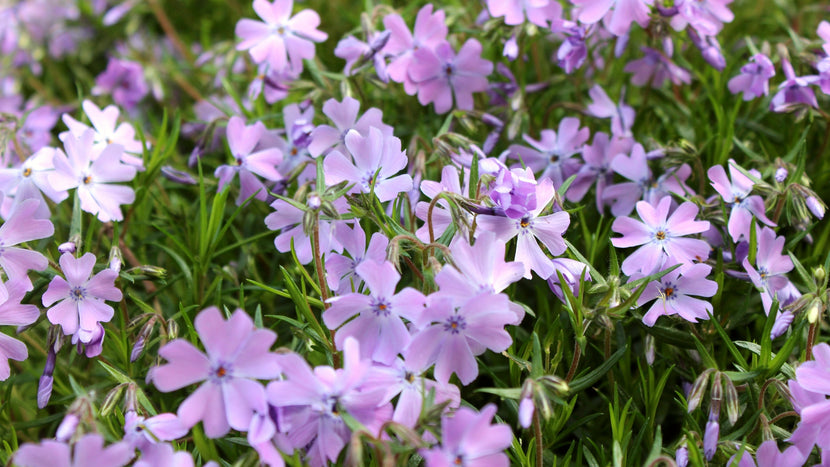
Why Propagate Creeping Phlox?
Creeping phlox is a popular, low-maintenance groundcover that offers a vibrant display of colors in the spring. Propagating creeping phlox can be a rewarding experience, allowing gardeners to share this beautiful plant with friends and family or expand their own garden. By learning how to propagate creeping phlox, gardeners can enjoy the benefits of this plant without having to purchase new plants every year.

Click Image to Find Garden Products
One of the main benefits of propagating creeping phlox is its ability to spread quickly. This plant can form a dense mat of stems and leaves, making it an ideal choice for areas where erosion control is needed. By propagating creeping phlox, gardeners can create a lush, verdant landscape that requires minimal maintenance.
Another benefit of propagating creeping phlox is its adaptability. This plant can thrive in a variety of conditions, from full sun to partial shade, and can tolerate a range of soil types. By learning how to propagate creeping phlox, gardeners can create a beautiful, low-maintenance landscape that can thrive in a variety of environments.
Propagating creeping phlox can also be a cost-effective way to expand a garden. By taking cuttings or dividing established plants, gardeners can create new plants without having to purchase them. This can be especially beneficial for gardeners who want to create a large landscape or share plants with friends and family.
Overall, propagating creeping phlox is a great way to enjoy the benefits of this beautiful plant while also expanding a garden. By learning how to propagate creeping phlox, gardeners can create a lush, verdant landscape that requires minimal maintenance and can thrive in a variety of environments.
Choosing the Right Method: Division, Cuttings, or Seeds
When it comes to propagating creeping phlox, there are three main methods to consider: division, cuttings, and seeds. Each method has its own advantages and disadvantages, and the right choice will depend on the specific situation and the desired outcome.
Division is a popular method for propagating creeping phlox, as it allows for the creation of multiple new plants from a single established plant. This method involves digging up the entire plant, gently separating the roots, and replanting the separated sections. Division is best done in the spring or fall, when the plant is dormant, and is a good option for gardeners who want to create multiple new plants quickly.
Another method for propagating creeping phlox is through cuttings. This involves taking stem cuttings from the tips of the plant’s stems, removing lower leaves, and planting the cuttings in a pot or tray filled with a well-draining mix. Cuttings can be taken at any time of the year, but the best results are typically achieved in the spring or summer when the plant is actively growing.
Seeds are also a viable option for propagating creeping phlox, although this method can be more time-consuming and unpredictable. Seeds can be sown indoors in the winter or directly in the garden in the spring, and require careful attention to ensure successful germination and growth.
When deciding which method to use, consider the following factors: the time of year, the desired outcome, and the level of expertise. Division is a good option for gardeners who want to create multiple new plants quickly, while cuttings are better suited for gardeners who want to propagate a small number of plants. Seeds are a good option for gardeners who want to try their hand at propagating from seed, but may require more patience and attention.
Regardless of the method chosen, it’s essential to follow proper techniques and provide the right conditions for successful propagation. By choosing the right method and following the right steps, gardeners can successfully propagate creeping phlox and enjoy the beauty of this stunning plant in their own garden.

Preparing for Propagation: When and How to Divide Creeping Phlox
Dividing creeping phlox is a popular method for propagating this beautiful plant, but it requires careful planning and preparation. To ensure successful propagation, it’s essential to divide the plant at the right time and follow proper techniques.
The best time to divide creeping phlox is in the spring or fall, when the plant is dormant. This allows the plant to focus its energy on producing new growth, rather than flowering. Avoid dividing the plant in the summer, when it’s actively growing, as this can cause stress and reduce the chances of successful propagation.
Before dividing the plant, prepare the soil by loosening it to a depth of about 12 inches. This will help to prevent the roots from becoming tangled and make it easier to separate the plant. Water the soil well the day before dividing to make it easier to handle.
To divide the plant, start by digging up the entire clump, taking care not to damage the roots. Gently separate the roots, working from the outside inwards. Use a sharp, sterile knife or garden fork to separate the roots, taking care not to damage the plant.
Once the roots are separated, replant the divisions immediately, making sure to water them well. Space the divisions about 12-18 inches apart, depending on the variety. Water the soil well after planting and keep it consistently moist during the first few weeks after planting.
It’s also essential to provide the right conditions for the newly divided plants to thrive. Make sure the soil is well-draining and rich in organic matter. Provide full sun to partial shade, depending on the variety, and water regularly.
By following these steps and dividing the plant at the right time, gardeners can successfully propagate creeping phlox and enjoy the beauty of this stunning plant in their own garden.
Taking Cuttings: A Step-by-Step Guide to Propagating Creeping Phlox
Taking cuttings is a popular method for propagating creeping phlox, as it allows for the creation of new plants that are genetically identical to the parent plant. This method is also relatively quick and easy, making it a great option for gardeners who want to propagate creeping phlox without a lot of fuss.
To take cuttings from creeping phlox, start by selecting healthy stems with plenty of leaves. Look for stems that are around 3-4 inches long and have at least two nodes (the joint where the leaf meets the stem). Avoid taking cuttings from weak or damaged stems, as these may not root well.
Next, cut the stems from the parent plant using a sharp, sterile knife or pruning tool. Make the cut just above a node, and at a 45-degree angle. This will help the cutting to root more easily.
Remove lower leaves from the cutting, leaving only two or three sets of leaves at the top. This will help to prevent the cutting from drying out and will also encourage rooting.
Plant the cutting in a pot or tray filled with a well-draining mix, such as a mix of peat moss and perlite. Water the mix well, and then plant the cutting about 1-2 inches deep. Firm the mix gently around the cutting to secure it in place.
Water the cutting well, and then provide bright, indirect light. Keep the mix consistently moist but not waterlogged, and provide temperatures between 65-75°F (18-24°C). Roots should develop within 1-2 weeks, and new growth should appear within 2-3 weeks.
Once the new plants have developed a robust root system and are growing well, they can be transplanted into individual pots or into the garden. Harden off the plants by gradually exposing them to outdoor conditions over the course of 7-10 days.
By following these steps, gardeners can successfully propagate creeping phlox using cuttings. This method is a great way to share this beautiful plant with friends and family, or to expand a garden with new plants.
Sowing Seeds: How to Grow Creeping Phlox from Seed
Growing creeping phlox from seed is a rewarding experience that can be achieved with the right techniques and conditions. This method is ideal for gardeners who want to create a large number of plants or for those who want to try their hand at seed propagation.
To start, obtain high-quality creeping phlox seeds from a reputable supplier. Sow the seeds indoors in a seed starting mix, about 6-8 weeks before the last frost date in your area. Sow the seeds on the surface of the mix, as they require light to germinate. Cover the seeds with a thin layer of the mix, and water gently.
Provide the seeds with bright, indirect light and maintain a consistent temperature of around 70-75°F (21-24°C). Keep the mix consistently moist but not waterlogged, and avoid overwatering, which can lead to rot and poor germination.
After 1-2 weeks, the seeds should germinate, and the seedlings will begin to emerge. Once the seedlings have 2-3 sets of leaves, transplant them into individual pots or cell packs filled with a well-draining mix. Harden off the seedlings by gradually exposing them to outdoor conditions over the course of 7-10 days.
Once the seedlings are hardened off, they can be transplanted into the garden, spaced about 12-18 inches apart. Water the plants well, and provide full sun to partial shade, depending on the variety. Keep the soil consistently moist but not waterlogged, and fertilize regularly to promote healthy growth.
It’s essential to note that growing creeping phlox from seed can be a slower process than other methods, such as division or cuttings. However, with the right techniques and conditions, gardeners can successfully grow creeping phlox from seed and enjoy the beauty of this stunning plant in their garden.

Post-Propagation Care: Tips for Ensuring Success
After propagating creeping phlox, it’s essential to provide the right conditions for the plants to thrive. Proper care and attention can help ensure successful propagation and promote healthy growth.
Watering is a critical aspect of post-propagation care. Keep the soil consistently moist but not waterlogged, as this can lead to root rot and other problems. Water the plants when the top inch of soil feels dry to the touch, and avoid getting water on the leaves to prevent fungal diseases.
Fertilization is also important for promoting healthy growth. Use a balanced, water-soluble fertilizer at half the recommended strength to avoid burning the roots. Apply the fertilizer once a month during the growing season, and avoid fertilizing during the winter months when the plants are dormant.
Pruning is another essential aspect of post-propagation care. Prune the plants regularly to maintain shape and promote healthy growth. Remove any dead or damaged stems, and cut back the plants to about 6 inches from the ground after they finish blooming.
Providing the right conditions for the plants to thrive is also crucial. Creeping phlox prefers full sun to partial shade, depending on the variety, and well-draining soil that is rich in organic matter. Avoid planting the plants in areas with standing water or where water tends to collect.
By following these tips and providing the right conditions for the plants to thrive, gardeners can ensure successful propagation and promote healthy growth. With proper care and attention, creeping phlox can be a beautiful and rewarding addition to any garden.

Troubleshooting Common Problems: Overcoming Obstacles in Propagation
While propagating creeping phlox can be a rewarding experience, it’s not without its challenges. Common problems that may arise during propagation include root rot, pests, and diseases. In this section, we’ll discuss some of the most common issues and provide tips and solutions for overcoming them.
Root rot is a common problem that can occur when the soil is too wet or when the plants are not receiving enough light. To prevent root rot, make sure to provide well-draining soil and avoid overwatering. If you notice any signs of root rot, such as yellowing leaves or soft stems, remove the affected plants and treat the remaining plants with a fungicide.
Pests, such as aphids and whiteflies, can also be a problem when propagating creeping phlox. To prevent pests, use neem oil or insecticidal soap to control infestations. Regularly inspect your plants for signs of pests and take action quickly to prevent the problem from spreading.
Diseases, such as powdery mildew and leaf spot, can also affect creeping phlox. To prevent diseases, provide good air circulation and avoid overhead watering. If you notice any signs of disease, treat the plants with a fungicide and remove any affected leaves or stems.
By being aware of these common problems and taking steps to prevent them, you can ensure successful propagation and enjoy the beauty of creeping phlox in your garden.
Conclusion: Spreading the Beauty of Creeping Phlox
Propagating creeping phlox is a rewarding experience that can help gardeners share this beautiful plant with others and expand their own garden. By following the steps outlined in this article, gardeners can successfully propagate creeping phlox and enjoy its vibrant display of colors.
Whether you’re a seasoned gardener or just starting out, propagating creeping phlox is a great way to add some beauty and life to your garden. With its low-maintenance requirements and ability to spread quickly, creeping phlox is a great choice for gardeners of all skill levels.
By sharing this beautiful plant with others, gardeners can help spread its beauty and create a sense of community. Whether you’re sharing cuttings with friends and family or trading seeds with fellow gardeners, propagating creeping phlox is a great way to connect with others and share in the joy of gardening.
In conclusion, propagating creeping phlox is a fun and rewarding experience that can help gardeners share this beautiful plant with others and expand their own garden. With its low-maintenance requirements and ability to spread quickly, creeping phlox is a great choice for gardeners of all skill levels. So why not give it a try and see the beauty of creeping phlox for yourself?