Understanding the Basics of Peanut Cultivation
Peanuts are one of the most widely consumed legumes globally, and growing them can be a rewarding experience for gardeners and farmers alike. To successfully cultivate peanuts, it’s essential to understand the basics of peanut cultivation, including the plant’s history, nutritional benefits, and growing requirements. Peanuts have been a staple crop for thousands of years, originating in South America and later introduced to Africa and Asia. Today, peanuts are grown in many parts of the world, with the United States, China, and India being among the top producers.

Click Image to Find Garden Products
Nutritionally, peanuts are an excellent source of protein, fiber, and healthy fats, making them a popular ingredient in many cuisines. However, to grow peanuts, you need to choose the right variety for your climate and soil type. There are several types of peanuts, including runner, virginia, and spanish, each with its unique characteristics and growing requirements. Runner peanuts, for example, are the most widely grown variety and thrive in well-draining soil with a pH between 6.0 and 7.0.
Before planting peanuts, it’s crucial to understand the specific growing requirements for your chosen variety. This includes factors such as temperature, moisture, and sunlight. Peanuts typically require a long growing season with warm temperatures and adequate moisture. In areas with cooler temperatures, peanuts may need to be started indoors and then transplanted outside when the weather warms up.
By understanding the basics of peanut cultivation, you can set yourself up for success and enjoy a bountiful harvest. Whether you’re a seasoned gardener or a beginner, growing peanuts can be a fun and rewarding experience. With the right knowledge and techniques, you can learn how to grow peanuts and enjoy the many benefits they have to offer.
Preparing the Soil for Optimal Peanut Growth
Soil preparation is a critical step in growing peanuts, as it directly affects the plant’s ability to absorb nutrients and water. To create an optimal growing environment, it’s essential to test and amend the soil pH, add organic matter, and control pests and diseases. Peanuts prefer a slightly acidic to neutral soil pH, ranging from 6.0 to 7.0. If the soil pH is too high or too low, it can lead to nutrient deficiencies and reduced yields.
To test the soil pH, you can purchase a DIY testing kit or send a sample to a laboratory for analysis. Based on the test results, you can amend the soil pH by adding lime to raise the pH or sulfur to lower it. Additionally, incorporating organic matter such as compost or well-rotted manure can help improve soil structure, fertility, and overall health.
Organic matter also plays a crucial role in controlling pests and diseases. By adding a 2-inch layer of compost or well-rotted manure to the soil, you can create a barrier that prevents pests and diseases from reaching the peanut plants. Furthermore, using crop rotation and cover cropping can help break disease and pest cycles, reducing the need for chemical pesticides and fungicides.
When preparing the soil for peanut growth, it’s also essential to consider the soil’s physical properties. Peanuts prefer well-draining soil with a loose, friable texture. If the soil is heavy clay or prone to waterlogging, it may be necessary to add organic matter or use raised beds to improve drainage.
By taking the time to prepare the soil properly, you can create an optimal growing environment for your peanut crop. This will help ensure a healthy and productive crop, and provide you with a bountiful harvest. Whether you’re a seasoned gardener or a beginner, learning how to grow peanuts starts with understanding the importance of soil preparation.
How to Plant Peanuts: A Step-by-Step Guide
Planting peanuts requires careful attention to detail, as the seeds are sensitive to temperature, moisture, and soil conditions. To ensure a successful crop, follow these steps for planting peanuts:
Step 1: Prepare the Soil – Before planting, make sure the soil is well-draining and has a pH between 6.0 and 7.0. Add organic matter such as compost or well-rotted manure to improve soil fertility and structure.
Step 2: Choose the Right Variety – Select a peanut variety that is suitable for your climate and soil type. Runner peanuts are the most widely grown variety and thrive in well-draining soil with a pH between 6.0 and 7.0.
Step 3: Sow the Seeds – Plant peanut seeds 1-2 inches deep and 3-4 inches apart in rows that are 3 feet apart. Sow the seeds in late spring or early summer, when the soil has warmed up to at least 65°F (18°C).
Step 4: Water and Mulch – Water the soil gently but thoroughly after planting. Apply a 2-inch layer of organic mulch such as straw or grass clippings to retain moisture and suppress weeds.
Step 5: Provide Support – Peanut plants need support as they grow. Use stakes or a trellis to provide a structure for the plants to climb on.
After planting, keep the soil consistently moist during the first few weeks. As the plants grow, reduce watering to about 1 inch per week. Avoid overwatering, as this can lead to disease and pest problems.
By following these steps, you can successfully plant peanuts and enjoy a bountiful harvest. Remember to monitor your plants regularly and take action if you notice any signs of disease or pests.
Nourishing Your Peanut Crop: Fertilization and Pest Management
Fertilization and pest management are crucial components of peanut cultivation. A well-nourished peanut crop is better equipped to withstand disease and pests, and will ultimately produce a higher yield. When it comes to fertilization, peanuts require a balanced diet of nitrogen, phosphorus, and potassium.
Organic fertilizers such as compost or well-rotted manure are excellent options for peanut crops. These fertilizers release nutrients slowly, providing a steady supply of nutrients to the plants. Chemical fertilizers can also be used, but it’s essential to follow the recommended application rates to avoid burning the plants.
Pest management is another critical aspect of peanut cultivation. Peanuts are susceptible to a range of pests, including aphids, whiteflies, and spider mites. To manage these pests, use a combination of cultural, biological, and chemical controls. Cultural controls include practices such as crop rotation, sanitation, and pruning. Biological controls involve introducing natural predators or parasites of the pest species. Chemical controls should be used as a last resort, and only when the pest population is severe.
Some common pests that can affect peanut crops include:
- Aphids: These small, soft-bodied insects feed on plant sap and can transmit plant viruses.
- Whiteflies: These tiny insects feed on plant sap and can transmit diseases such as tomato spotted wilt virus.
- Spider mites: These tiny, spider-like insects feed on plant sap and can cause yellowing or bronzing of the leaves.
To manage these pests, use a combination of the following methods:
- Inspect your plants regularly for signs of pests.
- Use neem oil or insecticidal soap to control aphids and whiteflies.
- Introduce natural predators or parasites of the pest species.
- Use chemical pesticides as a last resort, and only when the pest population is severe.
By following these tips, you can keep your peanut crop healthy and pest-free, and ultimately enjoy a bountiful harvest.
:max_bytes(150000):strip_icc()/GettyImages-1195352989-d513aa8df8964632b68637ddac237cbd.jpg)
Supporting Peanut Plants: The Role of Stakes and Irrigation
Peanut plants require support as they grow, especially when they begin to produce flowers and pods. Providing support helps to keep the plants upright, promotes healthy growth, and increases yields. Two essential tools for supporting peanut plants are stakes and irrigation systems.
Stakes are used to provide structural support for the peanut plants, keeping them upright and preventing them from toppling over in the wind. There are several types of stakes that can be used, including bamboo stakes, metal stakes, and wooden stakes. When using stakes, make sure to place them near the base of the plant and tie the plant to the stake using twine or a soft material.
Irrigation systems are also crucial for supporting peanut plants, especially during periods of drought or water stress. Peanut plants require consistent moisture, especially when they are producing flowers and pods. There are several types of irrigation systems that can be used, including drip irrigation, sprinkler irrigation, and furrow irrigation.
When installing an irrigation system, make sure to consider the specific needs of your peanut plants. For example, peanut plants require more water during the flowering and podding stages, so it’s essential to adjust the irrigation schedule accordingly. Additionally, make sure to use a moisture meter to monitor the soil moisture levels and adjust the irrigation schedule as needed.
Some tips for using stakes and irrigation systems include:
- Use stakes that are at least 3 feet tall to provide adequate support for the peanut plants.
- Place the stakes near the base of the plant and tie the plant to the stake using twine or a soft material.
- Use a drip irrigation system to deliver water directly to the roots of the plant, reducing evaporation and runoff.
- Monitor the soil moisture levels regularly and adjust the irrigation schedule as needed.
By providing support for your peanut plants using stakes and irrigation systems, you can promote healthy growth, increase yields, and enjoy a bountiful harvest.
Common Challenges in Growing Peanuts: Troubleshooting Tips
Despite the best efforts of peanut growers, challenges can arise during the growing season. Some common challenges include disease, pests, and weather damage. In this section, we will discuss some common problems that peanut growers may face and provide troubleshooting tips and solutions.
Disease is a common challenge for peanut growers, particularly fungal diseases such as powdery mildew and leaf spot. To prevent disease, make sure to rotate your crops regularly, remove any infected plants, and use fungicides as needed. Additionally, ensure that your peanut plants are receiving adequate air circulation and water.
Pests are another common challenge for peanut growers, particularly aphids, whiteflies, and spider mites. To control pests, use a combination of cultural, biological, and chemical controls. For example, introduce natural predators or parasites of the pest species, use insecticidal soap or neem oil, and apply chemical pesticides as a last resort.
Weather damage is also a common challenge for peanut growers, particularly drought, flooding, and extreme temperatures. To mitigate weather damage, make sure to plant your peanut crop at the right time, use irrigation systems to provide consistent moisture, and provide support for your plants during extreme weather conditions.
Some common signs of disease, pests, and weather damage include:
- Yellowing or browning of the leaves
- Black or white spots on the leaves or stems
- Presence of insects or eggs on the plants
- Wilting or droopy plants
If you notice any of these signs, take action immediately to prevent further damage. Some troubleshooting tips include:
- Remove any infected plants to prevent the spread of disease
- Use fungicides or insecticides as needed to control disease and pests
- Provide support for your plants during extreme weather conditions
- Monitor your plants regularly for signs of disease, pests, and weather damage
By being aware of these common challenges and taking action to prevent them, you can ensure a healthy and productive peanut crop.

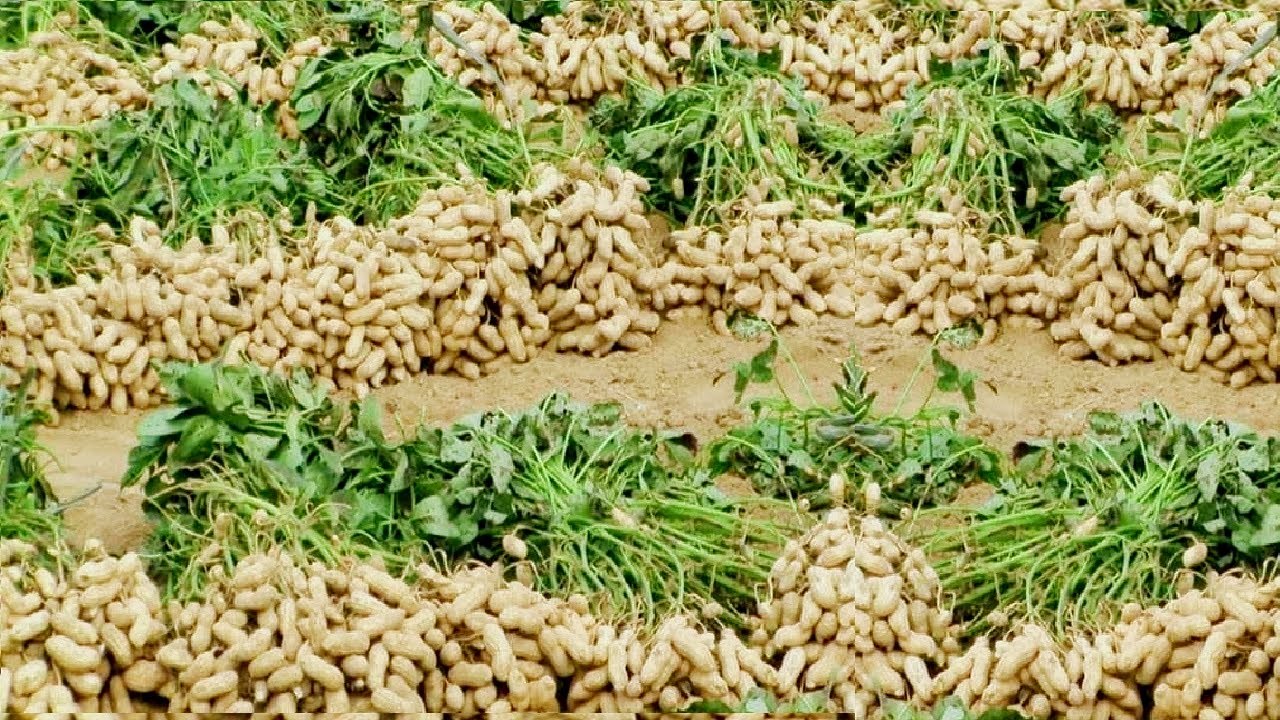
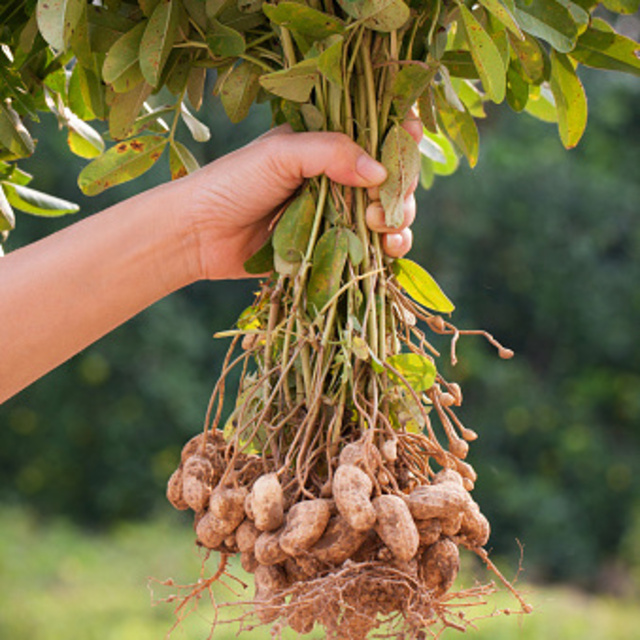
Harvesting Your Peanut Crop: Timing and Techniques
Harvesting peanuts is a critical step in the growing process, as it requires careful timing and technique to ensure a successful crop. Peanuts are typically ready to harvest about 120 to 150 days after planting, when the plants have turned yellow and the leaves have begun to dry.
To determine if your peanuts are ready to harvest, check the plants for the following signs:
- The plants have turned yellow and the leaves have begun to dry.
- The peanut pods have turned brown and are dry to the touch.
- The peanuts have reached their full size and are firm to the touch.
Once you have determined that your peanuts are ready to harvest, use the following techniques to dig and dry the crop:
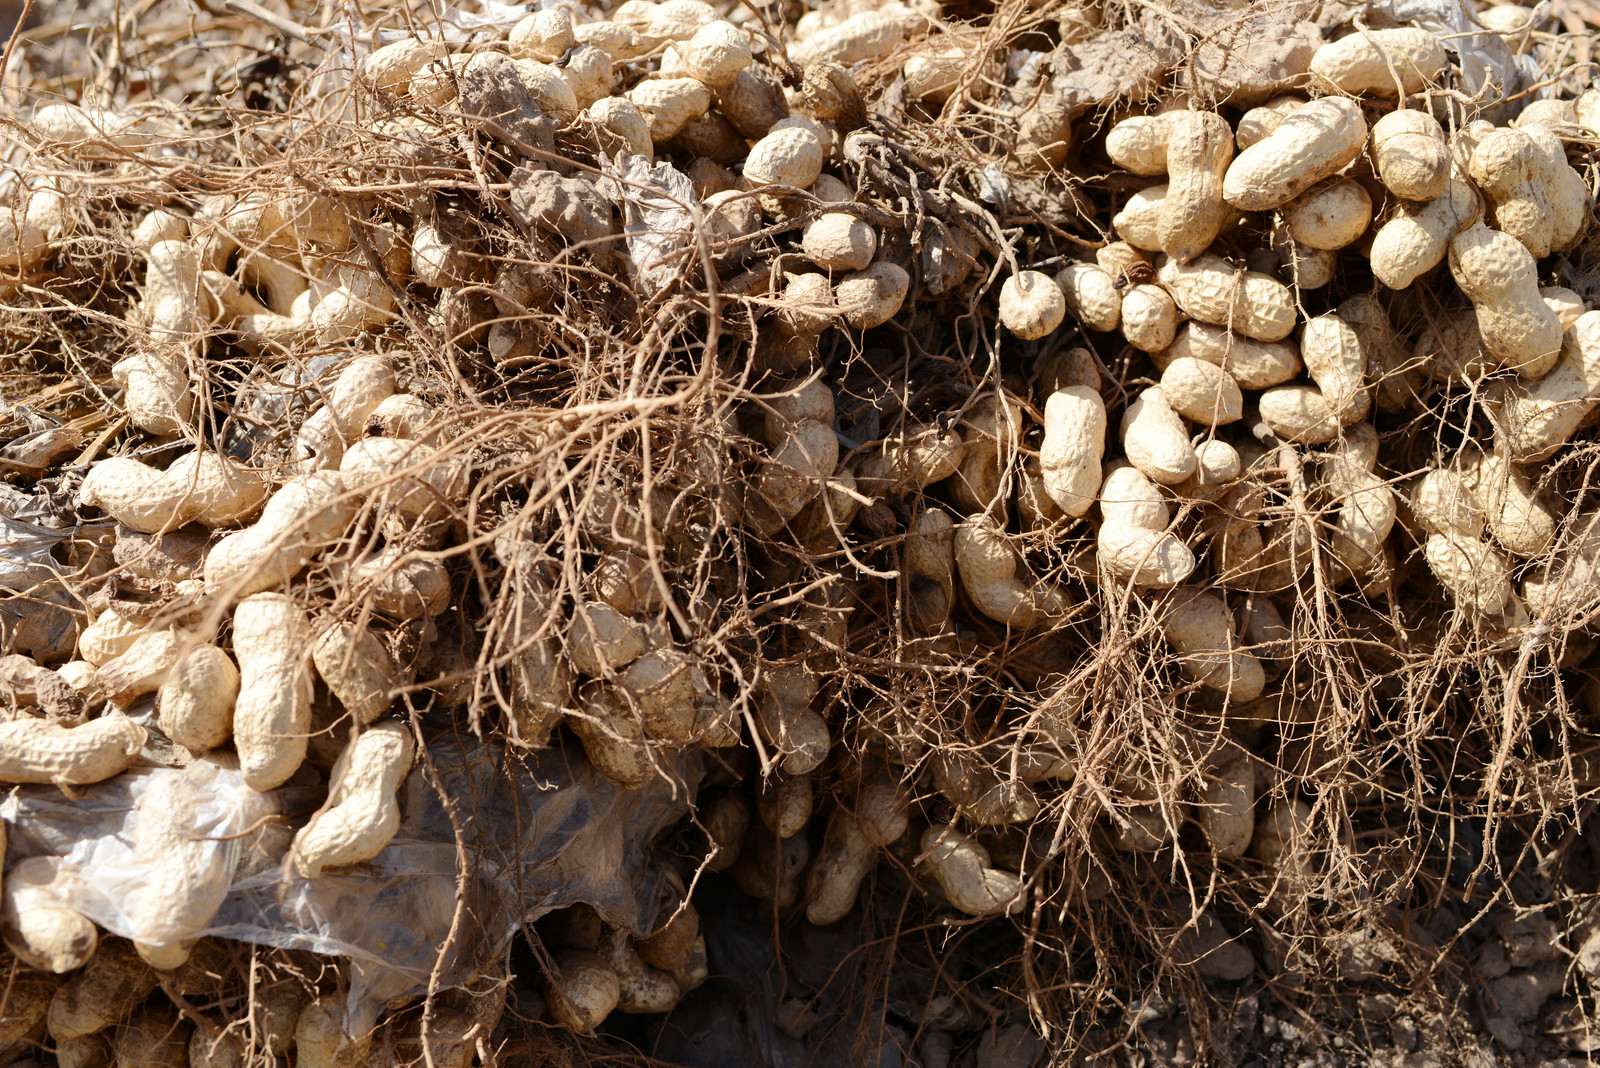
Digging: Use a garden fork or a specialized peanut digger to carefully dig up the peanut plants, taking care not to damage the roots or the peanuts. Lift the plants out of the ground, and gently shake off any excess soil.
Drying: Spread the peanut plants out in a dry, well-ventilated area, such as a barn or a shed. Allow the plants to dry completely, either by air drying or by using a machine specifically designed for drying peanuts.
Some tips for harvesting peanuts include:
- Harvest peanuts in the morning, when the plants are at their driest.
- Use a garden fork or a specialized peanut digger to carefully dig up the peanut plants.
- Handle the peanuts gently to avoid damaging them.
- Store the harvested peanuts in a cool, dry place to preserve their quality.
By following these tips and techniques, you can ensure a successful peanut harvest and enjoy the fruits of your labor.

Enjoying Your Homegrown Peanuts: Recipes and Uses
Now that you’ve successfully grown your own peanuts, it’s time to enjoy the fruits of your labor Peanuts are a versatile ingredient that can be used in a variety of recipes, from snacks and cooking to crafts and beauty treatments.
Here are some delicious and creative ways to use your homegrown peanuts:
- Peanut butter: Grind your peanuts into a creamy peanut butter and enjoy on toast, crackers, or as a dip for fruit.
- Thai peanut sauce: Blend peanuts with coconut milk, lime juice, and spices to create a creamy and flavorful sauce for noodles or stir-fries.
- Peanut brittle: Cook peanuts with sugar and water to create a crunchy and sweet brittle that’s perfect for snacking.
- African peanut stew: Simmer peanuts with vegetables and spices to create a hearty and flavorful stew.
- Peanut oil: Press or extract oil from your peanuts and use it for cooking or as a natural moisturizer.
Peanuts can also be used in crafts and beauty treatments, such as:
- Peanut shell crafts: Use peanut shells to create decorative items like wreaths, potpourri, or bird feeders.
- Peanut oil skin care: Use peanut oil as a natural moisturizer or to create homemade skin care products like lotions and creams.
- Peanut hair care: Use peanut oil as a hair mask or to create homemade hair care products like shampoos and conditioners.
With these creative and delicious ideas, you’ll be enjoying your homegrown peanuts in no time!
