Choosing the Perfect Amaryllis Bulb: What to Look For
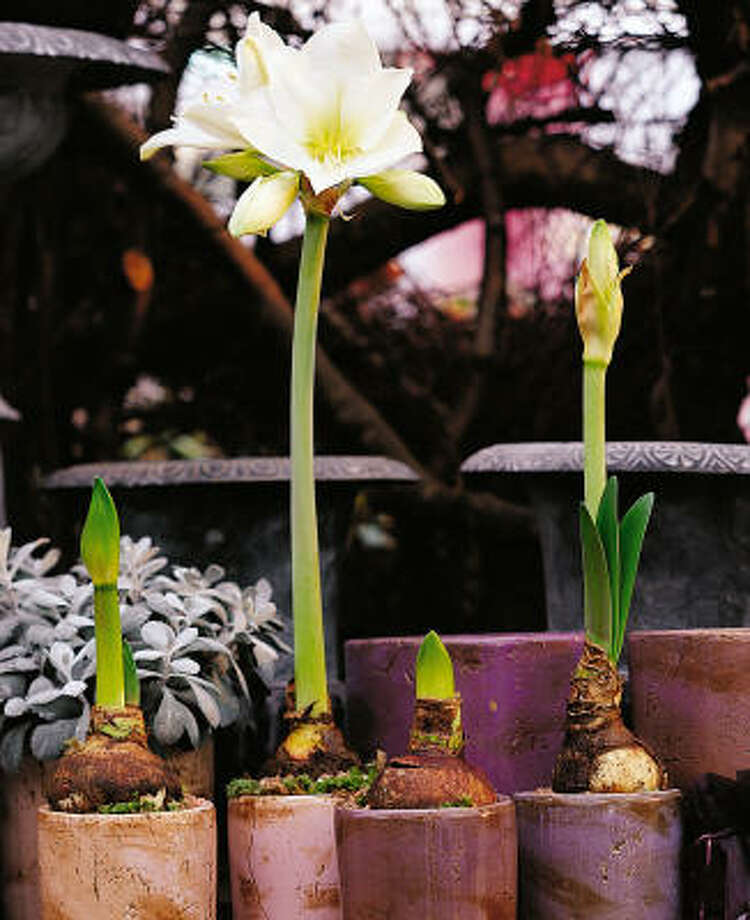
When it comes to planting amaryllis, selecting a healthy bulb is crucial for optimal growth and blooming. Amaryllis bulbs are available in various sizes, shapes, and colors, making it essential to know what to look for when choosing the perfect one. To ensure a successful planting experience, it’s vital to inspect the bulb for any signs of damage or disease.

Click Image to Find Garden Products
A healthy amaryllis bulb should be firm and plump, with no signs of soft spots or mold. The bulb should also have a slight give when pressed, indicating that it is not too dry or too wet. When selecting a bulb, choose one that is proportional to the size of the pot, as a bulb that is too large may not have enough room to grow.
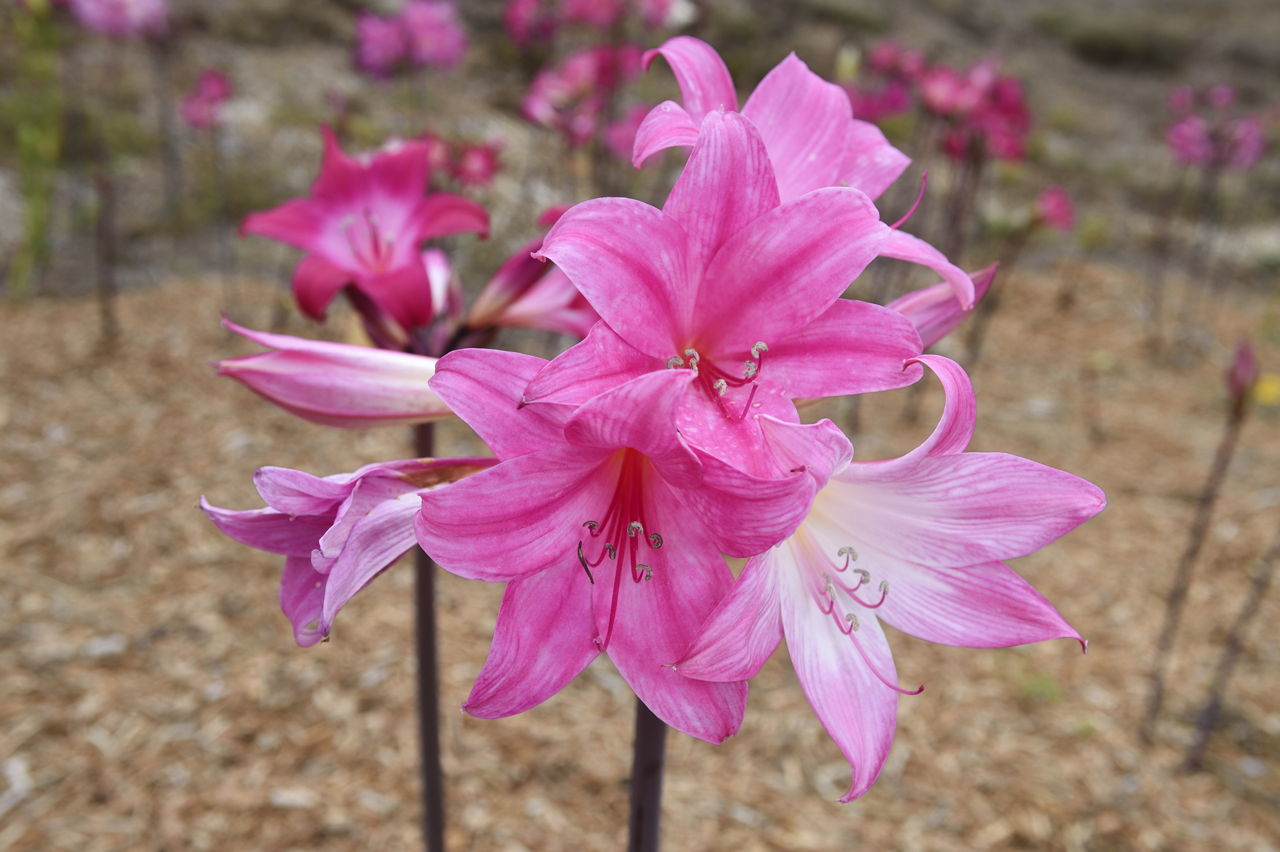
In addition to size and firmness, the color of the bulb can also be an indicator of its health. Amaryllis bulbs come in a range of colors, including red, pink, white, and bi-colored. While color is not necessarily an indicator of health, it’s essential to choose a bulb with vibrant, even coloration. Avoid bulbs with pale or washed-out color, as this can be a sign of disease or stress.
When purchasing an amaryllis bulb, it’s also essential to consider the time of year. Amaryllis bulbs are typically available from September to April, with the peak season being from October to December. During this time, the bulbs are at their best, with the highest chance of successful growth and blooming.
By choosing a healthy amaryllis bulb and following proper planting and care techniques, you can enjoy beautiful, long-lasting blooms. Remember to handle the bulb with care, as it can be easily damaged. With the right bulb and a little know-how, you’ll be well on your way to growing a stunning amaryllis plant.
Now that you’ve selected the perfect amaryllis bulb, it’s time to prepare the soil for planting. In the next section, we’ll discuss the importance of using well-draining potting soil and provide tips on how to prepare the soil for optimal amaryllis growth.

Preparing the Soil: Tips for Optimal Amaryllis Growth
Once you have selected a healthy amaryllis bulb, it’s time to prepare the soil for planting. The right soil can make all the difference in the success of your amaryllis plant. Amaryllis plants prefer well-draining potting soil that is rich in organic matter. To create the perfect soil mix, combine a high-quality potting soil with compost or manure.
Compost or manure adds essential nutrients to the soil, promoting healthy root growth and development. It also helps to improve the soil’s structure, allowing for better drainage and aeration. When selecting a potting soil, look for one that is specifically designed for indoor plants and contains a mix of peat moss, vermiculite, and perlite.
To prepare the soil for planting, start by filling a pot that is slightly larger than the amaryllis bulb with the potting soil mix. Moisten the soil with water, but make sure it’s not too wet or dry. The ideal moisture level is like a damp sponge. If the soil is too dry, the bulb may not grow properly, while too much water can cause the bulb to rot.
Next, add a layer of compost or manure to the soil. This will provide the amaryllis plant with the necessary nutrients for growth and blooming. Mix the compost or manure into the soil, making sure it’s evenly distributed. Finally, plant the amaryllis bulb in the soil, following the steps outlined in the next section.
By using a well-draining potting soil and adding organic matter, you can create the perfect environment for your amaryllis plant to thrive. This will help to promote healthy growth, encourage blooming, and ensure a long-lasting display of beautiful flowers.
Now that the soil is prepared, it’s time to plant the amaryllis bulb. In the next section, we’ll provide a step-by-step guide on how to plant the bulb, including how to handle the bulb, how deep to plant it, and how to water it after planting.
Planting the Amaryllis Bulb: A Step-by-Step Guide
Now that you have prepared the soil, it’s time to plant the amaryllis bulb. Planting the bulb is a straightforward process, but it’s essential to follow the steps carefully to ensure the best results. Here’s a step-by-step guide on how to plant the amaryllis bulb:
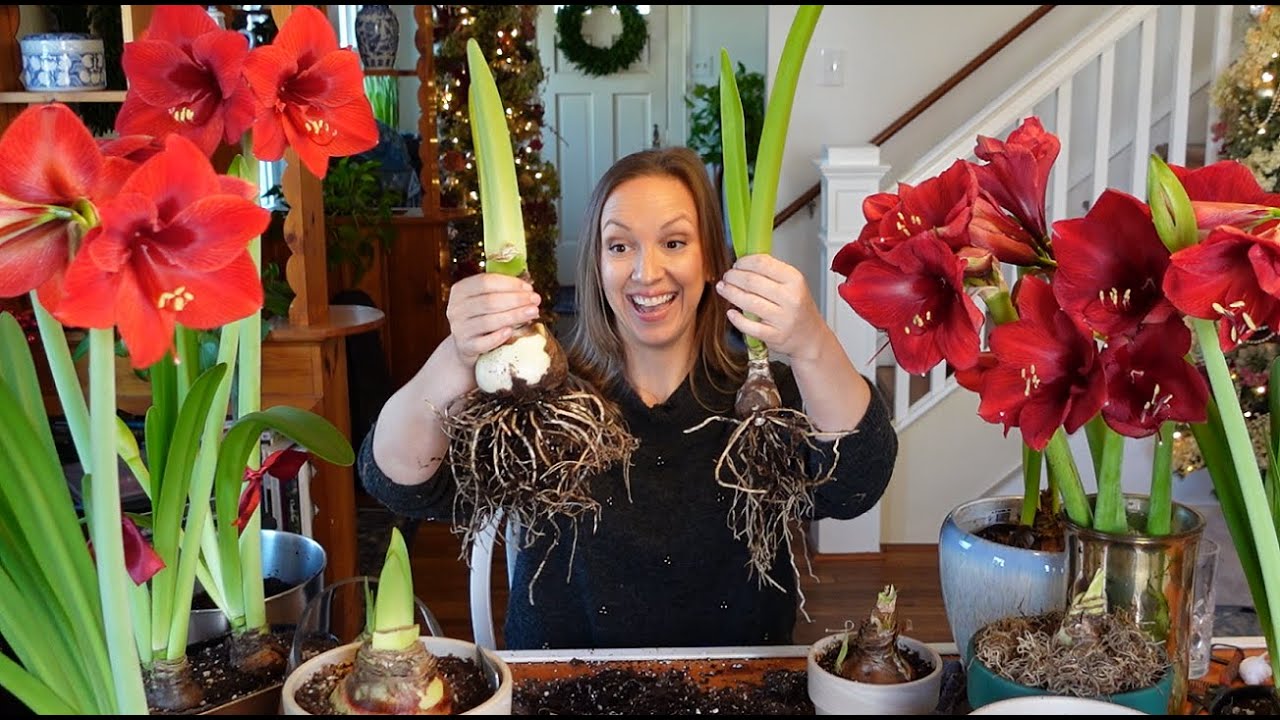
Step 1: Handle the Bulb with Care
When handling the amaryllis bulb, make sure to handle it gently to avoid damaging the roots or the bulb itself. If the bulb is wrapped in paper or mesh, remove it carefully to avoid damaging the roots.
Step 2: Plant the Bulb at the Right Depth
Plant the amaryllis bulb in the soil, making sure the base of the bulb is level with the soil surface. The bulb should be planted deep enough so that the neck of the bulb is above the soil surface. This will help prevent the bulb from rotting.
Step 3: Water the Bulb After Planting
After planting the bulb, water it thoroughly to settle the soil. Make sure the soil is moist but not waterlogged. If the soil is too dry, the bulb may not grow properly, while too much water can cause the bulb to rot.
Step 4: Provide Support for the Plant
As the amaryllis plant grows, it may need support to prevent it from toppling over. Use a stake or a trellis to provide support for the plant, making sure not to damage the stem or the roots.
By following these steps, you can ensure that your amaryllis bulb is planted correctly and will grow into a beautiful and healthy plant. Remember to provide the right conditions for the plant, including light, water, and temperature, to promote healthy growth and flowering.
In the next section, we’ll discuss the importance of providing the right conditions for amaryllis growth, including the optimal amount of light, water, and temperature.
Providing the Right Conditions: Light, Water, and Temperature
Amaryllis plants require specific conditions to grow and bloom well. Providing the right amount of light, water, and temperature is crucial for optimal growth and flowering. In this section, we’ll discuss the ideal conditions for amaryllis growth and how to adjust them to promote healthy growth and flowering.
Lighting: Amaryllis plants prefer bright, indirect light. Placing the plant near a sunny window or under grow lights can provide the necessary light for growth and flowering. However, direct sunlight can cause the leaves to become scorched and the flowers to fade. East- or west-facing windows are ideal for amaryllis plants.
Watering: Amaryllis plants require consistent moisture, especially during the growing season. Water the plant when the top inch of soil feels dry to the touch. Avoid over-watering, as this can cause the bulb to rot. Watering once a week is usually sufficient, but this may vary depending on the humidity and temperature of the environment.
Temperature: Amaryllis plants prefer daytime temperatures between 65-75°F (18-24°C) and nighttime temperatures around 55-65°F (13-18°C). Avoid placing the plant near heating or cooling vents, fireplaces, or drafty windows, as this can cause temperature fluctuations that can damage the plant.
Humidity: Amaryllis plants prefer a relatively low humidity environment, around 40-50%. To maintain the right humidity level, you can place the plant on a tray filled with water and pebbles or use a humidifier nearby.
By providing the right conditions for your amaryllis plant, you can promote healthy growth and flowering. Remember to adjust the conditions according to the plant’s needs, and don’t hesitate to experiment to find the optimal conditions for your specific plant.
In the next section, we’ll discuss the importance of supporting the plant as it grows, including how to stake the plant and prune it to promote healthy growth and flowering.
Supporting the Plant: Staking and Pruning
As the amaryllis plant grows, it may need support to prevent it from toppling over. Providing support for the plant is crucial to promote healthy growth and flowering. In this section, we’ll discuss the importance of staking and pruning the amaryllis plant.
Staking the Plant: Amaryllis plants can grow quite tall, and their stems can become weak and prone to breaking. To prevent this, it’s essential to stake the plant using a bamboo stake or a trellis. Gently tie the stem to the stake using a soft material like twine or a plant tie. Make sure not to tie the stem too tightly, as this can damage the plant.
Pruning the Plant: Pruning is an essential part of amaryllis plant care. It helps to promote healthy growth, encourages blooming, and prevents the plant from becoming leggy. To prune the amaryllis plant, remove any dead or dying leaves or flowers. Cut back the stem to about 2-3 inches from the soil surface after the blooming period. This will help the plant to conserve energy and promote new growth.
Timing of Pruning: The timing of pruning is crucial for amaryllis plants. Prune the plant immediately after the blooming period, as this will help to promote new growth and prevent the plant from becoming leggy. Avoid pruning the plant during the growing season, as this can cause stress to the plant and prevent it from blooming.
Benefits of Pruning: Pruning the amaryllis plant has several benefits. It helps to promote healthy growth, encourages blooming, and prevents the plant from becoming leggy. Pruning also helps to prevent the plant from becoming too tall and prone to breaking.
By providing support for the amaryllis plant through staking and pruning, you can promote healthy growth and flowering. Remember to prune the plant at the right time and avoid over-pruning, as this can cause stress to the plant.
In the next section, we’ll discuss common mistakes to avoid when planting amaryllis, including over-watering, under-watering, and exposing the plant to extreme temperatures.

Common Mistakes to Avoid When Planting Amaryllis
Planting amaryllis can be a rewarding experience, but it’s essential to avoid common mistakes that can lead to poor growth, disease, or even plant death. In this section, we’ll discuss common mistakes to avoid when planting amaryllis, including over-watering, under-watering, and exposing the plant to extreme temperatures.
Over-Watering: One of the most common mistakes when planting amaryllis is over-watering. Amaryllis plants prefer well-draining soil and can be susceptible to root rot if the soil is too wet. To avoid over-watering, make sure to check the soil moisture regularly and only water the plant when the top inch of soil feels dry to the touch.
Under-Watering: On the other hand, under-watering can also be detrimental to amaryllis plants. Amaryllis plants need consistent moisture, especially during the growing season. To avoid under-watering, make sure to water the plant regularly, but avoid getting water on the leaves or crown of the plant.
Extreme Temperatures: Amaryllis plants prefer temperatures between 65-75°F (18-24°C) during the day and around 55-65°F (13-18°C) at night. Avoid placing the plant near heating or cooling vents, fireplaces, or drafty windows, as this can cause temperature fluctuations that can damage the plant.
Insufficient Light: Amaryllis plants prefer bright, indirect light, but can tolerate low light conditions. However, insufficient light can lead to weak and spindly growth. To avoid this, make sure to place the plant in a spot that receives bright, indirect light, such as an east- or west-facing window.
By avoiding these common mistakes, you can ensure that your amaryllis plant grows and blooms well. Remember to monitor the plant’s condition regularly and adjust its care accordingly.
In the next section, we’ll discuss how to care for the amaryllis plant after it has been planted, including how to encourage blooming and how to deadhead flowers.
Post-Planting Care: How to Encourage Blooming
After planting the amaryllis bulb, it’s essential to provide the right care to encourage blooming. In this section, we’ll discuss how to care for the amaryllis plant after it has been planted, including how to encourage blooming and how to deadhead flowers.
Watering: Continue to water the amaryllis plant regularly, but make sure not to over-water. Check the soil moisture by sticking your finger into the soil up to the first knuckle. If the soil feels dry, it’s time to water.
Fertilizing: Feed the amaryllis plant with a balanced, water-soluble fertilizer once a month. This will provide the plant with the necessary nutrients to promote healthy growth and blooming.
Deadheading: Remove the flowers as they fade to encourage the plant to produce more blooms. Cut the flower stalk back to the base of the plant, making sure not to damage the leaves or the bulb.
Pruning: After the blooming period, cut back the leaves to about 2-3 inches from the soil surface. This will help the plant to conserve energy and promote new growth.
Repotting: Amaryllis plants typically need to be repotted every 2-3 years. Choose a pot that is slightly larger than the previous one, and use a well-draining potting mix. Repot the plant in the spring or summer when it is actively growing.
By following these post-planting care tips, you can encourage the amaryllis plant to bloom and enjoy its beautiful flowers for a longer period.
In the next section, we’ll provide tips on how to enjoy the amaryllis blooms for a longer period, including how to extend the blooming period and how to care for the plant after it has finished blooming.

Enjoying Your Amaryllis: Tips for Long-Lasting Blooms
With proper care and attention, amaryllis plants can provide beautiful blooms for several weeks. In this section, we’ll provide tips on how to enjoy the amaryllis blooms for a longer period, including how to extend the blooming period and how to care for the plant after it has finished blooming.
Extending the Blooming Period: To extend the blooming period, make sure to provide the amaryllis plant with the right conditions, including bright, indirect light and consistent temperatures. Avoid exposing the plant to extreme temperatures, as this can cause the blooms to fade quickly.
Caring for the Plant After Blooming: After the amaryllis plant has finished blooming, it’s essential to care for the plant to promote new growth and encourage future blooms. Cut back the flower stalk to the base of the plant, and continue to water and fertilize the plant as usual.
Forcing the Plant to Bloom Again: To force the amaryllis plant to bloom again, provide the plant with a period of cooler temperatures (around 50-60°F) for 30-60 days. This will help to stimulate the plant to produce new growth and encourage future blooms.
Dividing and Repotting: After the amaryllis plant has finished blooming, it’s a good idea to divide and repot the plant to promote new growth and encourage future blooms. Choose a pot that is slightly larger than the previous one, and use a well-draining potting mix.
By following these tips, you can enjoy the amaryllis blooms for a longer period and encourage the plant to produce new growth and future blooms.
With these tips and guidelines, you’re now ready to unlock the beauty of amaryllis and enjoy its stunning blooms for years to come.
