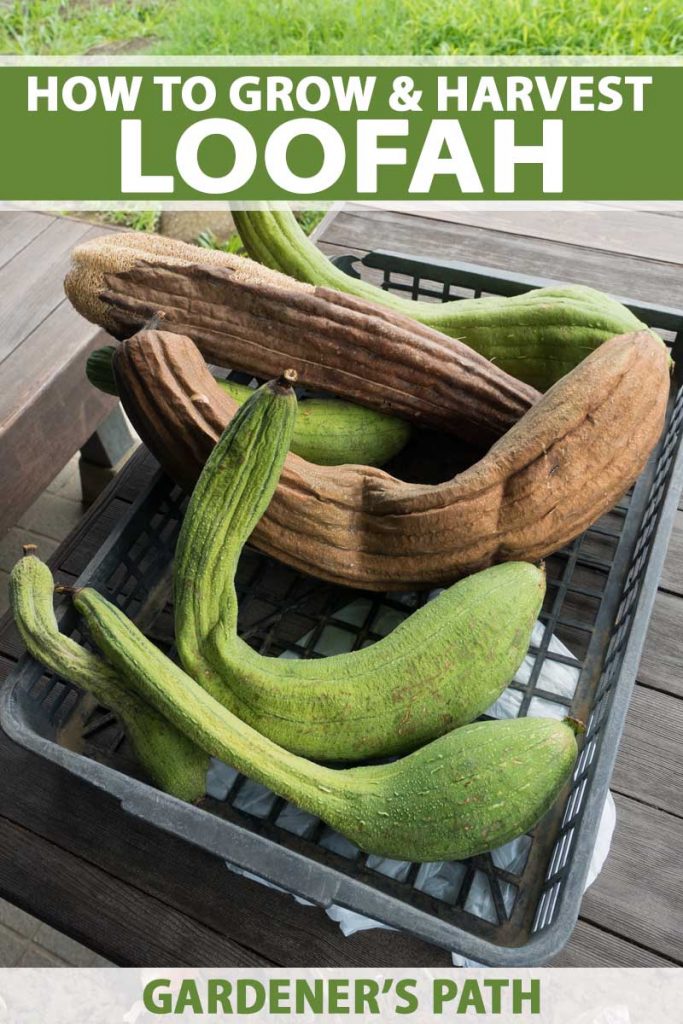
Unlocking the Secrets of Loofah Sponge Production
Loofah sponges have been a staple in many cultures for centuries, prized for their unique texture and versatility. In recent years, the demand for loofah sponges has increased significantly, driven by the growing interest in natural and sustainable products. As a result, many individuals are now seeking to learn how to grow loofah sponges themselves. This article aims to provide a comprehensive guide on how to cultivate loofah sponges, covering the essential steps and techniques required to produce high-quality sponges.

Click Image to Find Garden Products
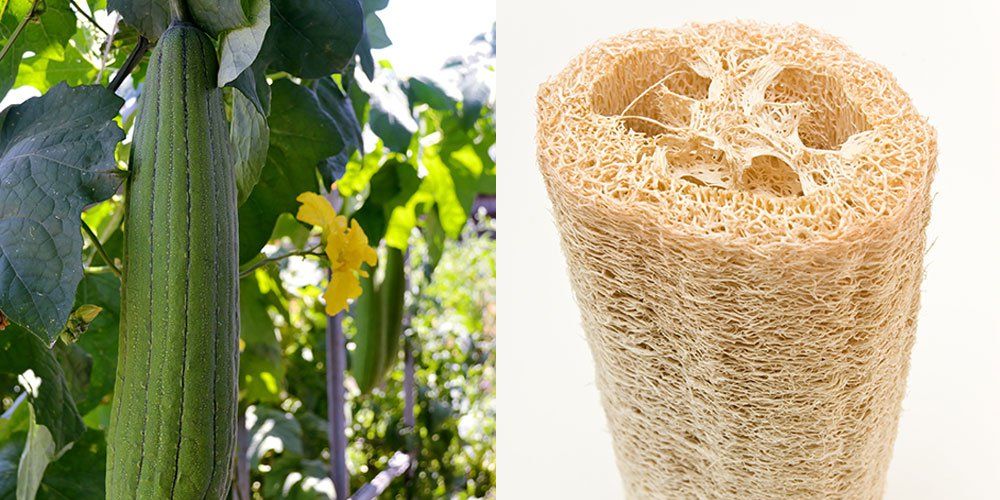
Loofah sponges are derived from the Luffa plant, a member of the Cucurbitaceae family. The plant is native to Asia and Africa, but can be grown in a variety of climates and regions. To grow loofah sponges, one must first understand the unique characteristics of the plant and its requirements. This includes selecting the right variety of loofah seeds, preparing the soil, and providing the optimal growing conditions.
By following the steps outlined in this article, individuals can learn how to grow loofah sponges and enjoy the many benefits they provide. From exfoliating skin to cleaning surfaces, loofah sponges are a versatile and natural product that can be used in a variety of ways. Whether you are a seasoned gardener or a beginner, this guide will provide you with the knowledge and skills necessary to successfully cultivate loofah sponges.
In addition to their practical uses, loofah sponges also offer a range of environmental benefits. The Luffa plant is a low-maintenance crop that requires minimal pesticides and fertilizers, making it an attractive option for those seeking to reduce their environmental impact. Furthermore, loofah sponges are biodegradable and compostable, reducing waste and the demand for synthetic products.
As the demand for loofah sponges continues to grow, it is essential to develop sustainable and responsible cultivation practices. By learning how to grow loofah sponges, individuals can contribute to a more environmentally friendly and sustainable future. In the following sections, we will delve deeper into the process of cultivating loofah sponges, providing a step-by-step guide on how to grow these versatile and natural products.
Choosing the Right Variety: Selecting the Best Loofah Seeds
When it comes to growing loofah sponges, selecting the right variety of seeds is crucial for optimal growth and production. There are several types of loofah seeds available, each with its unique characteristics, growth habits, and suitability for various climates. Understanding the different types of loofah seeds can help you make an informed decision and choose the best variety for your specific needs.
One of the most popular varieties of loofah seeds is the Luffa cylindrica, which is known for its high yield and large, cylindrical fruits. This variety is well-suited for warm and humid climates, making it an ideal choice for growers in tropical regions. Another popular variety is the Luffa acutangula, which is known for its smaller, more rounded fruits and is better suited for cooler and drier climates.
When selecting loofah seeds, it’s essential to consider factors such as climate, soil type, and desired fruit size. For example, if you’re growing in a cool and dry climate, you may want to choose a variety that is more tolerant of these conditions, such as the Luffa acutangula. On the other hand, if you’re growing in a warm and humid climate, you may want to choose a variety that is more suited to these conditions, such as the Luffa cylindrica.
In addition to considering the type of loofah seeds, it’s also essential to choose high-quality seeds that are fresh and have a high germination rate. Look for seeds that are specifically labeled as “suitable for growing loofah sponges” or “loofah seeds for cultivation.” Avoid seeds that are old or of poor quality, as they may not germinate or produce well.
By choosing the right variety of loofah seeds and following proper growing and care techniques, you can successfully grow loofah sponges and enjoy the many benefits they provide. Whether you’re a seasoned gardener or just starting out, growing loofah sponges can be a fun and rewarding experience. In the next section, we’ll discuss the importance of soil quality and preparation for loofah cultivation.

Preparing the Soil: Creating an Ideal Environment for Loofah Growth
Soil quality and preparation are crucial for successful loofah cultivation. Loofah plants require a well-draining, rich soil with a pH range of 6.0 to 6.8. A slightly acidic to neutral soil pH allows for optimal nutrient uptake and healthy plant growth. To create an ideal environment for loofah growth, it’s essential to test the soil and amend it if necessary.
A soil test will help determine the pH level and nutrient content of the soil. Based on the test results, add organic matter such as compost or well-rotted manure to adjust the pH and improve soil fertility. Loofah plants are heavy feeders and require a balanced fertilizer with a ratio of 10-10-10 (nitrogen-phosphorus-potassium). Apply the fertilizer according to the manufacturer’s instructions, taking care not to over-fertilize, which can damage the plants.
In addition to pH and nutrient adjustments, loofah plants require a well-draining soil to prevent waterlogged soil conditions. Add organic matter or perlite to improve soil structure and drainage. A mix of 70% topsoil, 20% compost, and 10% perlite provides an ideal growing medium for loofah plants.
When preparing the soil for loofah cultivation, it’s also essential to consider the soil’s temperature. Loofah seeds germinate best in warm soil, with temperatures between 70°F and 85°F (21°C and 30°C). In cooler climates, start seeds indoors 2-3 weeks before the last frost date and transplant them outside when the soil has warmed up.
By creating an ideal soil environment, loofah plants will thrive, and you’ll be on your way to growing healthy, productive plants. Remember to monitor soil conditions throughout the growing season and make adjustments as necessary to ensure optimal growth and development.
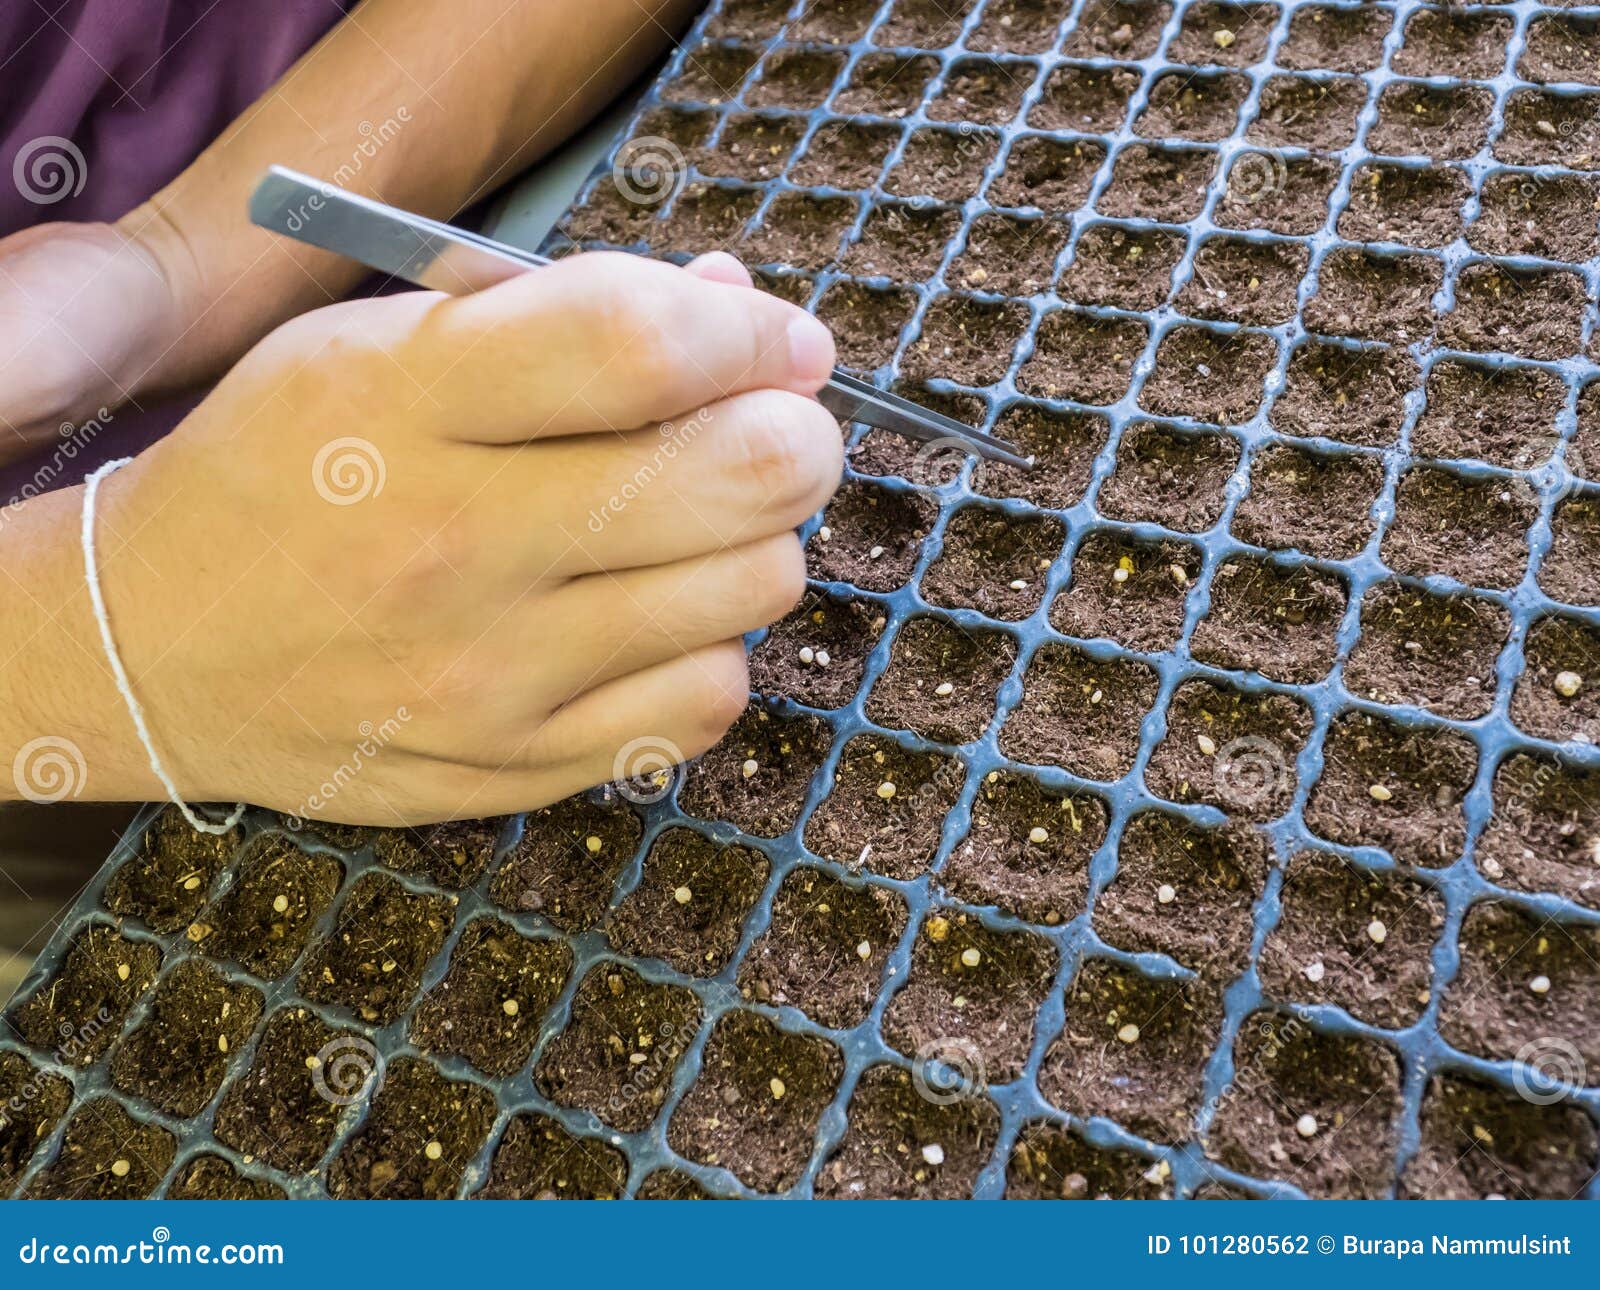
Sowing the Seeds: A Step-by-Step Guide to Planting Loofah
Now that the soil is prepared, it’s time to sow the loofah seeds. Sowing the seeds at the right time and in the right conditions is crucial for successful germination and growth. Here’s a step-by-step guide on how to plant loofah seeds:
Step 1: Choose the Right Time
In temperate climates, the best time to plant loofah seeds is in late spring to early summer, when the soil has warmed up to at least 70°F (21°C). In warmer climates, loofah seeds can be planted year-round. Make sure to check the specific instructions on the seed packet for the recommended planting time in your area.
Step 2: Prepare the Seeds
Loofah seeds have a hard outer coating that can inhibit germination. To improve germination rates, soak the seeds in water for 24 hours before planting. This will help to soften the outer coating and encourage the seeds to sprout.
Step 3: Sow the Seeds
Plant the loofah seeds 1 inch (2.5 cm) deep and 6-8 inches (15-20 cm) apart in rows that are 3-4 feet (90-120 cm) apart. Cover the seeds with a thin layer of soil and gently firm the soil to ensure good contact. Water the soil gently but thoroughly.
Step 4: Provide Support
Loofah plants are climbing plants that require support as they grow. Provide a trellis or other support system for the plants to climb on. This will help to keep the plants upright and encourage better fruiting.
Step 5: Keep the Soil Moist
Keep the soil consistently moist during the first few weeks after planting. This will help to encourage germination and establishment of the seedlings. Once the plants are established, reduce watering to about 1 inch (2.5 cm) per week.
By following these steps, you’ll be well on your way to growing healthy and productive loofah plants. Remember to keep the soil consistently moist and provide support for the climbing plants. With proper care, you’ll be harvesting your own loofah sponges in no time.
Nurturing Your Loofah Plants: Tips for Optimal Growth
Once the loofah seeds have germinated and the seedlings have emerged, it’s essential to provide the right conditions for optimal growth. Loofah plants require regular watering, fertilization, pruning, and pest management to thrive. Here are some tips on how to care for your loofah plants:
Watering
Loofah plants require consistent moisture, especially during the first few weeks after planting. Water the plants deeply once or twice a week, depending on weather conditions. Avoid overwatering, which can lead to root rot and other problems.
Fertilization
Loofah plants are heavy feeders and require regular fertilization to promote healthy growth. Use a balanced fertilizer with a ratio of 10-10-10 (nitrogen-phosphorus-potassium) and follow the manufacturer’s instructions for application rates.
Pruning
Pruning is essential to promote healthy growth and encourage fruiting. Remove any weak or spindly growth, and trim back the tips of the vines to encourage branching. This will help to increase the yield of loofah sponges.
Pest Management
Loofah plants are susceptible to pests such as aphids, whiteflies, and spider mites. Use organic or integrated pest management methods to control infestations, such as introducing beneficial insects or using neem oil.
Support
Loofah plants are climbing plants that require support as they grow. Provide a trellis or other support system for the plants to climb on, and train the vines to grow upwards. This will help to keep the plants upright and encourage better fruiting.
By following these tips, you can help to create an optimal environment for your loofah plants to thrive. Remember to monitor the plants regularly and adjust your care routine as needed to ensure the best possible results. With proper care, you’ll be harvesting your own loofah sponges in no time.
Learning how to grow loofah sponges requires attention to detail and a commitment to providing the right conditions for optimal growth. By following these tips and staying up-to-date with the latest best practices, you can enjoy a bountiful harvest of loofah sponges and start using them in your daily life.

Harvesting Your Loofah Sponges: Timing and Techniques
After months of careful cultivation, the moment of truth has finally arrived: it’s time to harvest your loofah sponges. Harvesting loofah sponges requires attention to detail and a bit of finesse, but with the right techniques, you can enjoy a bountiful crop of these versatile and useful plants.
When to Harvest
Loofah sponges are typically ready to harvest about 100 to 150 days after planting, when the fruit has reached its full size and the skin has turned a light brown color. Check the fruit regularly, as it can quickly go from ripe to overripe.
How to Check for Ripeness
To check if a loofah sponge is ripe, gently squeeze the fruit. A ripe loofah sponge will yield to pressure, but still feel slightly firm. If the fruit is too soft or mushy, it’s overripe and should be discarded.
Removing the Sponges from the Plant
Once you’ve identified a ripe loofah sponge, use scissors or a sharp knife to carefully cut the fruit from the plant. Leave a small piece of stem attached to the fruit to help it dry more easily.
Drying the Loofah Sponges
After harvesting, the loofah sponges need to be dried to remove excess moisture and prevent spoilage. You can air-dry the sponges by spreading them out in a single layer on a wire rack or tray, or use a food dehydrator to speed up the process.
Tips for Successful Harvesting
To ensure a successful harvest, make sure to handle the loofah sponges gently to avoid damaging the fruit. Also, harvest the sponges in the morning, when the dew is still present, to help prevent moisture loss.
By following these tips and techniques, you can enjoy a bountiful harvest of loofah sponges and start using them in your daily life. Whether you use them for cleaning, exfoliating, or crafting, loofah sponges are a versatile and useful plant that can add value and joy to your life.
Learning how to grow loofah sponges is a rewarding experience that requires patience, dedication, and attention to detail. By following the steps outlined in this guide, you can successfully cultivate and harvest your own loofah sponges and enjoy the many benefits they have to offer.
Drying and Processing: Turning Your Loofah Sponges into Usable Products
After harvesting your loofah sponges, the next step is to dry and process them to create usable products. Drying is an essential step in preserving the loofah sponges and preventing spoilage. Here are some methods for drying and processing loofah sponges:
Air-Drying
Air-drying is a simple and cost-effective method for drying loofah sponges. To air-dry your loofah sponges, tie them in small bunches and hang them upside down in a warm, dry, dark place. It may take several weeks for the loofah sponges to dry completely, depending on the humidity and temperature.
Oven-Drying
Oven-drying is a faster method for drying loofah sponges. Preheat your oven to its lowest temperature setting (usually around 150°F). Place the loofah sponges in a single layer on a baking sheet and dry for 2-3 hours. Check the loofah sponges regularly to ensure they don’t overdry.
Bleaching
Bleaching is a process that involves soaking the loofah sponges in a solution of water and bleach to remove any impurities and whiten the sponges. To bleach your loofah sponges, mix 1 part bleach with 10 parts water and soak the sponges for 10-15 minutes. Rinse the sponges thoroughly with clean water and dry them as usual.
Creating Usable Products
Once your loofah sponges are dry and processed, you can use them to create a variety of usable products. Here are some ideas:
Loofah Soap
Loofah soap is a popular product that combines the natural exfoliating properties of loofah sponges with the cleansing power of soap. To make loofah soap, simply grate a dried loofah sponge and mix it with your favorite soap recipe.
Exfoliating Gloves
Exfoliating gloves are a great way to use loofah sponges in your daily skincare routine. To make exfoliating gloves, simply sew a dried loofah sponge into a pair of gloves and use them to exfoliate your skin.
By following these methods for drying and processing loofah sponges, you can create a variety of usable products that are perfect for personal use or as gifts. Remember to always follow proper safety precautions when working with loofah sponges, and happy crafting!
Troubleshooting Common Issues: Overcoming Challenges in Loofah Cultivation
While growing loofah sponges can be a rewarding experience, it’s not without its challenges. Common issues that may arise during loofah cultivation include pests, diseases, and environmental stressors. In this section, we’ll address some of the most common problems and offer solutions and advice on how to overcome them.
Pests
Loofah plants are susceptible to pests such as aphids, whiteflies, and spider mites. To control infestations, use organic or integrated pest management methods such as introducing beneficial insects or using neem oil.
Diseases
Loofah plants are also susceptible to diseases such as powdery mildew and fungal infections. To prevent the spread of disease, ensure good air circulation and water plants carefully to avoid splashing water on the leaves.
Environmental Stressors
Loofah plants can be sensitive to environmental stressors such as extreme temperatures, drought, and excessive rainfall. To mitigate the effects of environmental stressors, provide support for the plants, ensure good soil quality, and water carefully.
Common Problems and Solutions
Here are some common problems that may arise during loofah cultivation, along with solutions and advice on how to overcome them:
Problem: Loofah plants are not producing fruit
Solution: Ensure that the plants are receiving enough sunlight, water, and nutrients. Also, check for pests and diseases and take action to control infestations.
Problem: Loofah plants are experiencing yellowing leaves
Solution: Check the soil pH and adjust if necessary. Also, ensure that the plants are receiving enough water and nutrients.
Problem: Loofah plants are experiencing powdery mildew
Solution: Ensure good air circulation and water plants carefully to avoid splashing water on the leaves. Also, use organic or integrated pest management methods to control infestations.
By being aware of the common issues that may arise during loofah cultivation and taking action to prevent and control them, you can ensure a healthy and productive crop of loofah sponges.
