Preparing the Soil for Daffodil Planting
Before planting daffodil bulbs, it’s essential to prepare the soil to ensure optimal growth and blooming. Daffodils prefer well-draining soil that is rich in organic matter. To test the pH level of your soil, use a soil testing kit or send a sample to a laboratory for analysis. Most daffodils prefer a slightly acidic to neutral soil pH, ranging from 6.0 to 7.0.

Click Image to Find Garden Products
If your soil test reveals that your soil is too acidic or too alkaline, you can amend the pH by adding lime or sulfur. Additionally, incorporate compost or well-rotted manure into the soil to improve its structure and fertility. Remove any debris, rocks, or weeds that may interfere with the growth of the bulbs.
When preparing the soil for daffodil planting, it’s also important to consider the soil’s texture. Daffodils prefer a well-draining soil that is not too dense or too sandy. If your soil is heavy clay or sandy, mix in some organic matter such as compost or peat moss to improve its texture.
By taking the time to prepare the soil for daffodil planting, you’ll be rewarded with healthy, thriving bulbs that will bloom beautifully in the spring. To learn more about how to plant a daffodil bulb, including the ideal planting depth and spacing, be sure to check out our step-by-step guide.
Preparing the Soil for Daffodil Planting
Before planting daffodil bulbs, it’s essential to prepare the soil to ensure optimal growth and blooming. Daffodils prefer well-draining soil that is rich in organic matter. To test the pH level of your soil, use a soil testing kit or send a sample to a laboratory for analysis. Most daffodils prefer a slightly acidic to neutral soil pH, ranging from 6.0 to 7.0.
If your soil test reveals that your soil is too acidic or too alkaline, you can amend the pH by adding lime or sulfur. Additionally, incorporate compost or well-rotted manure into the soil to improve its structure and fertility. Remove any debris, rocks, or weeds that may interfere with the growth of the bulbs.
When preparing the soil for daffodil planting, it’s also important to consider the soil’s texture. Daffodils prefer a well-draining soil that is not too dense or too sandy. If your soil is heavy clay or sandy, mix in some organic matter such as compost or peat moss to improve its texture.
By taking the time to prepare the soil for daffodil planting, you’ll be rewarded with healthy, thriving bulbs that will bloom beautifully in the spring. To learn more about how to plant a daffodil bulb, including the ideal planting depth and spacing, be sure to check out our step-by-step guide.
Some common mistakes to avoid when preparing the soil for daffodil planting include not testing the soil pH, not adding organic matter, and not removing debris. By avoiding these mistakes, you can ensure that your daffodils receive the best possible start in life.
It’s also important to note that daffodils can be planted in a variety of soil types, including clay, loam, and sand. However, they do require well-draining soil to prevent waterlogged soil conditions that can lead to rot and other problems.

How to Plant Daffodil Bulbs: A Step-by-Step Guide
Planting daffodil bulbs is a relatively straightforward process that requires some basic knowledge and attention to detail. To learn how to plant a daffodil bulb, follow these steps:
Step 1: Choose a location with well-draining soil and full sun to partial shade. Daffodils prefer a spot that receives at least 6 hours of direct sunlight per day.
Step 2: Plant the bulbs in the fall, about 6-8 weeks before the first frost. This allows the bulbs to establish themselves in the soil before the winter.
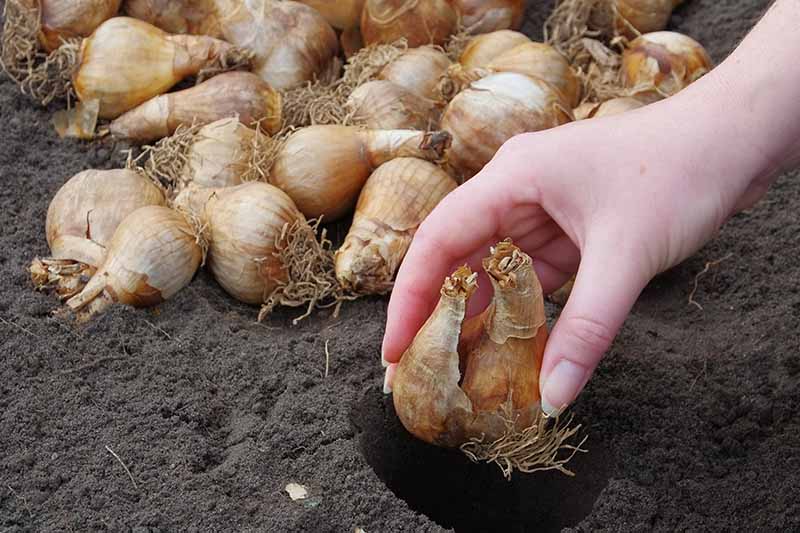
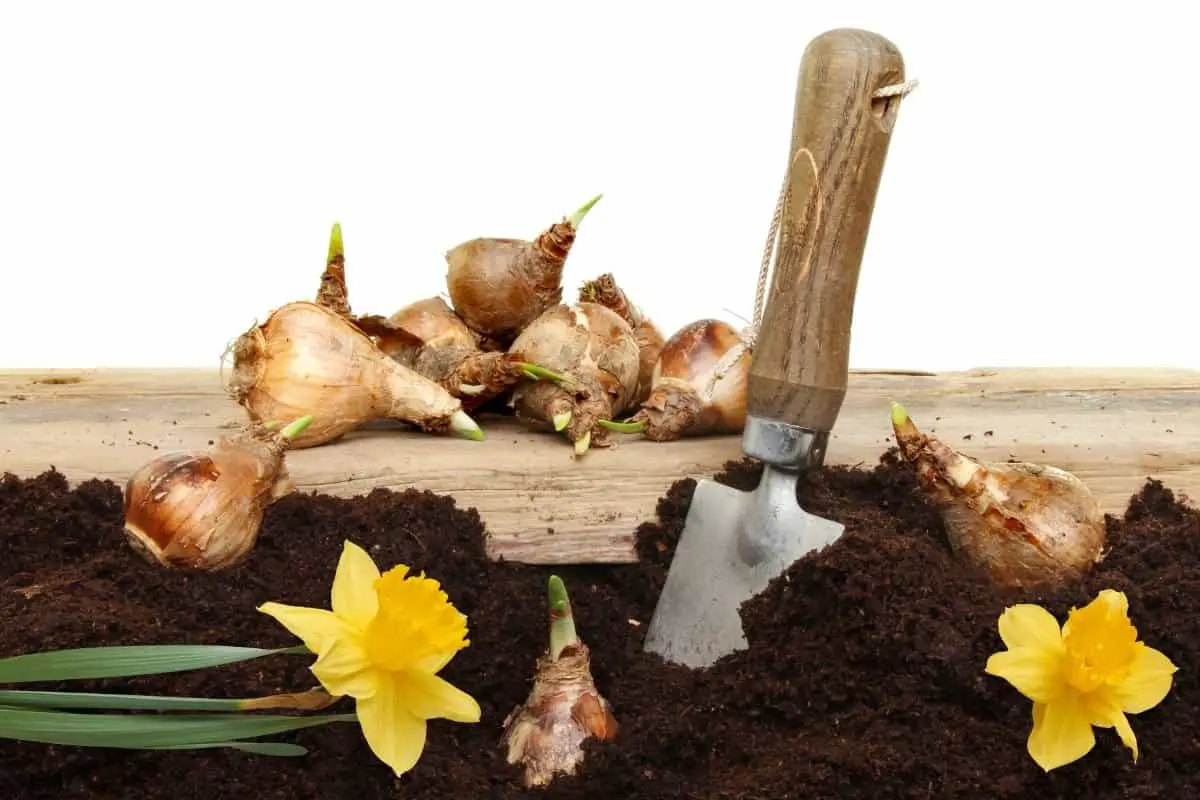
Step 3: Dig a hole that is 2-3 times deeper than the height of the bulb. For example, if the bulb is 2 inches tall, dig a hole that is 4-6 inches deep.
Step 4: Place the bulb in the hole, pointed end up. Fill the hole with soil, making sure to cover the bulb completely.
Step 5: Water the soil well after planting and keep it consistently moist during the first growing season.
Step 6: Apply a low-nitrogen, high-potassium fertilizer in the spring when the foliage emerges. This will help promote healthy growth and blooming.
Some important things to keep in mind when planting daffodil bulbs include:
Planting depth: Make sure to plant the bulbs at the correct depth to prevent them from rotting or becoming too exposed.
Spacing: Plant the bulbs 3-6 inches apart, depending on the variety. This will give them enough room to grow and bloom without becoming too crowded.
Orientation: Plant the bulbs with the pointed end up and the flat base down. This will help them grow and bloom correctly.
By following these steps and tips, you should be able to successfully plant your daffodil bulbs and enjoy their beautiful blooms in the spring.
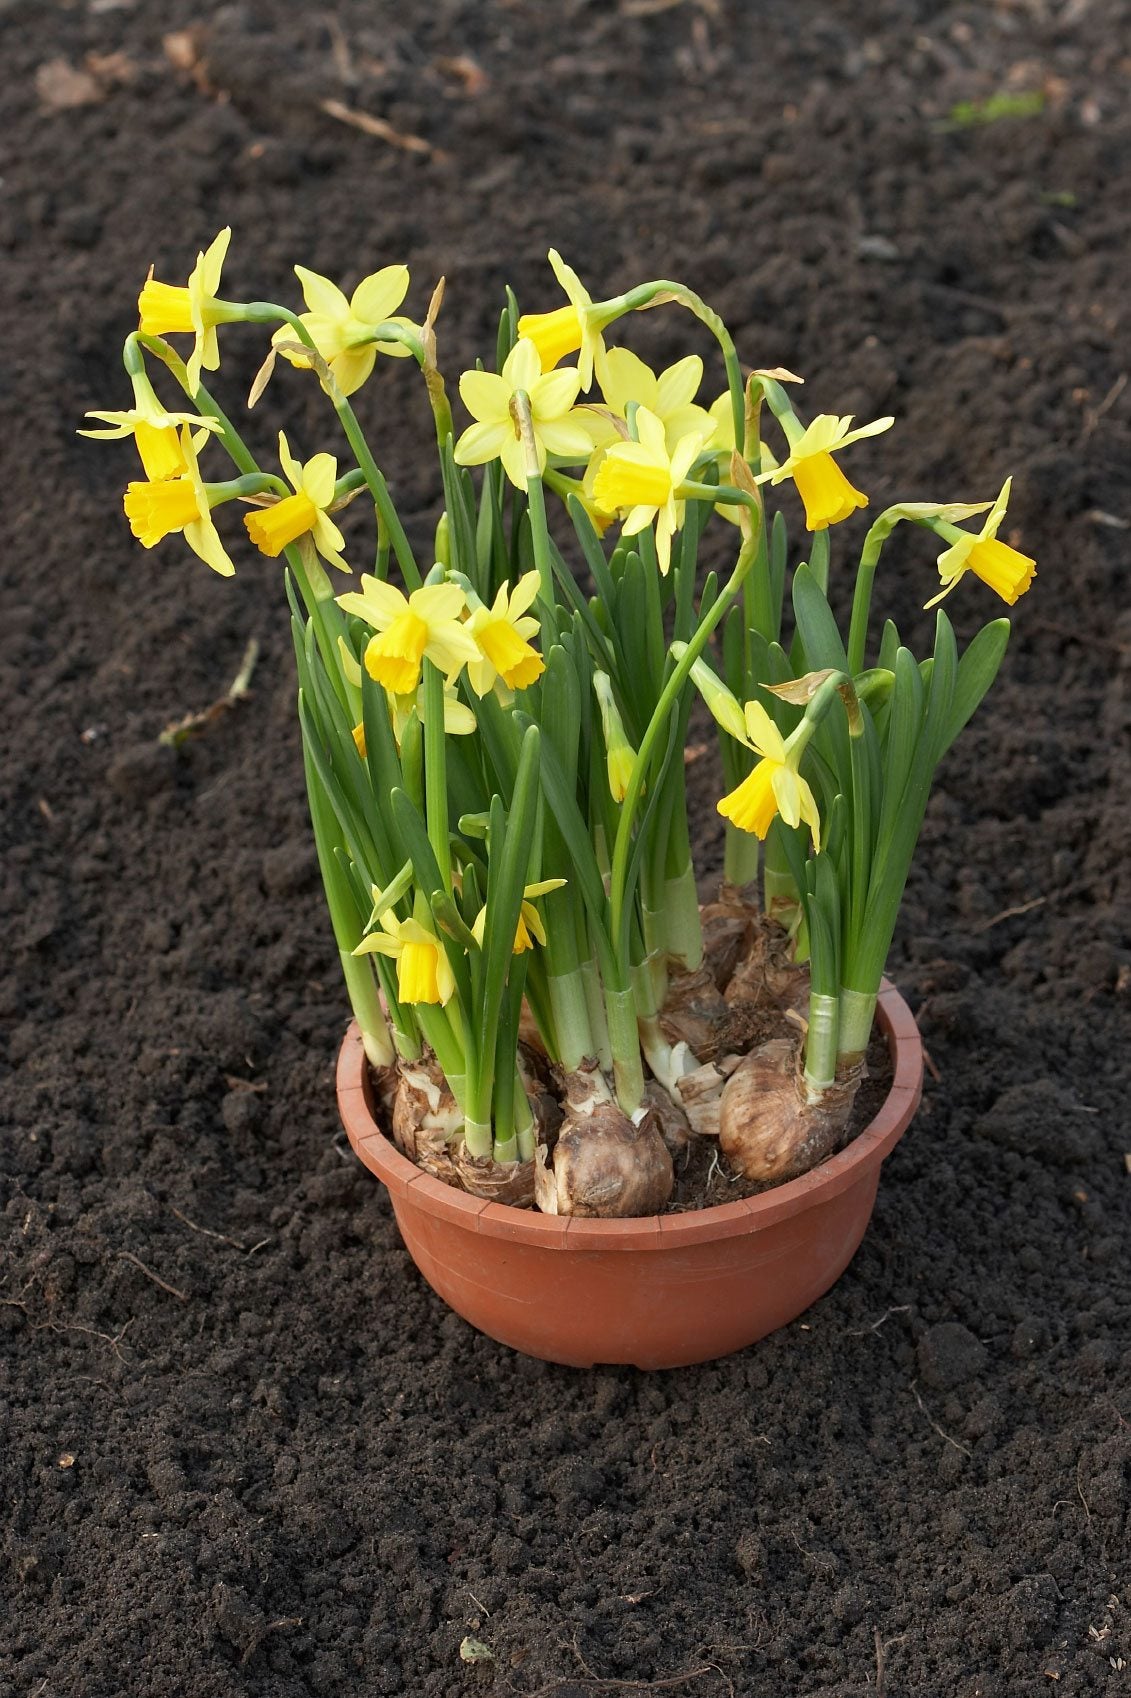
Planting Daffodils in Containers: A Great Alternative
Planting daffodils in containers is a great alternative to traditional garden planting. This method offers flexibility and space-saving benefits, making it ideal for small gardens, balconies, or patios. To plant daffodils in containers, follow these steps:
Step 1: Choose a container that is at least 6-8 inches deep and has drainage holes in the bottom. This will ensure that the bulbs have enough room to grow and that excess water can drain out.
Step 2: Select a high-quality potting soil that is specifically designed for bulbs. This type of soil will provide the necessary nutrients and drainage for healthy growth.
Step 3: Plant the daffodil bulbs in the container, following the same steps as traditional garden planting. Make sure to plant the bulbs at the correct depth and spacing, and water well after planting.
Step 4: Place the container in a location that receives full sun to partial shade, depending on the variety of daffodil. Make sure the container is protected from extreme temperatures and wind.
Some benefits of planting daffodils in containers include:
Flexibility: Containers can be moved to different locations, allowing you to enjoy your daffodils in different parts of your garden or home.
Space-saving: Containers take up less space than traditional garden beds, making them ideal for small gardens or balconies.
Year-round interest: Containers can be used to create a year-round display of interest, with daffodils blooming in the spring and other plants taking over in the summer and fall.
When planting daffodils in containers, it’s also important to consider the following tips:
Watering: Make sure to water the container regularly, but avoid overwatering, which can lead to rot and other problems.
Fertilizing: Fertilize the container with a low-nitrogen, high-potassium fertilizer in the spring, following the manufacturer’s instructions.
Deadheading: Remove the flowers as they fade, but allow the foliage to die back naturally. This will help the bulb store energy for next year’s bloom.
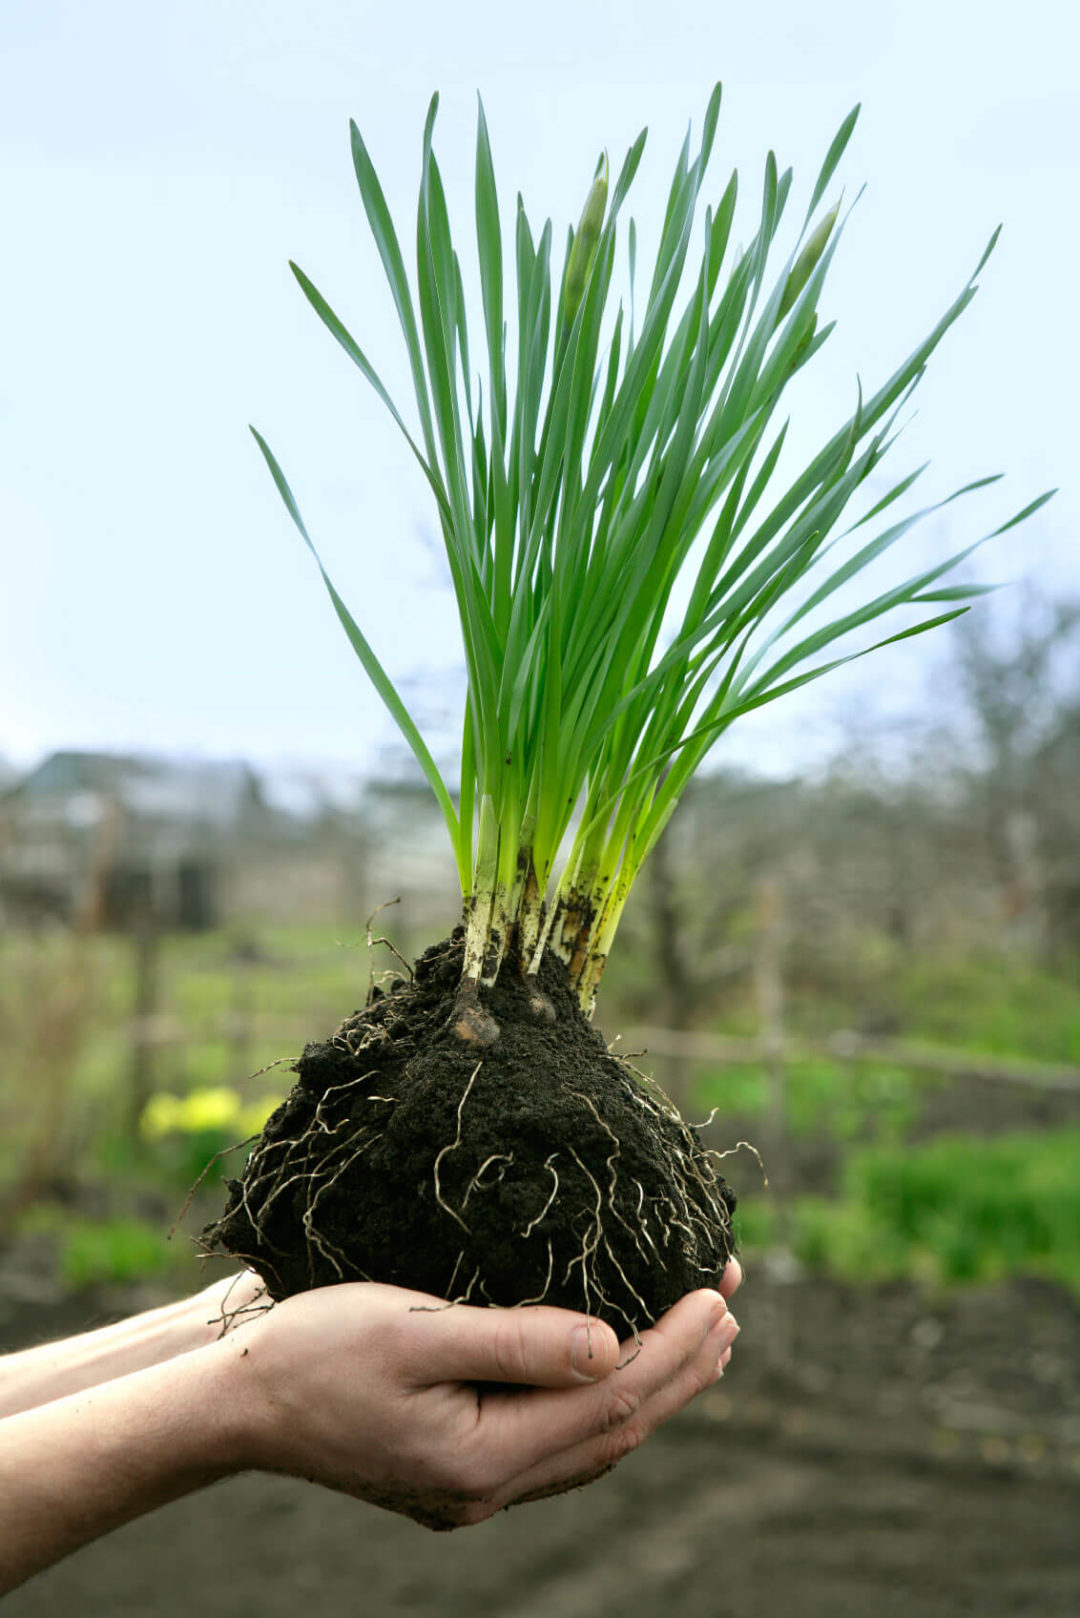
Caring for Newly Planted Daffodil Bulbs
After planting daffodil bulbs, it’s essential to provide them with the right care to ensure they grow and bloom successfully. Here are some tips on how to care for newly planted daffodil bulbs:
Watering: Water the bulbs regularly, but avoid overwatering, which can lead to rot and other problems. Make sure the soil is moist but not waterlogged.
Fertilizing: Fertilize the bulbs with a low-nitrogen, high-potassium fertilizer in the spring, following the manufacturer’s instructions. This will help promote healthy growth and blooming.
Deadheading: Remove the flowers as they fade, but allow the foliage to die back naturally. This will help the bulb store energy for next year’s bloom.
Pest and disease control: Keep an eye out for pests and diseases, such as aphids, slugs, and snails, and treat them promptly if necessary. Use organic or chemical controls as needed to prevent infestations.
Support: Provide support for the stems as they grow, using stakes or a trellis to keep them upright and secure.
Some common mistakes to avoid when caring for newly planted daffodil bulbs include:
Overwatering: Avoid watering the bulbs too much, as this can lead to rot and other problems.
Underwatering: Make sure to water the bulbs regularly, but avoid underwatering, which can cause the bulbs to dry out and die.
Not providing enough sunlight: Daffodils need full sun to partial shade to bloom successfully, so make sure to provide them with enough sunlight.
Not fertilizing: Fertilizing the bulbs in the spring will help promote healthy growth and blooming, so don’t forget to fertilize.
By following these tips, you can help ensure that your daffodil bulbs grow and bloom successfully, and enjoy the beautiful blooms for years to come.

Common Mistakes to Avoid When Planting Daffodils
When planting daffodils, it’s essential to avoid common mistakes that can lead to poor growth, reduced blooming, or even bulb failure. Here are some common mistakes to avoid when planting daffodils:
Planting too deeply: Daffodil bulbs should be planted at a depth of 2-3 times the height of the bulb. Planting too deeply can cause the bulb to rot or become too wet.
Not providing enough sunlight: Daffodils need full sun to partial shade to bloom successfully. Make sure to plant them in a location that receives at least 6 hours of direct sunlight per day.
Overwatering: Daffodils prefer well-draining soil and should not be overwatered. Avoid watering the bulbs too much, as this can lead to rot and other problems.
Not fertilizing: Fertilizing the bulbs in the spring will help promote healthy growth and blooming. Use a low-nitrogen, high-potassium fertilizer to encourage blooming.
Not deadheading: Deadheading the flowers as they fade will help the bulb store energy for next year’s bloom. Remove the flowers, but allow the foliage to die back naturally.
Some solutions to these common problems include:
Checking the soil depth: Before planting, check the soil depth to ensure it’s not too deep or too shallow.
Providing adequate sunlight: Make sure to plant the daffodils in a location that receives enough sunlight.
Watering carefully: Water the bulbs carefully, avoiding overwatering and ensuring the soil is moist but not waterlogged.
Fertilizing regularly: Fertilize the bulbs regularly, using a low-nitrogen, high-potassium fertilizer to encourage blooming.
Deadheading regularly: Deadhead the flowers regularly, removing the flowers as they fade and allowing the foliage to die back naturally.
By avoiding these common mistakes, you can help ensure that your daffodils grow and bloom successfully, and enjoy the beautiful blooms for years to come.
Encouraging Daffodils to Bloom Again Next Year
After the blooming period, it’s essential to encourage your daffodils to bloom again next year. Here are some tips to help you achieve this:
Allow the foliage to die back: After the blooming period, allow the foliage to die back naturally. This will help the bulb store energy for next year’s bloom.
Provide adequate nutrients: Fertilize the bulbs with a low-nitrogen, high-potassium fertilizer in the spring, following the manufacturer’s instructions. This will help promote healthy growth and blooming.
Divide and replant the bulbs: After 3-4 years, the bulbs may become congested and need to be divided and replanted. This will help maintain their health and promote blooming.
Some additional tips to encourage daffodils to bloom again next year include:
Deadheading: Deadheading the flowers as they fade will help the bulb store energy for next year’s bloom.
Watering: Water the bulbs regularly, but avoid overwatering, which can lead to rot and other problems.
Protecting from pests and diseases: Keep an eye out for pests and diseases, such as aphids, slugs, and snails, and treat them promptly if necessary.
By following these tips, you can help encourage your daffodils to bloom again next year and enjoy the beautiful blooms for years to come.
It’s also important to note that daffodils are a hardy perennial and can naturalize over time, meaning they will multiply and spread on their own. This can be a great way to create a beautiful display of daffodils in your garden, but it’s essential to keep in mind that they may need to be divided and replanted every few years to maintain their health and promote blooming.
Enjoying the Fruits of Your Labor: Daffodil Bloom Time
After months of preparation and care, the moment of truth has finally arrived – daffodil bloom time This is the most rewarding part of growing daffodils, as you get to enjoy the beautiful blooms that you’ve worked so hard to cultivate.
The different stages of growth and blooming are a wonder to behold. First, the green shoots emerge from the ground, followed by the buds that slowly begin to swell. Finally, the flowers burst forth in a riot of color and fragrance, filling the air with their sweet scent.
As you watch your daffodils bloom, take a moment to appreciate the beauty and wonder of nature. The intricate details of the flowers, the vibrant colors, and the delicate shapes all combine to create a truly breathtaking sight.
But daffodil bloom time is not just about admiring the beauty of the flowers – it’s also about enjoying the fruits of your labor. After all, you’ve worked hard to plant, care for, and nurture these bulbs, and now it’s time to reap the rewards.
So take a moment to stop and smell the daffodils, as the saying goes. Enjoy the beauty and wonder of these incredible flowers, and bask in the satisfaction of a job well done.
As you enjoy the blooms, remember that this is just the beginning. With proper care and maintenance, your daffodils will continue to bloom for years to come, providing a beautiful display of color and fragrance in your garden.
And as you look forward to future blooms, don’t forget to take a moment to appreciate the journey that brought you here. From planting the bulbs to enjoying the blooms, every step of the process has been a labor of love.
:max_bytes(150000):strip_icc()/planting-and-growing-daffodils-1402136-03-f74af7844c3941058fb569ec270a8ba6.jpg)