Choosing the Right Iris Bulbs for Your Garden
When it comes to growing irises, selecting the right type of bulb is crucial for success. With over 300 species of irises, choosing the right one can be overwhelming. However, by understanding the different types of irises and their characteristics, you can make an informed decision and set yourself up for a beautiful and thriving iris garden. Bearded irises, for example, are one of the most popular types of irises and are known for their distinctive beard-like structure on the falls of the flower. They come in a wide range of colors, including purple, blue, pink, and white, and are relatively low maintenance. Beardless irises, on the other hand, lack the beard-like structure and are often more delicate in appearance. Dutch irises are another popular type of iris and are known for their vibrant colors and unique shape. They are often used as cut flowers and are a popular choice for gardeners who want to add a pop of color to their garden.

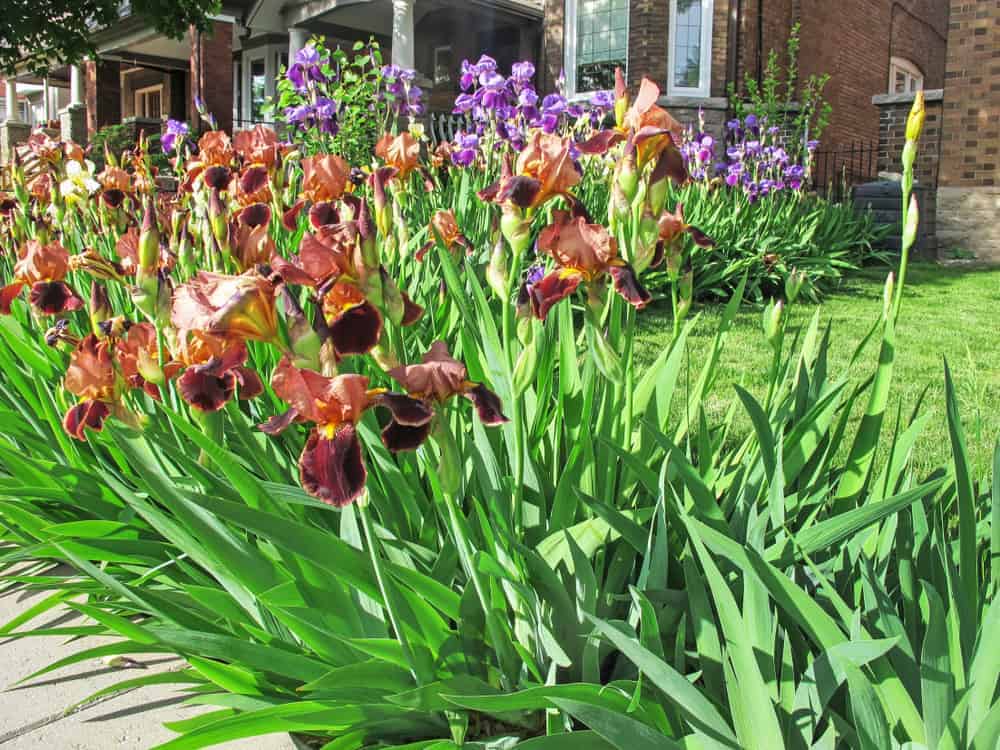
Click Image to Find Garden Products
When selecting iris bulbs, it’s also important to consider the climate and soil conditions of your garden. Irises prefer well-draining soil and full sun to partial shade. They also prefer a slightly acidic to neutral soil pH, ranging from 6.0 to 7.0. By choosing an iris bulb that is suitable for your garden’s climate and soil conditions, you can ensure that your irises will thrive and bloom beautifully. For gardeners who are new to growing irises, it’s a good idea to start with a few different types of bulbs to see which ones do best in your garden. This will also give you the opportunity to experiment with different colors and varieties, and to find the ones that you enjoy the most.
In addition to considering the type of iris and the climate and soil conditions of your garden, it’s also important to choose high-quality bulbs. Look for bulbs that are firm and plump, with no signs of mold or rot. Avoid bulbs that are soft or mushy, as these may be past their prime and may not bloom well. By choosing high-quality bulbs and following the tips outlined above, you can set yourself up for success and enjoy a beautiful and thriving iris garden.

Preparing the Soil for Optimal Iris Growth
Soil preparation is a crucial step in growing irises. Irises prefer well-draining soil that is rich in organic matter. To achieve this, it’s essential to test the pH level of your soil and amend it if necessary. Irises prefer a slightly acidic to neutral soil pH, ranging from 6.0 to 7.0. You can purchase a soil testing kit or send a sample to a laboratory for analysis.
Once you have determined the pH level of your soil, you can take steps to amend it if necessary. If your soil is too acidic, you can add lime to raise the pH level. If your soil is too alkaline, you can add elemental sulfur or aluminum sulfate to lower the pH level. In addition to adjusting the pH level, it’s also essential to add organic matter to the soil. This can be done by incorporating compost or well-rotted manure into the soil. Organic matter helps to improve the soil’s structure, fertility, and overall health.
Another critical step in preparing the soil for irises is to remove weeds and debris. Weeds can compete with irises for water and nutrients, and debris can harbor pests and diseases. Remove any weeds or debris from the soil, and till the soil to a depth of 12-18 inches to loosen and aerate it. This will help to improve drainage and promote healthy root growth.
When growing irises, it’s also essential to consider the soil’s nutrient content. Irises are heavy feeders and require a balanced diet of nutrients to thrive. You can add a balanced fertilizer to the soil in the spring when the irises are actively growing. Avoid over-fertilizing, as this can damage the plants and lead to weak growth.
By following these steps, you can create a well-prepared soil environment that will support the growth and bloom of your irises. Remember to test the soil pH level regularly and adjust it as necessary. With proper soil preparation and care, you can enjoy a beautiful and thriving iris garden.
Planting Iris Bulbs: A Step-by-Step Process
Planting iris bulbs is a straightforward process that requires some basic knowledge and attention to detail. To ensure the best results, it’s essential to handle and store the bulbs properly before planting. When purchasing iris bulbs, make sure to select firm, plump bulbs with no signs of mold or rot. Store the bulbs in a cool, dry place until you’re ready to plant them.
When planting iris bulbs, choose a location that receives full sun to partial shade, depending on the variety. Irises prefer well-draining soil, so make sure the planting site is not prone to waterlogging. Plant the bulbs in the fall, about 6-8 weeks before the first frost. This will give the bulbs enough time to establish themselves before the winter.
To plant the bulbs, dig a hole that is 2-3 times deeper than the height of the bulb. Place the bulb in the hole, pointed end up, and cover it with soil. Space the bulbs 3-4 inches apart, depending on the variety. Water the soil well after planting and keep it consistently moist during the first growing season.
When planting iris bulbs, it’s also essential to consider the depth and spacing. Planting the bulbs too deeply can cause them to rot, while planting them too shallowly can cause them to dry out. Planting the bulbs too close together can lead to overcrowding, which can reduce the quality of the blooms.
By following these steps and tips, you can ensure that your iris bulbs are planted correctly and will thrive in their new environment. Remember to water and fertilize the bulbs regularly, and enjoy the beautiful blooms that will follow.
In addition to planting the bulbs, it’s also essential to consider the soil conditions. Irises prefer a slightly acidic to neutral soil pH, ranging from 6.0 to 7.0. If your soil is too acidic or too alkaline, you may need to amend it before planting the bulbs.
By providing the right conditions and care, you can enjoy a beautiful and thriving iris garden. With proper planting and care, your irises will bloom for years to come, providing a stunning display of color and beauty.
Providing the Right Conditions for Iris Growth
Once you have planted your iris bulbs, it’s essential to provide them with the right conditions to grow and thrive. One of the most critical factors in iris growth is sunlight. Irises need full sun to partial shade, depending on the variety, to produce healthy foliage and vibrant blooms. Make sure to plant your irises in a location that receives at least 6 hours of direct sunlight per day.
Water is also crucial for iris growth. Irises need consistent moisture, especially during the first growing season. Water your irises regularly, but make sure not to overwater, as this can lead to root rot and other problems. Aim to provide about 1-2 inches of water per week, either through rainfall or irrigation.
Fertilization is also important for iris growth. Irises are heavy feeders and need a balanced diet of nutrients to produce healthy foliage and vibrant blooms. Use a balanced fertilizer, such as a 10-10-10 formula, and apply it in the spring when the irises are actively growing. Avoid over-fertilizing, as this can damage the plants and lead to weak growth.
In addition to sunlight, water, and fertilization, irises also need good air circulation to prevent disease. Make sure to plant your irises in a location with good air circulation, and avoid overcrowding, which can lead to disease and pest problems.
By providing the right conditions for iris growth, you can enjoy a beautiful and thriving iris garden. With proper care and attention, your irises will bloom for years to come, providing a stunning display of color and beauty.
It’s also important to note that irises have different growing requirements depending on the variety. Bearded irises, for example, prefer well-draining soil and full sun, while beardless irises prefer more shade and moist soil. Make sure to research the specific growing requirements for your iris variety to ensure optimal growth and bloom.
Common Challenges and Solutions for Growing Irises
While growing irises can be a rewarding experience, there are several common challenges that may arise. One of the most common problems is pests, such as aphids, whiteflies, and spider mites. These pests can cause damage to the leaves and flowers, and can also spread disease. To control pests, use insecticidal soap or neem oil, and make sure to inspect your plants regularly.
Diseases are another common challenge when growing irises. Iris leaf spot, iris root rot, and iris yellow streak virus are all common diseases that can affect irises. To prevent disease, make sure to provide good air circulation, water carefully, and avoid over-fertilizing. If you do notice any signs of disease, treat the plants with a fungicide or bactericide.
Overcrowding is another common problem when growing irises. When irises are planted too close together, they can become susceptible to disease and pests. To prevent overcrowding, make sure to plant your irises at the correct spacing, and divide and replant them every 3-4 years.
Other common challenges when growing irises include extreme temperatures, drought, and poor soil quality. To address these challenges, make sure to provide your irises with the right growing conditions, including full sun to partial shade, well-draining soil, and consistent moisture.
By being aware of these common challenges and taking steps to prevent them, you can enjoy a healthy and thriving iris garden. With proper care and attention, your irises will bloom beautifully and provide a stunning display of color and beauty.
In addition to these common challenges, it’s also important to be aware of the specific growing requirements for your iris variety. Different varieties of irises have different growing requirements, so make sure to research the specific needs of your plants.
:max_bytes(150000):strip_icc()/iris-flowers-plant-profile-5120188-01-04a464ab8523426fab852b55d3bb04f0.jpg)
Deadheading and Dividing Irises for Continued Bloom
Deadheading and dividing irises are two essential steps in maintaining their health and promoting continued bloom. Deadheading involves removing the spent flowers, or seed pods, from the plant to encourage new blooms to form. This process is simple and only requires a pair of scissors or pruning shears.
To deadhead your irises, simply cut off the spent flowers at the base of the stem, making sure not to damage the leaves or the rhizome. This will encourage the plant to focus its energy on producing new blooms rather than seed production. Deadheading should be done regularly, as soon as the blooms have faded, to promote continued bloom and maintain the plant’s appearance.
Dividing irises is another important step in maintaining their health and promoting continued bloom. Irises are perennial plants that grow from rhizomes, which are underground stems that produce new plants. Over time, the rhizome can become congested, leading to a decrease in bloom production. Dividing the irises every 3-4 years will help to maintain their health and promote continued bloom.
To divide your irises, start by digging up the entire clump of plants, making sure to get as much of the rhizome as possible. Then, gently wash the rhizome to remove any dirt or debris. Use a sharp knife or garden fork to separate the individual plants, making sure each section has at least one growing point. Replant the divided irises in well-draining soil, making sure to water them well and provide adequate sunlight.
By deadheading and dividing your irises regularly, you can promote continued bloom and maintain the health and appearance of your plants. These simple steps will help to ensure that your irises continue to thrive and provide beautiful blooms for years to come.
Winter Care and Storage for Iris Bulbs
As the winter months approach, it’s essential to provide proper care and storage for your iris bulbs to ensure their survival and continued bloom. In areas with harsh winters, it’s crucial to protect the bulbs from extreme temperatures and moisture.
To protect your iris bulbs from winter damage, start by cutting back the foliage to about 2-3 inches from the ground after the first frost. This will help to prevent moisture from accumulating on the leaves and reduce the risk of rot. Next, apply a layer of mulch or straw to the soil to insulate the bulbs and protect them from extreme temperatures.
In areas with mild winters, you can simply leave the foliage intact and provide a layer of mulch or straw to protect the bulbs from moisture and extreme temperatures. However, in areas with harsh winters, it’s recommended to dig up the bulbs and store them in a cool, dry place until the spring.
To store your iris bulbs, start by gently digging them up, making sure not to damage the rhizome. Then, wash the bulbs gently to remove any dirt or debris. Allow the bulbs to dry for a few days before storing them in a cool, dry place, such as a basement or garage.
When storing your iris bulbs, make sure to keep them away from direct sunlight and moisture. You can store them in a paper bag or a breathable container, such as a mesh bag or a wooden crate. Check on the bulbs periodically to ensure they are not rotting or developing mold.
By providing proper winter care and storage for your iris bulbs, you can ensure their survival and continued bloom. With proper care and attention, your irises will thrive and provide beautiful blooms for years to come.

Enjoying the Fruits of Your Labor: Iris Bloom Time
After months of careful planning and attention, the moment of truth finally arrives: iris bloom time. There’s nothing quite like the thrill of seeing your irises burst into bloom, their vibrant colors and delicate petals a testament to your hard work and dedication.
To make the most of iris bloom time, it’s essential to provide your plants with the right conditions. Make sure to water them regularly, but avoid overwatering, which can lead to rot and other problems. Also, provide your irises with plenty of sunlight, as this will help to bring out the colors and promote healthy growth.
One of the best ways to enjoy your irises is to cut them and bring them indoors. Simply snip off the stems at the base of the plant, and arrange them in a vase or bouquet. This will not only add a pop of color to your home, but also help to promote continued bloom by encouraging the plant to produce more flowers.
Another way to enjoy your irises is to create a beautiful arrangement or bouquet. Simply choose a few of your favorite blooms, and arrange them in a vase or container. You can also add some greenery, such as ferns or baby’s breath, to add texture and interest to the arrangement.
In addition to enjoying your irises in arrangements and bouquets, you can also use them to create beautiful potpourri or wreaths. Simply dry the blooms and combine them with other dried flowers, herbs, and spices to create a unique and fragrant potpourri. Alternatively, you can use the blooms to create a beautiful wreath or garland, perfect for adding a touch of elegance to your home or garden.
By enjoying the fruits of your labor and making the most of iris bloom time, you can experience the full beauty and wonder of these incredible flowers. Whether you choose to enjoy them in arrangements, bouquets, or simply in the garden, irises are sure to bring joy and delight to your life.
