Understanding the Unique Needs of Your Orchid
When it comes to taking care of an orchid, it’s essential to understand the specific needs of your plant. Orchids are one of the most diverse families of flowering plants, with over 30,000 species, each with its unique requirements. Lighting, watering, and temperature are the most critical factors to consider when caring for your orchid. Different types of orchids have varying needs, so it’s crucial to research the specific requirements of your plant.

Click Image to Find Garden Products
For example, Phalaenopsis orchids, also known as moth orchids, prefer bright, indirect light, while Cattleya orchids require more direct sunlight. Similarly, some orchids, like Paphiopedilum, prefer cooler temperatures, while others, like Dendrobium, thrive in warmer temperatures. Understanding these differences is vital to providing the best care for your orchid.
Watering is another critical aspect of orchid care. Over-watering is a common mistake that can lead to root rot and kill your plant. On the other hand, under-watering can cause the leaves to become wrinkled and the plant to become stressed. The frequency of watering depends on the type of orchid, the potting mix, and the environment. A general rule of thumb is to water your orchid once a week in the summer and once every 10-14 days in the winter.
Humidity is also an essential factor to consider when taking care of an orchid. Most orchids prefer a humid environment, typically between 40-70% relative humidity. You can increase the humidity around your plant by placing it on a tray filled with water and pebbles or using a humidifier.
By understanding the unique needs of your orchid, you can provide the best care and create an environment that promotes healthy growth and blooming. Remember, every orchid is different, so it’s essential to research the specific requirements of your plant to ensure you’re providing the best care.

How to Create the Perfect Environment for Your Orchid
Creating an ideal environment for your orchid is crucial for its growth and blooming. When taking care of an orchid, it’s essential to consider the lighting, humidity, and temperature requirements of your plant. Orchids generally prefer bright, indirect light, but some species can tolerate direct sunlight. Placing your orchid near an east- or west-facing window is ideal, as it provides gentle, indirect light.
Humidity is another critical factor to consider when creating an environment for your orchid. Most orchids prefer a humid environment, typically between 40-70% relative humidity. You can increase the humidity around your plant by placing it on a tray filled with water and pebbles or using a humidifier. This will help maintain a consistent humidity level and prevent dry air from damaging your orchid.
Temperature control is also vital for orchid care. Different species of orchids have varying temperature requirements, but most prefer daytime temperatures between 65-75°F (18-24°C) and nighttime temperatures 5-10°F (3-6°C) lower. Avoid placing your orchid near heating or cooling vents, fireplaces, or drafty windows, as this can cause temperature fluctuations.
Air circulation is also essential for healthy orchid growth. Good air circulation helps prevent fungal diseases and promotes healthy root growth. You can improve air circulation around your orchid by placing it at least 6-8 inches away from any walls or surfaces. This will allow for good air movement and help prevent stagnant air from accumulating around your plant.
By creating an environment that meets the specific needs of your orchid, you can promote healthy growth and blooming. Remember, every orchid is different, so it’s essential to research the specific requirements of your plant to ensure you’re providing the best care. With the right environment, your orchid will thrive and provide you with beautiful blooms for years to come.
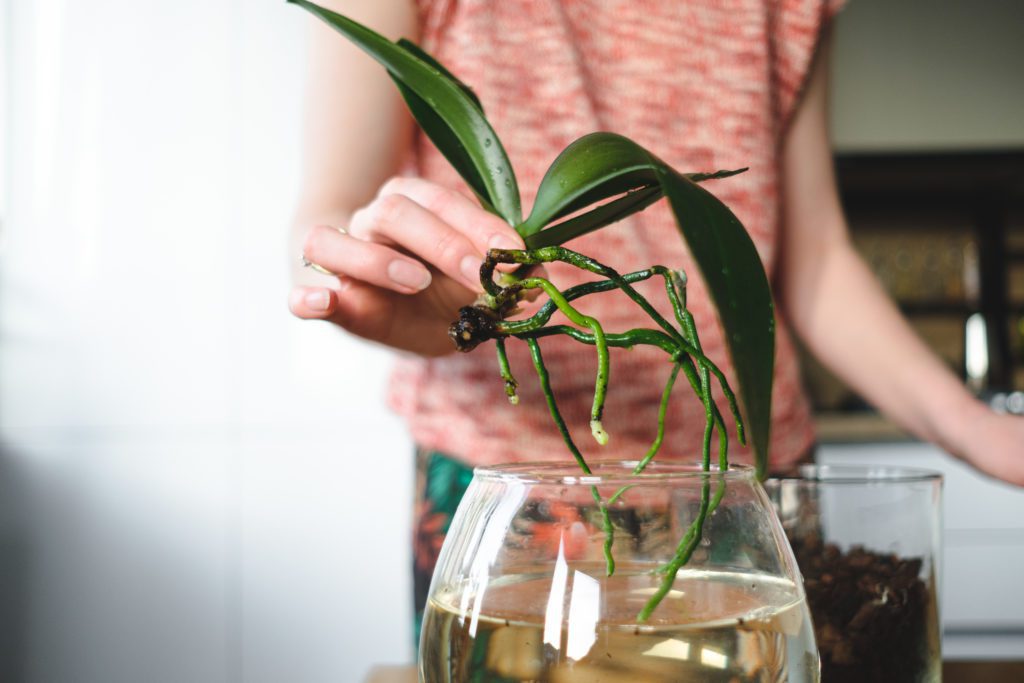
The Art of Watering Your Orchid
Watering is one of the most critical aspects of taking care of an orchid. Orchids require careful watering to thrive, and over-watering or under-watering can be detrimental to their health. To water your orchid correctly, you need to understand the moisture requirements of your plant and the factors that affect its watering needs.
One way to check the moisture level of your orchid is to stick your finger into the potting mix about an inch deep. If the mix feels dry, it’s time to water your orchid. If it’s already moist, you can wait another day or two before watering again. It’s also essential to check the moisture level of the potting mix in the morning, as this will give you an idea of how much water your orchid needs throughout the day.
The quality of the water you use is also crucial for your orchid’s health. Tap water can contain high levels of salt, fluoride, and other minerals that can harm your orchid. To avoid this, use distilled or rainwater to water your orchid. If you don’t have access to these types of water, you can use tap water that has been left to sit for 24 hours to allow the minerals to dissipate.
The frequency of watering your orchid depends on the type of orchid, the potting mix, and the environment. As a general rule, water your orchid once a week in the summer and once every 10-14 days in the winter. However, this can vary depending on the specific needs of your orchid, so it’s essential to research the watering requirements of your plant.
Over-watering is a common mistake that can lead to root rot and kill your orchid. To avoid this, make sure not to water your orchid too frequently, and avoid getting water on the plant’s crown or leaves. Under-watering can also be detrimental to your orchid’s health, causing the leaves to become wrinkled and the plant to become stressed.
By understanding the art of watering your orchid, you can provide your plant with the right amount of moisture to thrive. Remember, every orchid is different, so it’s essential to research the specific watering requirements of your plant to ensure you’re providing the best care.
:max_bytes(150000):strip_icc()/basic-indoor-orchid-care-1902822-moss-17d84d7f134f4ca18831cadad4b46e7a.jpg)
Fertilizing Your Orchid for Optimal Growth
Fertilizing your orchid is essential for promoting healthy growth and blooming. When taking care of an orchid, it’s crucial to provide your plant with the necessary nutrients to thrive. Orchids require a balanced diet of nutrients, including nitrogen, phosphorus, and potassium, to produce healthy leaves, stems, and flowers.
There are several types of fertilizers available for orchids, including balanced fertilizers, bloom-boosting fertilizers, and fertilizers specifically formulated for orchids. Balanced fertilizers, such as 20-20-20, provide an equal ratio of nitrogen, phosphorus, and potassium, making them suitable for most orchids. Bloom-boosting fertilizers, such as 15-30-15, have a higher phosphorus content, which promotes blooming and flower production.
When fertilizing your orchid, it’s essential to follow the instructions on the fertilizer package and start with a weak solution. You can gradually increase the strength of the fertilizer as your orchid becomes more established. It’s also crucial to fertilize your orchid during the growing season, which typically occurs in the spring and summer months.
The frequency of fertilizing your orchid depends on the type of fertilizer and the growth stage of your plant. As a general rule, fertilize your orchid once a month during the growing season and once every two months during the dormant season. You can also fertilize your orchid more frequently, such as every two weeks, if you’re using a weak solution.
Over-fertilizing can be detrimental to your orchid’s health, causing the leaves to become yellow and the roots to become burned. Under-fertilizing can also be problematic, causing the leaves to become pale and the plant to become stressed. By fertilizing your orchid correctly, you can promote healthy growth and blooming, and enjoy the beauty of your orchid for years to come.
In addition to fertilizing, repotting your orchid every two to three years can also provide essential nutrients and promote healthy growth. When repotting, use a well-draining potting mix specifically designed for orchids, and gently remove the plant from its pot, taking care not to damage the roots.
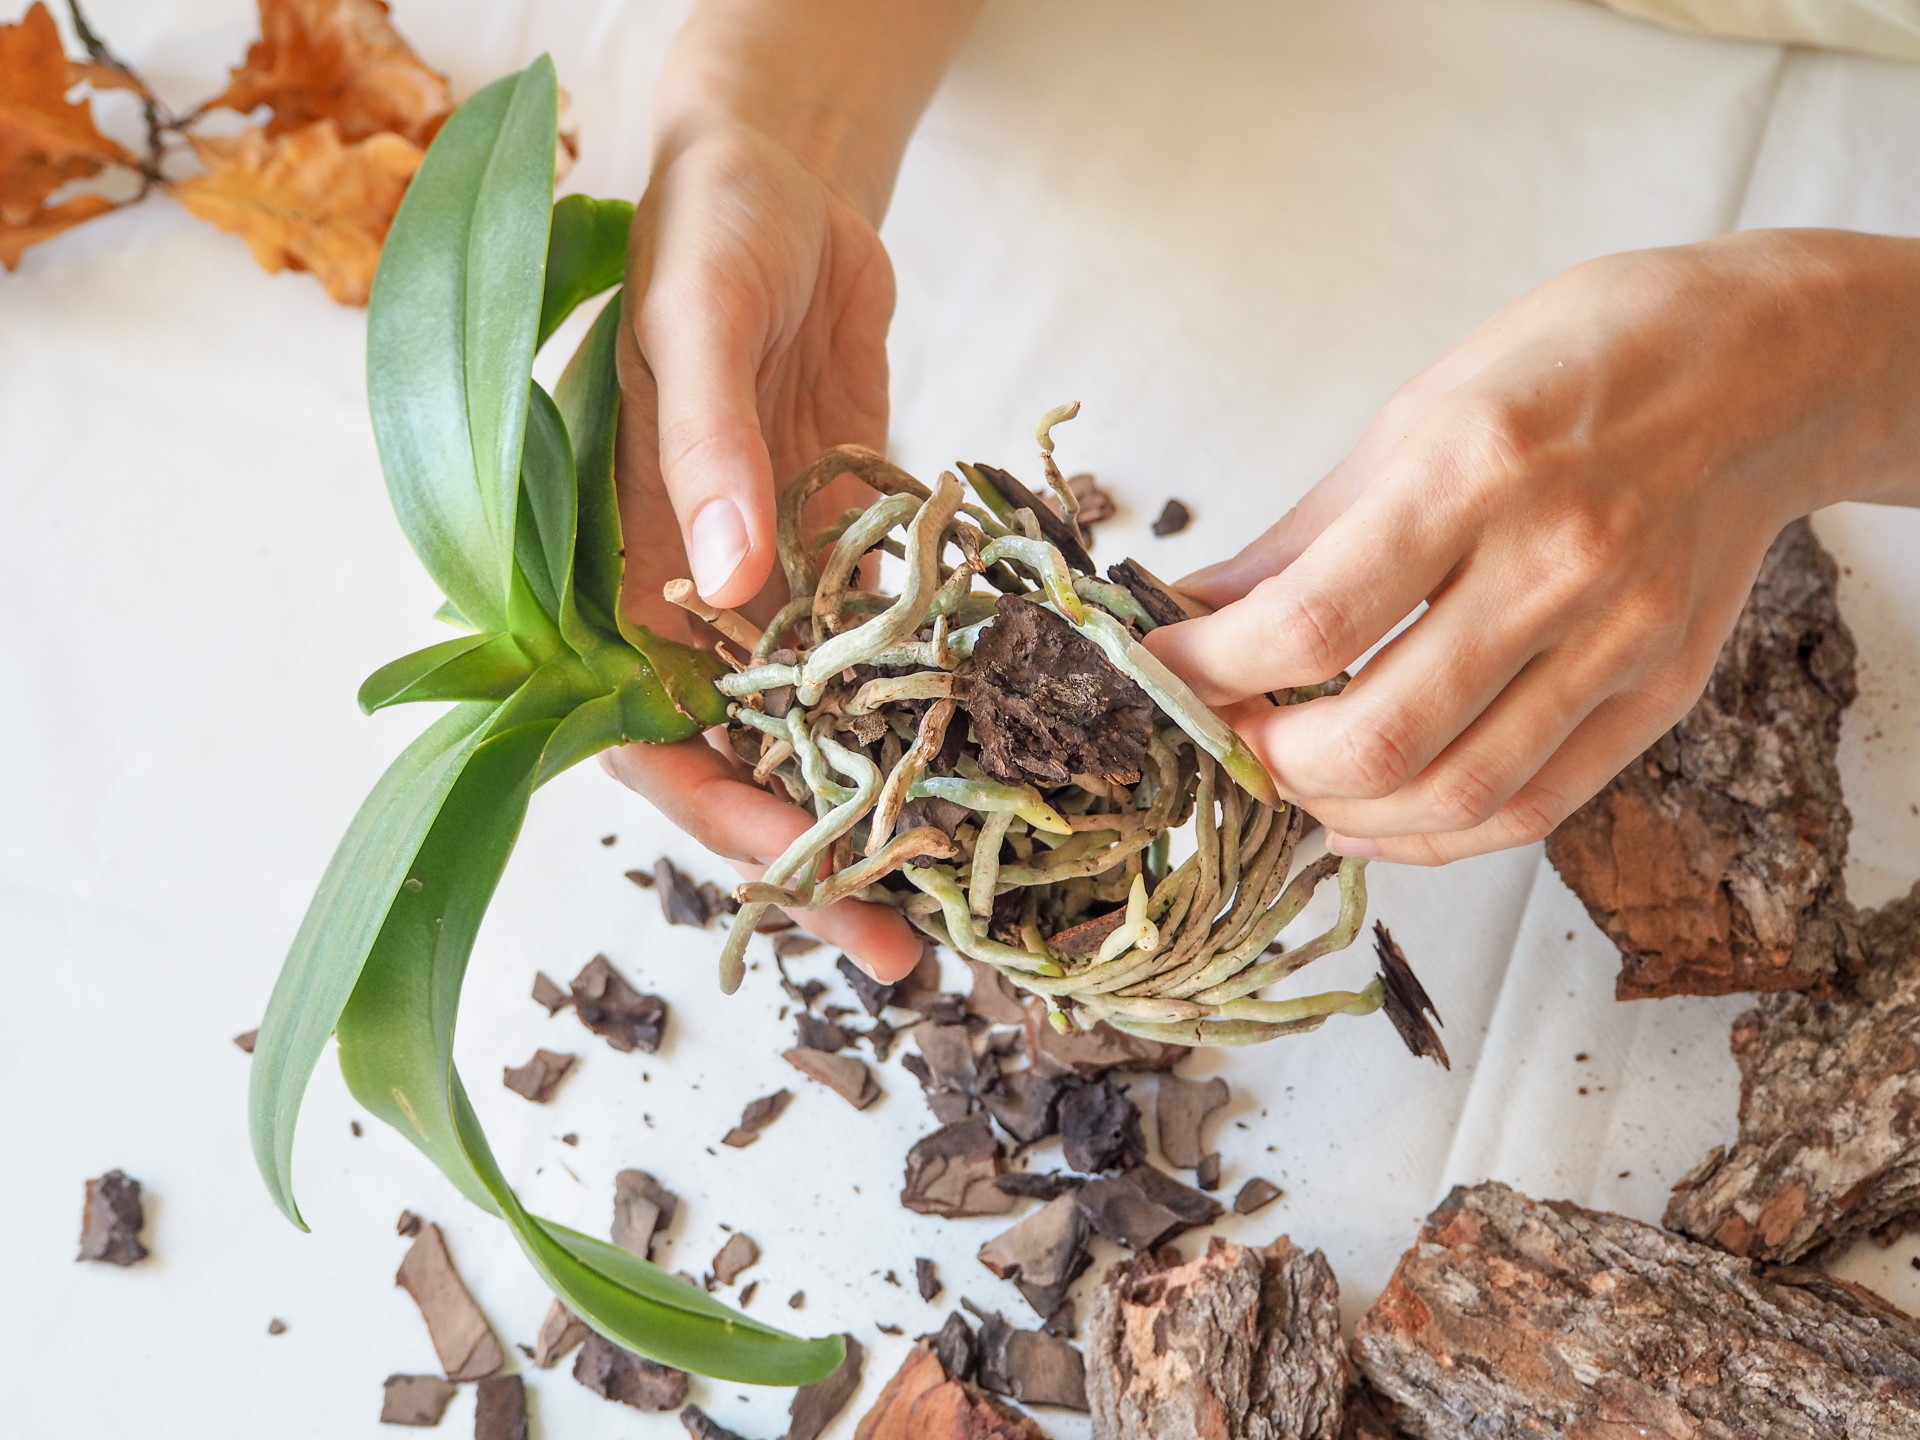
Pruning and Potting: Essential Orchid Care Techniques
Pruning and potting are essential techniques for taking care of an orchid. Pruning helps to maintain the shape and size of the plant, promotes healthy growth, and encourages blooming. Potting, on the other hand, provides the orchid with a fresh growing medium and a larger pot to accommodate its growing roots.
When to prune your orchid depends on the type of orchid and its growth cycle. Generally, pruning is done after the orchid has finished blooming, as this allows the plant to focus its energy on producing new growth. Remove any dead or dying leaves, stems, or flowers, and cut back the plant to about 6-8 inches from the potting mix.
How to prune your orchid is also important. Use a pair of sterile scissors or pruning shears to prevent the spread of disease. Make clean cuts just above a node, and avoid tearing or ripping the plant’s tissues. This will help to prevent infection and promote healthy healing.
Potting is also a crucial aspect of orchid care. Orchids typically need to be repotted every 2-3 years, as their potting mix breaks down over time. Choose a pot that is slightly larger than the previous one, and use a well-draining potting mix specifically designed for orchids. Gently remove the plant from its pot, taking care not to damage the roots, and trim away any dead or dying roots.
When choosing a potting mix, look for one that is specifically designed for orchids. These mixes typically contain a combination of bark, sphagnum moss, and perlite, which provide good drainage and aeration for the roots. Avoid using regular potting soil, as it can retain too much water and cause root rot.
Repotting is also an opportunity to inspect the roots of your orchid and trim away any dead or dying roots. This will help to prevent root rot and promote healthy growth. After repotting, water your orchid thoroughly and provide it with bright, indirect light to help it recover from the shock of being repotted.
Pest Control and Common Orchid Diseases
When taking care of an orchid, it’s essential to be aware of the common pests and diseases that can affect these plants. Mealybugs, spider mites, and root rot are some of the most common issues that can arise. By understanding how to prevent and treat these problems, you can help keep your orchid healthy and thriving.
Mealybugs are small, white insects that can infest orchids, particularly those with soft, succulent leaves. To prevent mealybugs, inspect your orchid regularly and isolate any infested plants. Treat mealybugs with insecticidal soap or neem oil, and make sure to follow the instructions on the product label.
Spider mites are tiny, spider-like insects that can cause yellowing or bronzing of the leaves. To prevent spider mites, maintain good air circulation around your orchid and avoid over-watering. Treat spider mites with insecticidal soap or neem oil, and make sure to follow the instructions on the product label.
Root rot is a common problem that can occur when the roots of the orchid become waterlogged. To prevent root rot, make sure to repot your orchid regularly and use a well-draining potting mix. Treat root rot by removing any affected roots and repotting the orchid in fresh potting mix.
Other common orchid diseases include leaf spot, crown rot, and flower blight. To prevent these diseases, maintain good hygiene and sanitation practices, such as washing your hands before handling your orchid and disinfecting any pruning tools.
By being aware of the common pests and diseases that can affect orchids, you can take steps to prevent them and keep your plant healthy. Regularly inspect your orchid, maintain good hygiene and sanitation practices, and take action quickly if you notice any problems.
In addition to preventing pests and diseases, it’s also essential to provide your orchid with the right environment and care. This includes providing bright, indirect light, maintaining good air circulation, and watering and fertilizing your orchid correctly.
Propagation and Division: Sharing Your Orchid with Others
Propagation and division are essential techniques for sharing your orchid with others and creating new plants. By understanding how to propagate and divide your orchid, you can share your passion for orchids with friends and family, and create new plants to enjoy.
When to divide your orchid depends on the type of orchid and its growth cycle. Generally, division is done when the plant has outgrown its pot or when you want to create new plants. Choose a time when the plant is actively growing, and make sure to divide the plant in the morning, when the plant is at its highest water content.
How to divide your orchid is also important. Use a sterile tool, such as a sharp knife or pruning shears, to separate the plant into sections. Make sure each section has at least one growing stem and some roots. Pot each section in a well-draining potting mix, and water thoroughly.
Propagation can also be done through keiki growth, which is a natural process where a new plant grows on the mother plant. To propagate through keiki growth, wait until the keiki has developed its own roots and leaves, then cut it from the mother plant using a sterile tool. Pot the keiki in a well-draining potting mix, and water thoroughly.
Caring for new plants is crucial to their success. Make sure to provide bright, indirect light, maintain good air circulation, and water and fertilize correctly. Keep the soil consistently moist but not waterlogged, and fertilize with a balanced fertilizer once a month.
Sharing your orchid with others can be a rewarding experience, and propagation and division are great ways to do so. By following these steps, you can create new plants to share with friends and family, and enjoy the beauty of your orchid for years to come.

Troubleshooting Common Orchid Care Issues
When taking care of an orchid, it’s not uncommon to encounter issues that can affect the plant’s health and well-being. By understanding how to troubleshoot common problems, you can take steps to address them and keep your orchid thriving.
Droopy leaves are a common issue that can be caused by a variety of factors, including over-watering, under-watering, and lack of humidity. To address droopy leaves, check the soil moisture and adjust your watering schedule as needed. You can also increase the humidity around your orchid by placing it on a tray filled with water and pebbles.
Lack of blooms is another common issue that can be caused by a variety of factors, including lack of light, inadequate fertilization, and root bound conditions. To address lack of blooms, make sure your orchid is receiving sufficient light and fertilize it regularly with a balanced fertilizer. You can also repot your orchid in a larger pot to give the roots more room to grow.
Root problems are a common issue that can be caused by a variety of factors, including over-watering, under-watering, and root bound conditions. To address root problems, check the roots of your orchid and trim away any dead or damaged roots. You can also repot your orchid in a well-draining potting mix to prevent waterlogged soil.
Other common issues that can affect orchids include pests, diseases, and nutrient deficiencies. To address these issues, make sure to inspect your orchid regularly and take action quickly if you notice any problems. You can also use insecticidal soap or neem oil to control pests and fungicides to control diseases.
By understanding how to troubleshoot common issues, you can take steps to address them and keep your orchid thriving. Remember to always inspect your orchid regularly and take action quickly if you notice any problems. With proper care and attention, your orchid can thrive and provide you with beautiful blooms for years to come.
