Choosing the Right Bulbs for Your Garden
When it comes to selecting the perfect bulbs for your garden, the options can be overwhelming. With so many varieties to choose from, it’s essential to consider a few key factors to ensure you’re making the right choice. Tulips, daffodils, and hyacinths are popular favorites, but what sets them apart? Understanding the unique characteristics of each type of bulb will help you make an informed decision.

Click Image to Find Garden Products
Climate is a crucial consideration when selecting bulbs. Different varieties thrive in different conditions, so it’s essential to choose bulbs that are suitable for your region’s temperature and moisture levels. For example, tulips and daffodils are ideal for cooler climates, while hyacinths prefer warmer temperatures.
Soil type is another critical factor to consider. Bulbs prefer well-draining soil that is rich in organic matter. If your soil is heavy clay or sandy, you may need to amend it with compost or other organic matter to create a more favorable environment.
Desired bloom time is also an important consideration. If you want to enjoy a burst of color in early spring, choose bulbs that bloom in late winter to early spring, such as crocuses or grape hyacinths. For a mid-spring display, opt for tulips or daffodils. If you prefer a summer bloom, consider planting bulbs like canna or gladiolus.
By considering these factors, you’ll be able to choose the perfect bulbs for your garden. Whether you’re a seasoned gardener or just starting out, selecting the right bulbs will set you up for success and ensure a beautiful display of color in the months to come. When learning how to plant a bulb, it’s essential to start with the right foundation – the right bulb for your garden.
Preparing the Soil for Optimal Growth
Before planting bulbs, it’s essential to prepare the soil to ensure optimal growth. The right soil conditions can make all the difference in the success of your bulb garden. When learning how to plant a bulb, it’s crucial to start with a solid foundation – well-prepared soil.
The first step in preparing the soil is to test its pH level. Most bulbs prefer a slightly acidic to neutral soil pH, ranging from 6.0 to 7.0. You can purchase

Preparing the Soil for Optimal Growth
Before planting bulbs, it’s essential to prepare the soil to ensure optimal growth. The right soil conditions can make all the difference in the success of your bulb garden. When learning how to plant a bulb, it’s crucial to start with a solid foundation – well-prepared soil.
The first step in preparing the soil is to test its pH level. Most bulbs prefer a slightly acidic to neutral soil pH, ranging from 6.0 to 7.0. You can purchase a soil testing kit or send a sample to a lab for analysis. Based on the results, you can amend the soil with lime or sulfur to adjust the pH.
In addition to pH, it’s essential to ensure the soil has good drainage and aeration. Bulbs don’t like wet feet, so make sure the soil isn’t waterlogged. You can improve drainage by adding organic matter like compost or well-rotted manure. These amendments will also help to improve the soil’s structure and fertility.
Remove any debris, weeds, or rocks from the planting area. Weeds can compete with your bulbs for water and nutrients, so it’s essential to eliminate them before planting. Use a garden fork or spade to gently loosen the soil to a depth of about 12 inches. This will help to break up any clods and improve soil aeration.
Finally, rake the soil to create a smooth, even surface. This will help to prevent any air pockets from forming and ensure good contact between the bulb and the soil. By following these steps, you’ll be able to create a well-prepared soil bed that will give your bulbs the best chance to thrive.
How to Plant Bulbs for Maximum Success
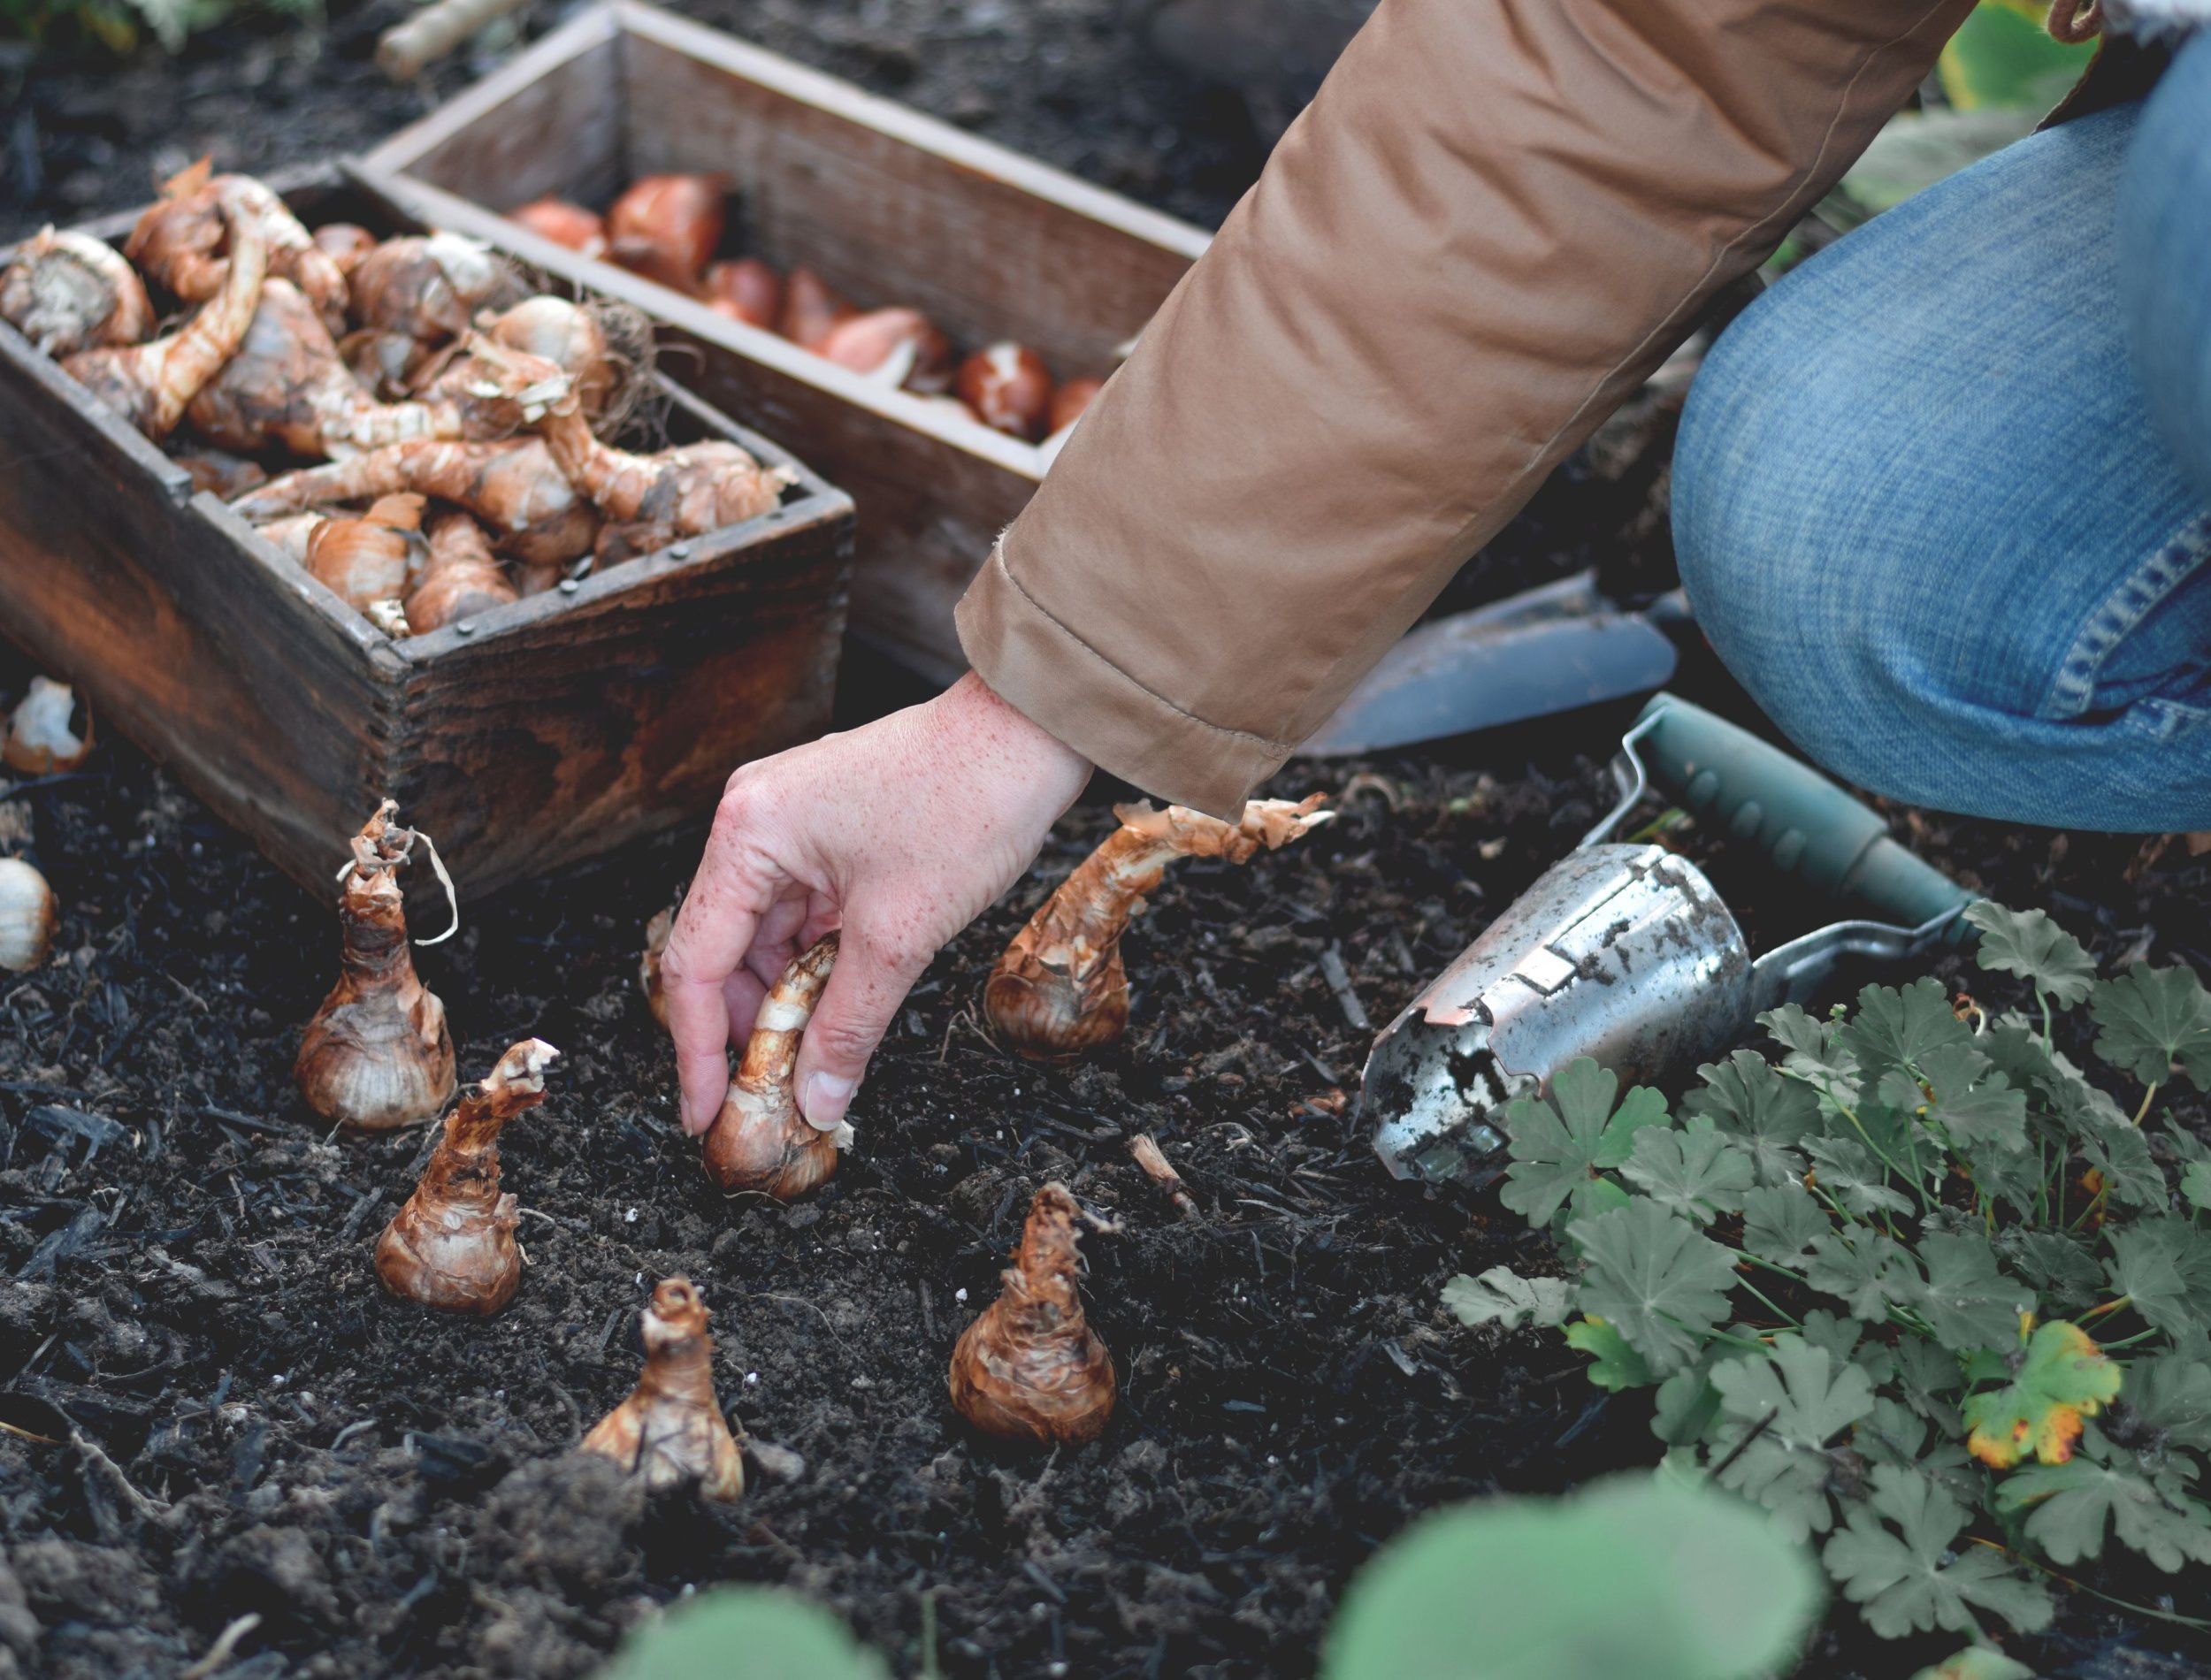
Now that you’ve chosen the right bulbs and prepared the soil, it’s time to plant them. Planting bulbs is a straightforward process, but it’s essential to follow a few simple steps to ensure maximum success. When learning how to plant a bulb, it’s crucial to handle the bulbs with care and plant them at the correct depth and spacing.
Start by gently removing the bulbs from their packaging and inspecting them for any damage or rot. If a bulb is damaged or rotten, it’s best to discard it to prevent the spread of disease. Next, dig a planting hole that is about 2-3 times deeper than the height of the bulb. The hole should be wide enough to accommodate the bulb’s roots, which can spread out quite a bit.
Place the bulb in the hole, making sure the pointed end is facing upwards. Fill the hole with soil, gently firming it around the bulb to prevent any air pockets from forming. Plant the bulbs at the correct spacing, which varies depending on the type of bulb. For example, tulips and daffodils should be planted about 3-6 inches apart, while hyacinths can be planted closer together, about 2-3 inches apart.
Finally, water the bulbs well after planting and keep the soil consistently moist during the first growing season. This will help the bulbs establish a strong root system and promote healthy growth. By following these simple steps, you’ll be able to enjoy a beautiful display of blooming bulbs in the spring.

Common Mistakes to Avoid When Planting Bulbs
When learning how to plant a bulb, it’s essential to avoid common mistakes that can lead to poor growth, disease, or even bulb failure. By being aware of these mistakes, you can take steps to prevent them and ensure a successful bulb garden.
One of the most common mistakes is planting bulbs too deeply or too shallowly. Planting bulbs too deeply can cause them to rot, while planting them too shallowly can cause them to dry out. Make sure to plant your bulbs at the correct depth, which varies depending on the type of bulb.
Another mistake is not providing enough space between bulbs. Overcrowding can lead to disease and poor growth, so make sure to plant your bulbs at the recommended spacing. For example, tulips and daffodils should be planted about 3-6 inches apart, while hyacinths can be planted closer together, about 2-3 inches apart.
Not preparing the soil properly is also a common mistake. Make sure to test your soil pH and amend it if necessary. Add organic matter like compost or well-rotted manure to improve soil structure and fertility.
Planting bulbs in the wrong location is another mistake to avoid. Make sure to plant your bulbs in a location that receives the right amount of sunlight and has good drainage. Avoid planting bulbs in areas with standing water or where water tends to collect.
Finally, not watering bulbs properly can lead to poor growth or bulb failure. Make sure to water your bulbs regularly, but avoid overwatering, which can lead to rot and other problems.
Post-Planting Care: How to Keep Your Bulbs Thriving
After planting your bulbs, it’s essential to provide them with the right care to ensure they thrive. Proper post-planting care can make a significant difference in the health and longevity of your bulbs. When learning how to plant a bulb, it’s crucial to understand the importance of post-planting care.
Deadheading is an essential part of post-planting care. Remove the flower heads as soon as they finish blooming to encourage the bulb to focus its energy on re-growing and storing energy for next year’s bloom. Cut the flower stem back to the base of the plant, making sure not to damage the foliage.
Dividing and re-planting bulbs is also an important part of post-planting care. Over time, bulbs can become congested and may need to be divided to maintain their health and vigor. Wait until the foliage has died back, then carefully dig up the bulbs and separate them. Re-plant the bulbs in the fall, making sure to plant them at the correct depth and spacing.
Storing bulbs for future planting is also crucial. After the foliage has died back, carefully dig up the bulbs and store them in a cool, dry place. Make sure to label the bulbs so you can identify them later. Store the bulbs in a paper bag or breathable container to maintain air circulation.
Finally, consider adding a layer of mulch to your bulb bed to retain moisture and suppress weeds. This will help to keep your bulbs healthy and thriving throughout the growing season.
Troubleshooting Common Problems with Bulbs
Despite proper care and attention, bulbs can still encounter problems. Pests, diseases, and poor growth are common issues that can affect bulbs. When learning how to plant a bulb, it’s essential to be aware of these potential problems and know how to troubleshoot them.
Pests like aphids, slugs, and snails can damage bulbs and affect their growth. To control pests, use organic or chemical pest control methods, such as neem oil or insecticidal soap. Remove any infested or damaged foliage to prevent the spread of pests.
Diseases like tulip fire and daffodil mosaic virus can also affect bulbs. To prevent diseases, make sure to plant healthy bulbs, and avoid overwatering, which can lead to root rot. Remove any infected or damaged foliage to prevent the spread of disease.
Poor growth can be caused by a variety of factors, including inadequate sunlight, water, or fertilization. To promote healthy growth, make sure to provide your bulbs with the right conditions, including sufficient sunlight, water, and fertilization.
If you notice that your bulbs are not blooming, it may be due to a lack of chill hours. Some bulbs, like tulips and daffodils, require a certain number of chill hours to bloom. If you live in a warm climate, you may need to provide your bulbs with artificial chill hours by storing them in the refrigerator for a few weeks.
By being aware of these common problems and knowing how to troubleshoot them, you can ensure that your bulbs thrive and provide beautiful blooms for years to come.

Enjoying the Fruits of Your Labor: Tips for Showcasing Your Blooming Bulbs
After investing time and effort into planting and caring for your bulbs, it’s essential to showcase their beauty and enjoy the fruits of your labor. Here are some tips on how to make the most of your blooming bulbs:
Creating beautiful arrangements is a great way to showcase your blooming bulbs. Consider combining different types of bulbs, such as tulips and daffodils, to create a stunning display. Use a vase or container that complements the colors and shapes of the bulbs, and add some greenery, like eucalyptus or ferns, to add texture and depth.
Photography is another excellent way to capture the beauty of your blooming bulbs. Use natural light to take stunning photos, and experiment with different angles and compositions to add visual interest. Consider using a macro lens to get up close and personal with the intricate details of the bulbs.
Sharing your blooms with friends and family is a great way to spread the joy of gardening. Consider hosting a garden party or open house to showcase your blooming bulbs, or simply share photos and updates on social media. You can also consider gifting bulbs or bouquets to loved ones, which can be a thoughtful and personalized present.
In addition to showcasing your blooming bulbs, consider preserving their beauty for future enjoyment. Pressing or drying bulbs can be a great way to preserve their shape and color, and can be used to create beautiful crafts and decorations. You can also consider making potpourri or wreaths using dried bulbs, which can add a lovely touch to your home decor.
Finally, don’t forget to take time to simply enjoy the beauty of your blooming bulbs. Take a moment to sit in your garden, breathe in the scent of the flowers, and appreciate the fruits of your labor. Gardening is a journey, and the joy of watching your bulbs bloom is a reward in itself.
