What to Do with Tulips After They Finish Flowering
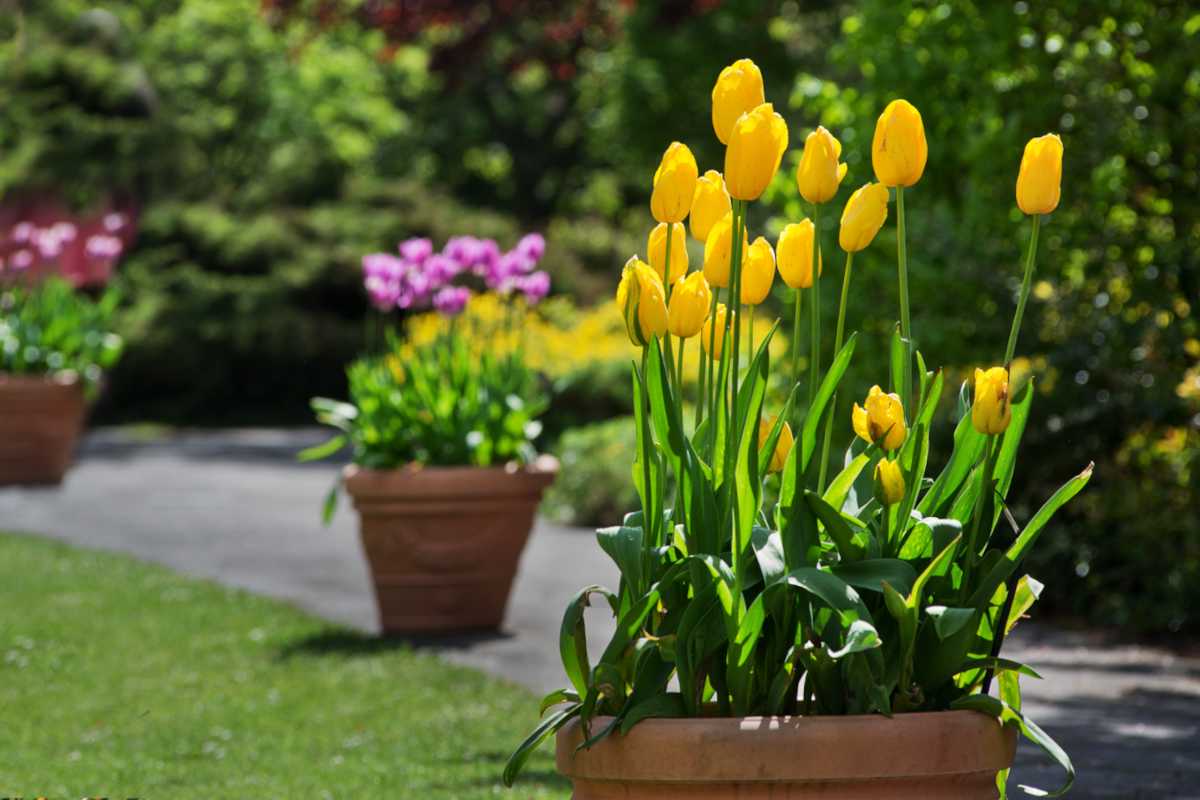
After the vibrant blooms of tulips in pots have faded, it’s essential to provide proper care to promote healthy growth and encourage re-blooming. Tulips after flowering in pots require attention to deadheading, fertilizing, and pruning to ensure they thrive. Deadheading, the process of removing spent blooms, is crucial in directing the plant’s energy towards re-growth and preventing seed production. This simple step can make a significant difference in the overall health and vigor of the tulips.

Click Image to Find Garden Products
Fertilizing tulips in pots after they finish blooming is also vital for promoting healthy growth. A balanced, water-soluble fertilizer can provide the necessary nutrients for the tulips to recharge and prepare for next year’s bloom. It’s essential to choose a fertilizer specifically formulated for bulbs, as they have unique nutritional needs. By fertilizing at the right time, you can help your tulips in pots recover from the energy expended during blooming and support their growth during the dormant period.
Pruning tulip foliage after blooming is another critical step in maintaining the health of the plants. As the blooms fade, the foliage will begin to yellow and die back. Pruning the foliage at the right time can help prevent disease and encourage healthy growth. It’s essential to wait until the foliage has died back naturally, as cutting it off too early can weaken the bulb and reduce next year’s bloom.
By following these simple steps, you can help your tulips in pots thrive and encourage re-blooming. Remember to deadhead spent blooms, fertilize with a balanced, bulb-specific fertilizer, and prune the foliage at the right time. With proper care, your tulips after flowering in pots will continue to provide beauty and enjoyment for years to come.

How to Deadhead Tulips in Pots for Better Blooms Next Year
Deadheading tulips in pots is a simple yet crucial step in promoting healthy growth and encouraging re-blooming. To deadhead tulips, wait until the blooms have faded and the petals have dropped off. This is usually around 1-2 weeks after the flowers have bloomed. Using a pair of clean scissors or pruning shears, carefully snip off the spent bloom at the base of the stem, making sure not to damage the foliage or the bulb.
It’s essential to remove the entire flower stem, including the base, to prevent seed production and direct the plant’s energy towards re-growth. After deadheading, dispose of the dead flowers to prevent the spread of disease and encourage healthy growth. By deadheading tulips in pots, you can help promote healthy growth, prevent seed production, and encourage re-blooming.
When to deadhead tulips in pots depends on the variety and growing conditions. As a general rule, deadhead tulips when the blooms have faded and the petals have dropped off. For most varieties, this is around 1-2 weeks after the flowers have bloomed. However, some varieties, such as Darwin Hybrids and Fosteriana tulips, may require deadheading earlier, around 7-10 days after blooming.
Deadheading tulips in pots is a simple yet effective way to promote healthy growth and encourage re-blooming. By removing spent blooms and directing the plant’s energy towards re-growth, you can help your tulips after flowering in pots thrive and produce vibrant blooms for years to come.
/tulips-planting-and-growing-tulips-1402137-06-5c18a69c82114b16bc8eb3baf69935e3.jpg)
Fertilizing Tulips in Pots: Tips and Recommendations
Fertilizing tulips in pots after they finish blooming is essential for promoting healthy growth and encouraging re-blooming. Tulips after flowering in pots require a balanced fertilizer that provides the necessary nutrients for the bulbs to recharge and prepare for next year’s bloom. When choosing a fertilizer, look for a product that is specifically formulated for bulbs, such as Miracle-Gro Bulb Food or Espoma Organic Bulb Tone.
These fertilizers are designed to provide the necessary nutrients for bulb growth and development, including nitrogen, phosphorus, and potassium. Nitrogen promotes healthy foliage growth, while phosphorus supports root development and flower production. Potassium helps to promote overall plant health and resistance to disease.
When applying fertilizer to tulips in pots, follow the instructions on the product label for the recommended application rate. Typically, fertilizers are applied at a rate of 1-2 tablespoons per pot, depending on the size of the pot and the number of bulbs. It’s essential to avoid over-fertilizing, as this can damage the bulbs and lead to weak growth.
In addition to using a bulb-specific fertilizer, consider adding a layer of compost or well-rotted manure to the potting mix. This will help to improve the soil structure and provide additional nutrients for the bulbs. By fertilizing tulips in pots after they finish blooming, you can help promote healthy growth and encourage re-blooming, ensuring that your tulips after flowering in pots continue to thrive and produce vibrant blooms for years to come.
Pruning Tulip Foliage: When and How to Do It
Pruning tulip foliage after blooming is an essential step in promoting healthy growth and preventing disease. As the blooms fade, the foliage will begin to yellow and die back. Pruning the foliage at the right time can help prevent disease and encourage healthy growth.
When to prune tulip foliage depends on the variety and growing conditions. As a general rule, prune tulip foliage when the leaves have turned yellow and died back. This is usually around 4-6 weeks after the blooms have faded. However, some varieties, such as Darwin Hybrids and Fosteriana tulips, may require pruning earlier, around 2-3 weeks after the blooms have faded.
To prune tulip foliage, use a pair of clean scissors or pruning shears to cut the leaves off at the base of the stem. Make sure to remove any dead or dying leaves, as these can harbor disease and pests. It’s also essential to disinfect your pruning tools between cuts to prevent the spread of disease.
Pruning tulip foliage has several benefits, including promoting healthy growth, preventing disease, and encouraging re-blooming. By removing dead and dying leaves, you can help prevent the spread of disease and encourage healthy growth. Additionally, pruning can help direct the plant’s energy towards re-growth and encourage re-blooming.
When pruning tulip foliage, it’s essential to avoid cutting too much of the foliage, as this can weaken the bulb and reduce next year’s bloom. Instead, prune only the dead and dying leaves, and leave the healthy foliage intact. By pruning tulip foliage correctly, you can help promote healthy growth and encourage re-blooming, ensuring that your tulips after flowering in pots continue to thrive and produce vibrant blooms for years to come.

Repotting Tulips in Pots: A Step-by-Step Guide
Repotting tulips in pots is an essential step in promoting healthy growth and preventing disease. After 3-4 years, the potting mix can become depleted of nutrients, and the bulbs can become crowded. Repotting tulips in pots provides an opportunity to refresh the potting mix, divide and replant the bulbs, and provide a larger pot if necessary.
When to repot tulips in pots depends on the variety and growing conditions. As a general rule, repot tulips in the fall, about 6-8 weeks after the foliage has died back. This allows the bulbs to establish themselves in the new pot before the winter months.
To repot tulips in pots, start by carefully removing the bulbs from the old pot. Gently wash the bulbs to remove any remaining potting mix, and inspect them for any signs of disease or damage. If the bulbs are crowded, divide them and replant the largest bulbs in a new pot.
Choose a pot that is only slightly larger than the previous one, and use a high-quality potting mix that is specifically designed for bulbs. Plant the bulbs at the same depth as before, and water well to settle the potting mix.
Repotting tulips in pots has several benefits, including promoting healthy growth, preventing disease, and encouraging re-blooming. By refreshing the potting mix and dividing the bulbs, you can help promote healthy growth and prevent disease. Additionally, repotting can help direct the plant’s energy towards re-growth and encourage re-blooming.
When repotting tulips in pots, it’s essential to handle the bulbs carefully to avoid damaging them. Make sure to wear gloves when handling the bulbs, and avoid exposing them to extreme temperatures or moisture. By following these steps and tips, you can help promote healthy growth and encourage re-blooming, ensuring that your tulips after flowering in pots continue to thrive and produce vibrant blooms for years to come.
Tulip Varieties that Thrive in Pots
When it comes to growing tulips in pots, not all varieties are created equal. Some tulip varieties are better suited for container gardening than others, due to their compact growth habit and vibrant blooms. Dwarf tulip varieties, such as ‘Red Riding Hood’ or ‘Ballerina’, are excellent choices for pots, as they grow to be around 10-12 inches tall and produce vibrant, cup-shaped blooms.
Species tulips, such as Tulipa clusiana, are also well-suited for pots, as they have a compact growth habit and produce delicate, star-shaped blooms. These varieties are perfect for adding a touch of elegance and sophistication to your container garden.
Another benefit of growing tulip varieties in pots is that they can be easily moved to different locations, allowing you to enjoy their blooms in different parts of your garden or patio. This is especially useful if you have a small garden or limited space, as you can move the pots around to create a dynamic and changing display.
When choosing tulip varieties for pots, make sure to select varieties that are specifically bred for container gardening. These varieties will have a compact growth habit and produce blooms that are proportional to the size of the pot. Avoid using tulip varieties that are too large or vigorous, as they may become top-heavy and require staking.
By growing tulip varieties in pots, you can enjoy their vibrant blooms and elegant foliage, even in small spaces. With proper care and attention, tulips after flowering in pots can thrive and produce beautiful blooms for years to come.
Common Problems with Tulips in Pots and How to Solve Them
When growing tulips in pots, there are several common problems that can occur, including pests, diseases, and nutrient deficiencies. These problems can be frustrating and challenging to address, but with the right knowledge and techniques, you can overcome them and keep your tulips healthy and thriving.
One common problem with tulips in pots is pests, such as aphids, slugs, and snails. These pests can cause damage to the leaves and flowers, and can also spread disease. To control pests, use organic pest control methods, such as neem oil or insecticidal soap. You can also use physical barriers, such as copper tape or fine mesh, to prevent slugs and snails from reaching the plants.
Diseases are another common problem with tulips in pots, including fungal diseases, such as powdery mildew and botrytis, and bacterial diseases, such as tulip fire. To prevent diseases, make sure to provide good air circulation and water the plants carefully, avoiding overhead watering. You can also use fungicides or bactericides to control diseases.
Nutrient deficiencies are also a common problem with tulips in pots, particularly nitrogen, phosphorus, and potassium deficiencies. To address nutrient deficiencies, use a balanced fertilizer, such as a 10-10-10 formula, and follow the instructions on the label. You can also use organic fertilizers, such as compost or manure tea, to provide nutrients to the plants.
By addressing these common problems, you can keep your tulips healthy and thriving, and enjoy their beautiful blooms for years to come. Remember to monitor your plants regularly, and take action quickly if you notice any problems. With the right care and attention, your tulips after flowering in pots can continue to thrive and produce beautiful blooms.
Overwintering Tulips in Pots: Tips for Success
Overwintering tulips in pots is an essential step in ensuring their survival and promoting healthy growth. After the blooming period, tulips in pots need to be protected from extreme temperatures and moisture to prevent damage to the bulbs. Here are some tips for overwintering tulips in pots:
First, make sure to stop watering the tulips in pots after the blooming period. This will help to prevent the bulbs from rotting and reduce the risk of disease. Next, move the pots to a cool, dry location, such as a cold frame or unheated garage. The ideal temperature for overwintering tulips in pots is between 35°F and 45°F (2°C and 7°C).
During the winter months, the tulips in pots will go dormant, and the bulbs will recharge their energy for next year’s bloom. To ensure the bulbs receive enough moisture, water the pots lightly every 4-6 weeks. This will help to keep the soil from drying out completely and prevent the bulbs from becoming too dry.
Another important tip for overwintering tulips in pots is to provide protection from extreme temperatures. If you live in an area with very cold winters, consider using a cold frame or bringing the pots indoors to a cool, dry location. This will help to protect the bulbs from damage caused by extreme temperatures.
By following these tips, you can ensure the success of your tulips after flowering in pots. With proper care and attention, your tulips will continue to thrive and produce beautiful blooms for years to come.