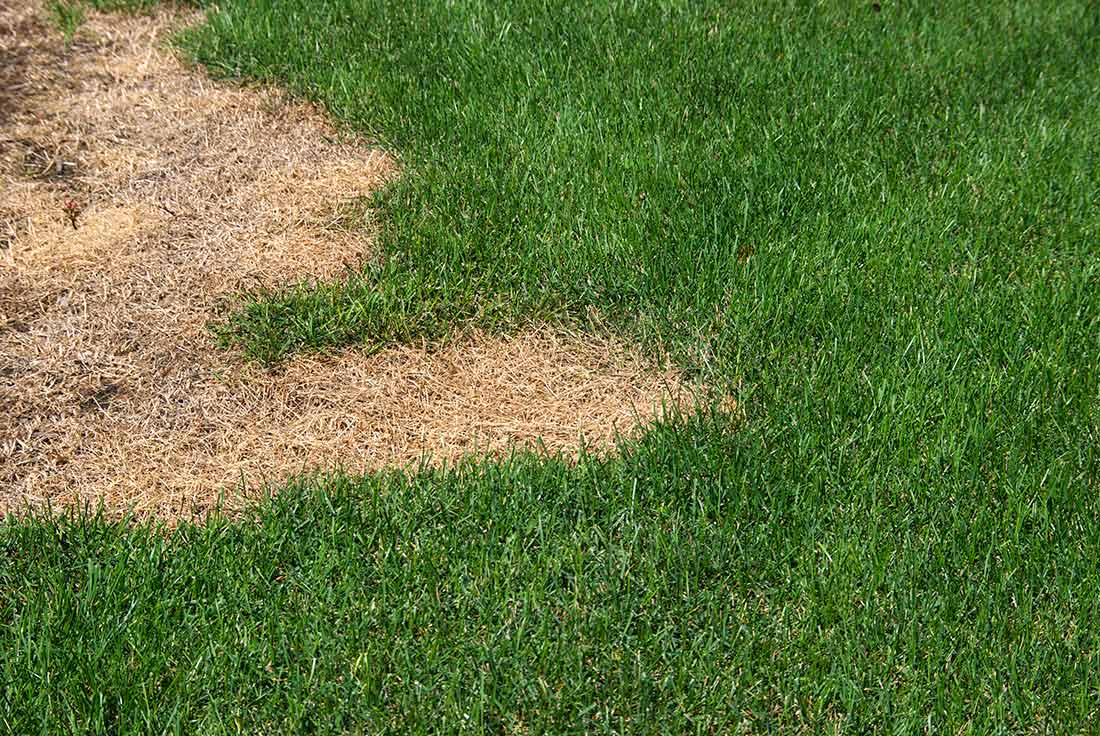
Identifying the Causes of Bare Spots: Understanding the Root of the Problem
Bare spots on lawns can be a frustrating and unsightly issue for homeowners. Before attempting to repair these areas, it’s essential to understand the underlying causes of the problem. Soil compaction, poor drainage, and pest or disease infestations are common culprits behind bare spots. By identifying the root cause, you can develop an effective plan to fix lawn bare spots and prevent future occurrences.

Click Image to Find Garden Products
Soil compaction, for instance, can be caused by heavy foot or vehicle traffic, which can prevent air, water, and nutrients from reaching the grass roots. Poor drainage, on the other hand, can be due to soil composition, slope, or inadequate irrigation systems. Pest or disease infestations, such as white grubs, chinch bugs, or fungal diseases, can also lead to bare spots.
To diagnose the cause of bare spots, inspect the affected area carefully. Look for signs of soil compaction, such as hard, dense soil or puddles of water. Check for pests or diseases by examining the grass blades and soil for any unusual growth patterns or discoloration. Understanding the underlying cause of bare spots will help you choose the most effective repair method and prevent future problems.
For example, if soil compaction is the cause, aeration and dethatching may be necessary to improve soil quality and promote healthy root growth. If poor drainage is the issue, installing a French drain or adjusting the irrigation system may be required. By addressing the root cause of bare spots, you can ensure a successful repair and a lush, healthy lawn.

Preparing the Area: Removing Debris and Weeds
Once the underlying cause of the bare spot has been identified, it’s essential to prepare the area for repair. Clearing the bare spot of debris, weeds, and dead grass is crucial for a successful repair. This step will help create a clean slate for new growth and prevent any further damage to the surrounding lawn.
To start, use a rake to remove any loose debris, such as dead grass, leaves, or twigs. Be gentle, as rough raking can damage the surrounding lawn. Next, use a weeding fork or trowel to remove any weeds or roots that may be present. Make sure to remove the entire root system to prevent regrowth.
For larger areas, consider using a lawn aerator or dethatcher to loosen and remove dead grass and debris. These tools can be rented or purchased at most hardware stores or home improvement centers. When using these tools, be sure to follow the manufacturer’s instructions and take necessary safety precautions.
After removing debris and weeds, inspect the area for any remaining dead grass or roots. Use a garden fork or spade to gently loosen and remove any remaining debris. This will help create a smooth, even surface for new growth.
By properly preparing the area, you’ll be able to create a solid foundation for new growth and increase the chances of a successful repair. Remember to handle the area with care, as rough handling can damage the surrounding lawn and lead to further bare spots.
With the area prepared, you can now move on to the next step in the process: improving soil quality through aeration and dethatching. This step is crucial for promoting healthy root growth and preventing future bare spots.
:max_bytes(150000):strip_icc()/repair-bare-patch-on-lawn-2153035-10-c9bf20adbeaf42ab836ba1256c6a38ff.jpg)
Soil Aeration and Dethatching: Improving Soil Quality
Soil aeration and dethatching are essential steps in the process of how to fix lawn bare spots. These techniques help to improve soil quality, reduce soil compaction, and promote healthy root growth. By aerating and dethatching the soil, you can create a more favorable environment for new growth and help to prevent future bare spots.
Soil aeration involves using a specialized tool to remove small plugs of soil and grass, allowing air, water, and nutrients to reach the roots more easily. This process can be done manually with a fork or spade, or mechanically with a lawn aerator. Aeration is particularly beneficial for lawns with heavy clay or compacted soil.
Dethatching, on the other hand, involves removing the dead grass and debris that accumulates on the soil surface. This can be done using a dethatching rake or a power rake. Dethatching helps to improve soil drainage, reduce soil compaction, and promote healthy root growth.
There are several methods and tools available for aeration and dethatching, including manual and mechanical options. For small areas, a manual fork or spade may be sufficient. For larger areas, a mechanical lawn aerator or dethatcher may be more efficient. It’s essential to choose the right tool for the job and follow the manufacturer’s instructions for proper use.
When to aerate and dethatch depends on the type of grass and climate. For cool-season grasses, aeration and dethatching are typically done in the fall or early spring. For warm-season grasses, these processes are usually done in the late spring or early summer. It’s crucial to avoid aerating and dethatching during periods of drought or extreme weather conditions.
By incorporating soil aeration and dethatching into your lawn care routine, you can improve soil quality, promote healthy root growth, and reduce the likelihood of future bare spots. Remember to always follow proper techniques and use the right tools for the job to ensure the best results.
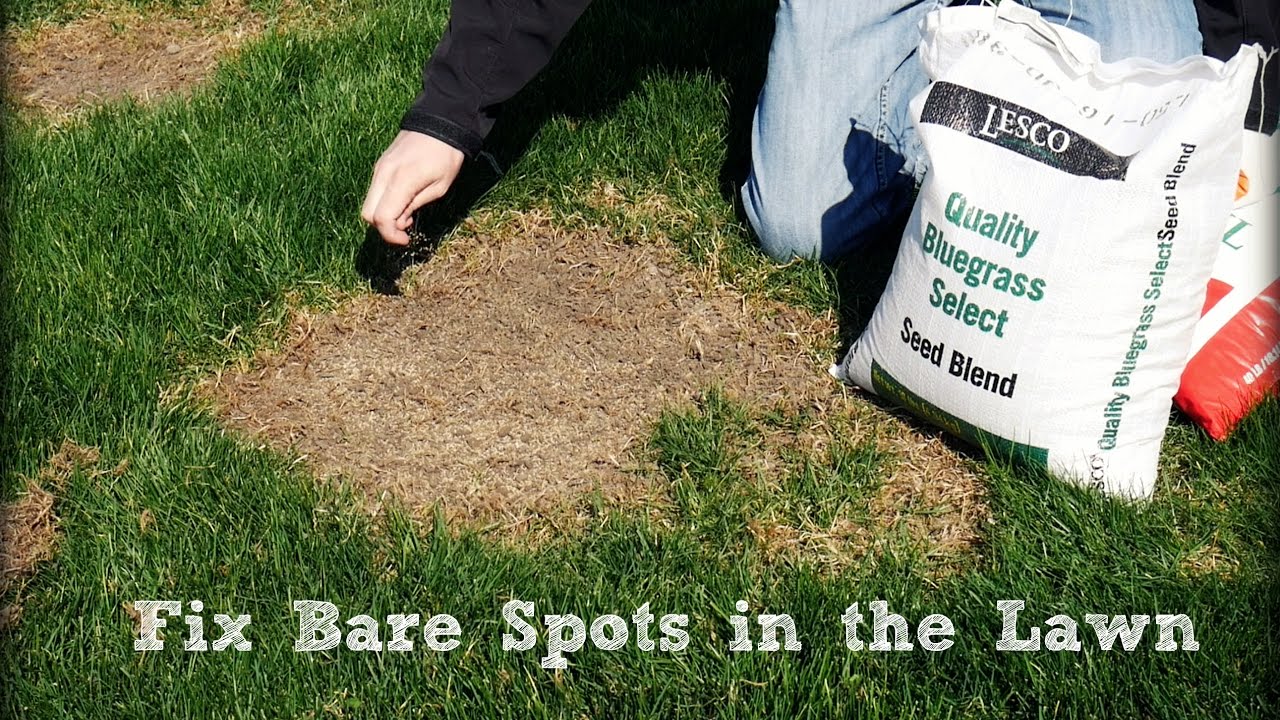
Applying the Right Seed or Sod: Choosing the Best Option for Your Lawn
When it comes to repairing bare spots on your lawn, choosing the right seed or sod is crucial for successful growth. Both options have their pros and cons, and the right choice will depend on your specific lawn type, climate, and personal preferences.
Grass seed is a popular choice for repairing bare spots because it is relatively inexpensive and easy to apply. However, it can take several weeks for the seed to germinate and grow, and it may require multiple applications to achieve the desired results. Additionally, grass seed can be susceptible to erosion and may not provide immediate coverage.
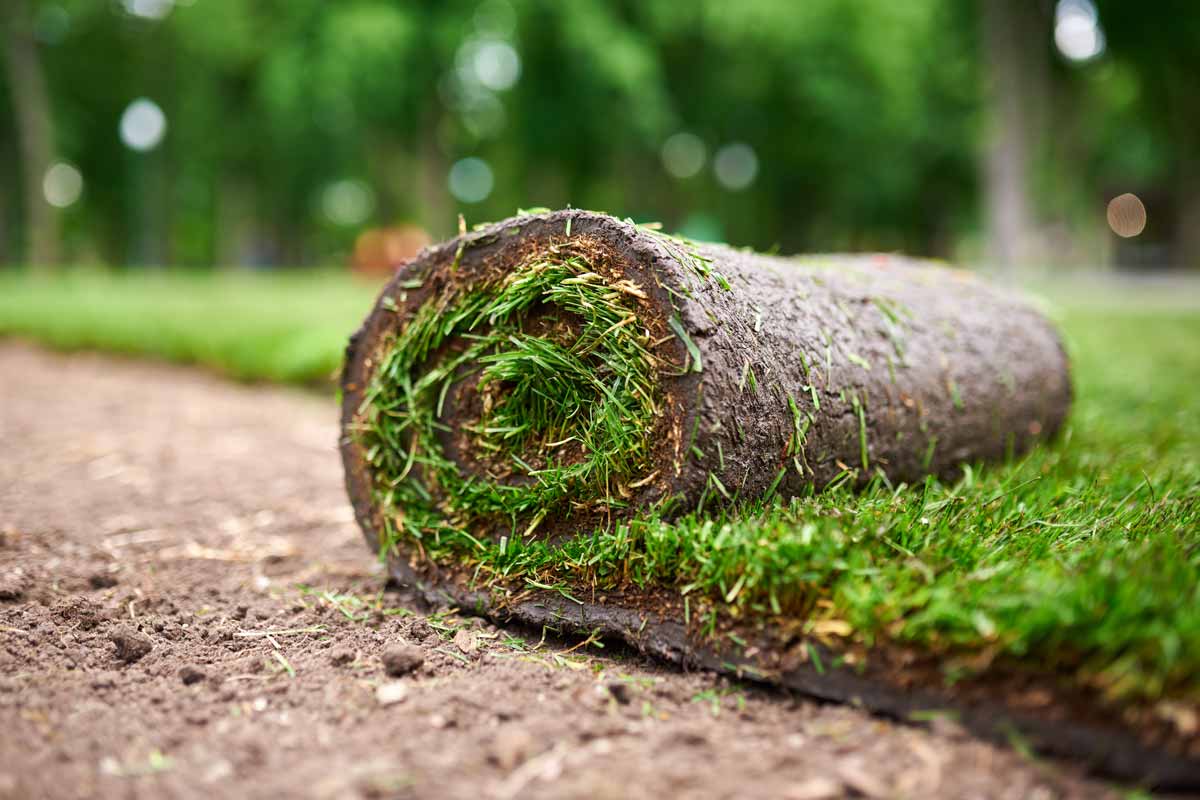
Sod, on the other hand, provides instant coverage and can be a more durable option for high-traffic areas. However, it can be more expensive than grass seed, and it may require more labor to install. Sod also requires more maintenance than grass seed, as it needs to be watered and fertilized regularly to promote healthy growth.
To choose the right seed or sod for your lawn, consider the following factors:
Climate: If you live in an area with extreme temperatures or weather conditions, you may want to choose a seed or sod that is specifically designed to withstand those conditions.
Lawn type: Different types of grass have different growth habits and requirements. Choose a seed or sod that is compatible with your existing lawn type.
Personal preferences: Consider your personal preferences for color, texture, and maintenance requirements when choosing a seed or sod.
By choosing the right seed or sod for your lawn, you can ensure successful growth and a lush, healthy appearance. Remember to follow the manufacturer’s instructions for application and maintenance to achieve the best results.
Some popular types of grass seed and sod for repairing bare spots include:
Kentucky bluegrass: A dark green, fine-textured grass that is suitable for cool-season lawns.
Perennial ryegrass: A fast-growing, fine-textured grass that is suitable for cool-season lawns.
Tall fescue: A deep green, coarse-textured grass that is suitable for warm-season lawns.
By considering these factors and choosing the right seed or sod for your lawn, you can achieve successful growth and a beautiful, lush appearance.
Fertilizing and Watering: Providing Essential Nutrients for Growth
Fertilizing and watering are crucial steps in the process of how to fix lawn bare spots. Providing essential nutrients and adequate moisture will help promote healthy growth and establishment of the new seed or sod.
When it comes to fertilizing, it’s essential to choose a fertilizer that is specifically formulated for your lawn type and climate. A balanced fertilizer with a mix of nitrogen, phosphorus, and potassium (N-P-K) will provide the necessary nutrients for growth. Apply the fertilizer according to the manufacturer’s instructions, taking care not to over-fertilize, which can damage the lawn.
Watering is also critical for the establishment of new seed or sod. Keep the soil consistently moist during the first few weeks after repair, but avoid overwatering, which can lead to shallow root growth and other problems. As the new seed or sod becomes established, you can gradually reduce the frequency of watering.
Some tips for fertilizing and watering include:
Use a fertilizer with a slow-release formula to provide nutrients over an extended period.
Avoid fertilizing during extreme weather conditions, such as high winds or heavy rainfall.
Water deeply but infrequently to encourage deep root growth.
Monitor the soil moisture by inserting a finger into the soil or using a soil probe.
By providing essential nutrients and adequate moisture, you can promote healthy growth and establishment of the new seed or sod, and help prevent future bare spots.
Some popular types of fertilizers for lawn repair include:
Scotts Turf Builder: A balanced fertilizer with a mix of N-P-K.
Miracle-Gro Lawn Food: A slow-release fertilizer with a mix of N-P-K.
Espoma Organic Lawn Fertilizer: A natural, organic fertilizer with a mix of N-P-K.
By choosing the right fertilizer and following proper application and watering techniques, you can help promote healthy growth and establishment of the new seed or sod, and achieve a lush, healthy lawn.

Maintaining the Repaired Area: Tips for Long-Term Success
Maintaining the repaired area is crucial for long-term success and preventing future bare spots. Regular mowing, watering, and fertilizing will help promote healthy growth and establishment of the new seed or sod.
Regular mowing is essential for maintaining a healthy lawn. Keep the mower blade at a height of 2.5-3 inches to promote deep root growth and prevent weed growth. Mow the lawn regularly, but avoid over-mowing, which can stress the lawn and lead to bare spots.
Watering is also critical for maintaining a healthy lawn. Water the lawn deeply but infrequently to encourage deep root growth. Avoid overwatering, which can lead to shallow root growth and other problems.
Fertilizing is also important for maintaining a healthy lawn. Use a balanced fertilizer with a mix of nitrogen, phosphorus, and potassium (N-P-K) to provide essential nutrients for growth. Apply the fertilizer according to the manufacturer’s instructions, taking care not to over-fertilize, which can damage the lawn.
In addition to regular mowing, watering, and fertilizing, it’s also important to monitor the lawn for pests and diseases. Keep an eye out for common lawn pests like white grubs, chinch bugs, and billbugs, and diseases like powdery mildew and rust. Use organic or chemical controls as needed to prevent infestations and infections.
Some tips for maintaining the repaired area include:
Keep the lawn free of debris and clutter to prevent damage and promote healthy growth.
Avoid using high-nitrogen fertilizers, which can promote weak and shallow root growth.
Use a lawn aerator or dethatcher to improve soil drainage and reduce soil compaction.
Monitor the lawn regularly for signs of pests and diseases, and take action promptly to prevent infestations and infections.
By following these tips and maintaining the repaired area regularly, you can help prevent future bare spots and achieve a lush, healthy lawn.

Common Mistakes to Avoid: Troubleshooting Common Issues
When it comes to repairing bare spots on your lawn, there are several common mistakes to avoid. These mistakes can lead to failed repairs, wasted time and money, and a lawn that looks worse than before. In this section, we’ll identify some of the most common mistakes to avoid and provide troubleshooting tips for addressing common issues that may arise.
One of the most common mistakes is using the wrong type of seed or sod for your lawn. This can lead to poor growth, uneven color, and a lawn that looks unhealthy. To avoid this mistake, make sure to choose a seed or sod that is specifically designed for your lawn type and climate.
Another common mistake is not providing adequate care for the repaired area. This can include not watering enough, not fertilizing enough, or not mowing regularly. To avoid this mistake, make sure to follow the care instructions provided by the seed or sod manufacturer, and adjust as needed based on weather conditions and lawn type.
Some other common mistakes to avoid include:
Not preparing the soil properly before seeding or sodding.
Not using the right type of fertilizer or not fertilizing enough.
Not watering enough or not watering deeply enough.
Not mowing regularly or not mowing at the right height.
Not monitoring for pests and diseases and not taking action promptly.
To troubleshoot common issues that may arise, try the following:
Check the soil moisture and adjust watering as needed.
Check the fertilizer application and adjust as needed.
Check the mowing height and adjust as needed.
Check for pests and diseases and take action promptly.
By avoiding common mistakes and troubleshooting common issues, you can ensure a successful repair and a healthy, lush lawn.
Conclusion: A Beautiful Lawn is Within Reach
Repairing bare spots on your lawn can seem like a daunting task, but with the right steps and techniques, you can achieve a lush, healthy lawn. By following the steps outlined in this article, you can identify the underlying causes of bare spots, prepare the area for repair, and apply the right seed or sod to promote healthy growth.
Remember to maintain the repaired area regularly, including mowing, watering, and fertilizing, to prevent future bare spots. And don’t be discouraged if you encounter common mistakes or issues along the way – troubleshooting tips and advice are available to help you overcome any obstacles.
With patience and persistence, you can achieve a beautiful lawn that you’ll be proud to show off. So don’t wait any longer – take action today to repair your lawn’s bare spots and start enjoying a lush, healthy lawn.
By following the steps outlined in this article, you’ll be well on your way to a beautiful lawn that will be the envy of your neighbors. And remember, a healthy lawn is not just aesthetically pleasing – it also provides a safe and enjoyable space for outdoor activities and relaxation.
So why wait? Start repairing your lawn’s bare spots today and enjoy the many benefits of a lush, healthy lawn. With the right techniques and a little bit of effort, you can achieve a beautiful lawn that will last for years to come.