Discover the Magic of Garlic Propagation
Growing garlic from a single clove is a simple and rewarding process that can provide a bountiful harvest of delicious, flavorful bulbs. This method of propagation is not only cost-effective but also reduces waste, as it utilizes the cloves that would otherwise be discarded. Garlic is typically grown from individual cloves, rather than seeds, as it allows for more control over the variety and quality of the final product. By planting garlic cloves, gardeners can enjoy a higher yield and better flavor profile compared to seed-grown garlic.

Click Image to Find Garden Products
For those wondering, “can I grow garlic from a clove?”, the answer is a resounding yes. With the right conditions and care, garlic cloves can be coaxed into producing healthy, vigorous plants that will thrive in a variety of environments. Whether you’re a seasoned gardener or just starting out, growing garlic from cloves is a great way to add some excitement to your garden and enjoy the many benefits of homegrown produce.
Garlic propagation from cloves is a relatively straightforward process that requires minimal equipment and expertise. By following a few simple steps and providing the right conditions, gardeners can enjoy a successful harvest of delicious, homegrown garlic. In the following sections, we’ll explore the ins and outs of growing garlic from cloves, including how to choose the right variety, prepare the soil, and care for your plants.

Choosing the Right Garlic Cloves for Planting
Selecting healthy, disease-free garlic cloves is crucial for a successful harvest. When choosing garlic cloves for planting, look for firm, plump bulbs with no signs of mold or rot. It’s also essential to choose a variety of garlic that is well-suited to your climate and desired flavor profile. For example, if you live in a cooler climate, you may want to choose a variety of garlic that is specifically bred for cooler temperatures, such as ‘Elephant’ or ‘Rocambole’.
When selecting garlic cloves, consider the following factors: size, shape, and color. Larger cloves tend to produce larger bulbs, while smaller cloves produce smaller bulbs. Cloves that are irregularly shaped or have visible signs of damage may not produce well. Color is also an important factor, as different varieties of garlic can have distinct colors, such as white, yellow, or purple.
It’s also important to note that garlic cloves can be purchased from a variety of sources, including nurseries, gardening stores, and online retailers. When purchasing garlic cloves, make sure to choose a reputable supplier to ensure that you are getting high-quality, disease-free cloves. By choosing the right garlic cloves for planting, you can set yourself up for success and enjoy a bountiful harvest of delicious, homegrown garlic.
Preparing the Soil for Garlic Planting
Before planting garlic cloves, it’s essential to prepare the soil to ensure optimal growth. Garlic prefers well-draining, fertile soil with a pH between 6.0 and 7.0. If your soil is heavy clay or sandy, you may need to amend it with organic matter such as compost or well-rotted manure to improve its structure and fertility.
To determine your soil’s pH level, you can purchase a soil testing kit or send a sample to a laboratory for analysis. Based on the results, you can adjust the pH level by adding lime to raise it or sulfur to lower it. Additionally, you can add organic matter such as compost or well-rotted manure to improve the soil’s nutrient content and structure.
Garlic also requires adequate drainage to prevent waterlogged soil, which can lead to rot and other diseases. If your soil is prone to waterlogging, you can raise the bed by 6-8 inches to improve drainage. You can also add organic matter such as compost or well-rotted manure to improve the soil’s structure and drainage.
Once you’ve prepared the soil, you can plant your garlic cloves with confidence. Remember to plant the cloves in the fall, about 6-8 weeks before the first frost, to allow the garlic to establish itself before winter. By preparing the soil properly, you’ll be well on your way to growing delicious, healthy garlic from a single clove.

How to Plant Garlic Cloves for Optimal Growth
Planting garlic cloves is a straightforward process that requires some basic knowledge and attention to detail. To ensure optimal growth, it’s essential to plant the cloves at the right time, in the right location, and with the right spacing.
The best time to plant garlic cloves is in the fall, about 6-8 weeks before the first frost. This allows the garlic to establish itself before winter, when the soil is cooler and there is ample moisture. In warmer climates, garlic can be planted in late winter or early spring, when the soil has cooled down and the risk of frost has passed.
When planting garlic cloves, make sure to choose a location that receives full sun and has well-draining soil. Garlic prefers a slightly acidic to neutral soil pH, ranging from 6.0 to 7.0. If your soil is heavy clay or sandy, you may need to amend it with organic matter such as compost or well-rotted manure to improve its structure and fertility.
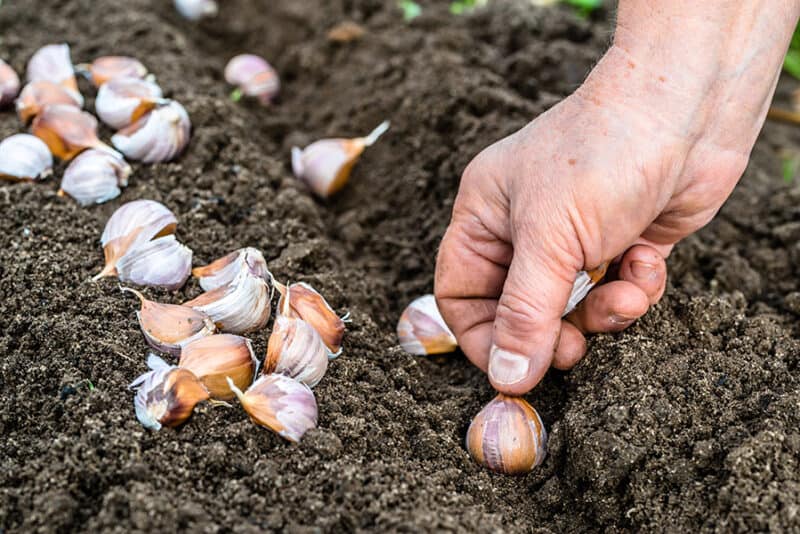
To plant garlic cloves, follow these steps:
1. Separate the garlic cloves from the bulb, making sure each clove has a small amount of the basal plate (the flat base of the clove) intact.
2. Plant the cloves 2-4 inches deep, with the pointed end facing upwards. This will help the garlic grow straight and prevent it from becoming deformed.
3. Space the cloves 4-6 inches apart, depending on the variety of garlic you are growing. Some varieties, such as ‘Elephant’ garlic, may require more space due to their larger size.
4. Cover the cloves with a thin layer of soil, and water well to settle the soil.
By following these steps and providing the right conditions, you can grow delicious, healthy garlic from a single clove. Remember to keep the soil consistently moist during the first few weeks after planting, and to fertilize the garlic regularly to promote healthy growth.
Caring for Your Garlic Plants: Tips and Tricks
Once your garlic plants are established, they require regular care to ensure optimal growth and health. Here are some tips and tricks to help you care for your garlic plants:
Watering: Garlic plants need consistent moisture, especially during the first few weeks after planting. Water the plants deeply once or twice a week, depending on weather conditions. Avoid overwatering, which can lead to rot and other diseases.
Fertilizing: Garlic plants benefit from regular fertilization. Use a balanced fertilizer (e.g., 10-10-10 NPK) and follow the manufacturer’s instructions for application rates. You can also side-dress with a high-phosphorus fertilizer (e.g., 10-20-10 NPK) to promote bulb formation.
Pest Management: Garlic plants are susceptible to pests like aphids, spider mites, and thrips. Use neem oil or insecticidal soap to control infestations. You can also use row covers to prevent pests from reaching the plants.
Disease Management: Garlic plants are prone to diseases like powdery mildew, rust, and botrytis. Use fungicides specifically designed for garlic and follow the manufacturer’s instructions for application rates. Practice good sanitation and remove any infected plants to prevent the spread of disease.
Common Problems: Keep an eye out for common problems like yellowing leaves, stunted growth, and bulb rot. These issues can be caused by factors like nutrient deficiencies, overwatering, or pests. Adjust your care routine accordingly to address these issues.
By following these care tips, you can ensure your garlic plants receive the attention they need to thrive. Remember to monitor your plants regularly and adjust your care routine as needed to promote optimal growth and health.
Harvesting Your Garlic Crop: When and How
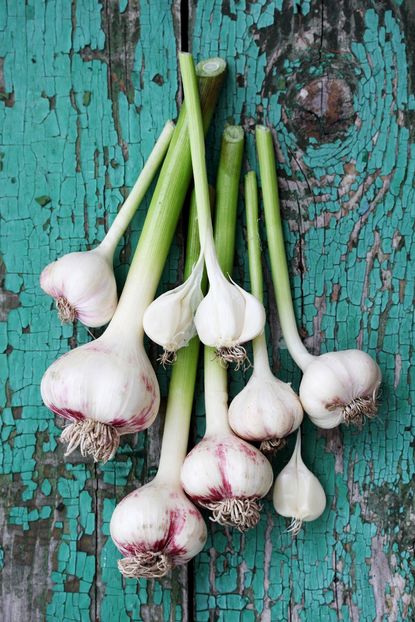
Harvesting garlic is a crucial step in the growing process, and timing is everything. Garlic is ready to harvest when the tops of the plants begin to yellow and fall over. This usually occurs in mid to late summer, about 3-4 months after planting.
To check for readiness, gently dig around the plants with a fork, being careful not to damage the bulbs. If the bulbs are ready, they should be firm and plump, with a papery wrapper covering the cloves. If the bulbs are not yet ready, cover them back up and wait a few more days before checking again.
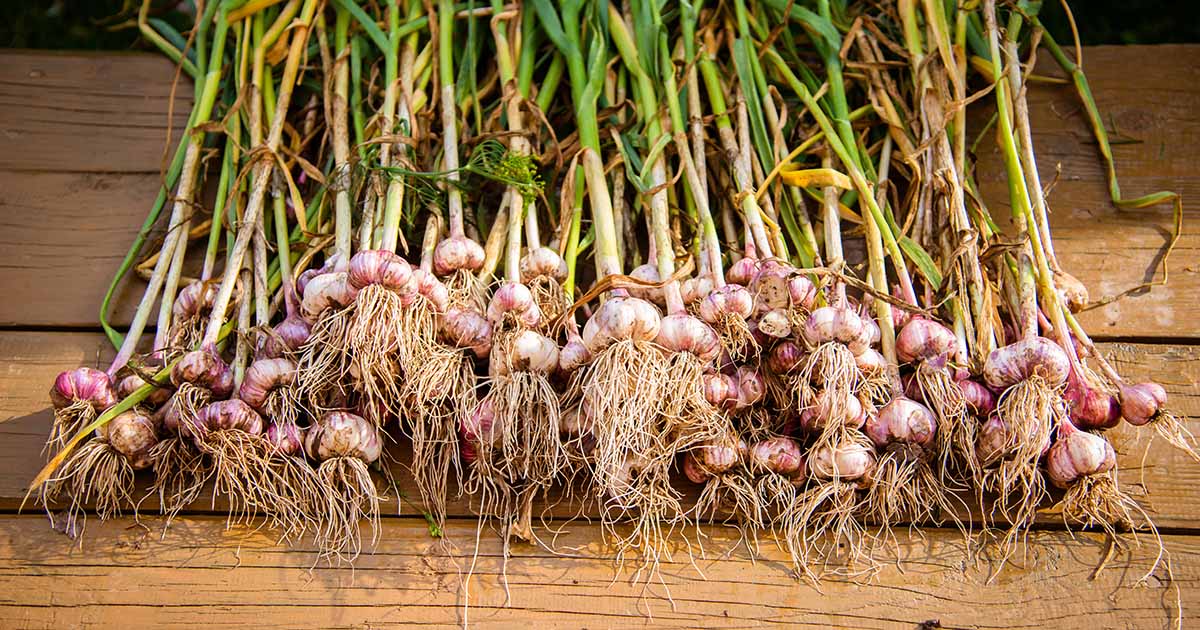
Once the garlic is ready, use a garden fork to carefully dig up the bulbs. Lift the bulbs out of the ground, taking care not to damage the cloves or the papery wrapper. Gently brush off any excess soil, and trim the tops of the plants to within an inch or two of the bulb.
After harvesting, it’s essential to cure the garlic bulbs to dry out the skin and prevent rot. To cure the garlic, place the bulbs in a warm, dry, well-ventilated area with good air circulation. You can also use a food dehydrator or a low-temperature oven (150-200°F) to speed up the curing process.
Once the garlic is cured, you can store it in a cool, dry place for several months. You can also use it immediately in cooking, or preserve it through methods like freezing, pickling, or roasting.
Troubleshooting Common Issues with Garlic Planting
While growing garlic from cloves can be a rewarding experience, it’s not without its challenges. Here are some common issues that may arise and some solutions to help you troubleshoot:
Rot: Garlic rot is a common problem that can be caused by overwatering, poor drainage, or fungal infections. To prevent rot, make sure to plant garlic cloves in well-draining soil and avoid overwatering. If you notice any signs of rot, remove the affected plants immediately to prevent the spread of disease.
Pests: Garlic is susceptible to pests like aphids, spider mites, and thrips. To control infestations, use neem oil or insecticidal soap. You can also use row covers to prevent pests from reaching the plants.
Disease: Garlic is also prone to diseases like powdery mildew, rust, and botrytis. To prevent disease, make sure to plant garlic cloves in well-draining soil and avoid overwatering. You can also use fungicides specifically designed for garlic to control infections.
Deformed Bulbs: Deformed bulbs can be caused by a variety of factors, including poor soil quality, inadequate watering, or pests. To prevent deformed bulbs, make sure to plant garlic cloves in well-draining soil and provide adequate watering and fertilization.
By being aware of these common issues and taking steps to prevent them, you can minimize problems and enjoy a successful garlic harvest. Remember to monitor your plants regularly and take action quickly if you notice any signs of trouble.

Conclusion: Enjoy Your Homegrown Garlic Harvest
Growing garlic from a single clove is a rewarding experience that can provide you with a bountiful harvest of delicious, flavorful bulbs. By following the steps outlined in this article, you can successfully grow garlic from cloves and enjoy the many benefits of homegrown produce.
Not only is growing garlic from cloves a cost-effective and sustainable way to produce garlic, but it also allows you to control the quality and flavor of your garlic. With the right care and attention, you can grow garlic that is superior to store-bought garlic in terms of flavor, texture, and aroma.
So why not give growing garlic from cloves a try? With a little patience and practice, you can enjoy a successful harvest of homegrown garlic and discover the joy of growing your own food. Whether you’re a seasoned gardener or just starting out, growing garlic from cloves is a great way to get started with gardening and enjoy the many rewards of homegrown produce.
Remember, growing garlic from cloves is a simple and rewarding process that can provide you with a bountiful harvest of delicious, flavorful bulbs. So go ahead, give it a try, and enjoy the many benefits of homegrown garlic!