The Joy of Growing Daylilies: An Overview
Daylilies, with their hardy nature and diverse range of colors and varieties, have long been a favorite among garden enthusiasts. These perennials, also known by their botanical name Hemerocallis, offer a stunning display of blooms throughout the summer months, making them an ideal choice for any garden. The appeal of daylilies extends beyond their beauty, as they are relatively low-maintenance and adaptable to various growing conditions. However, to ensure their continued health and vibrancy, it is essential to understand the basics of care and maintenance for daylilies.

Click Image to Find Garden Products

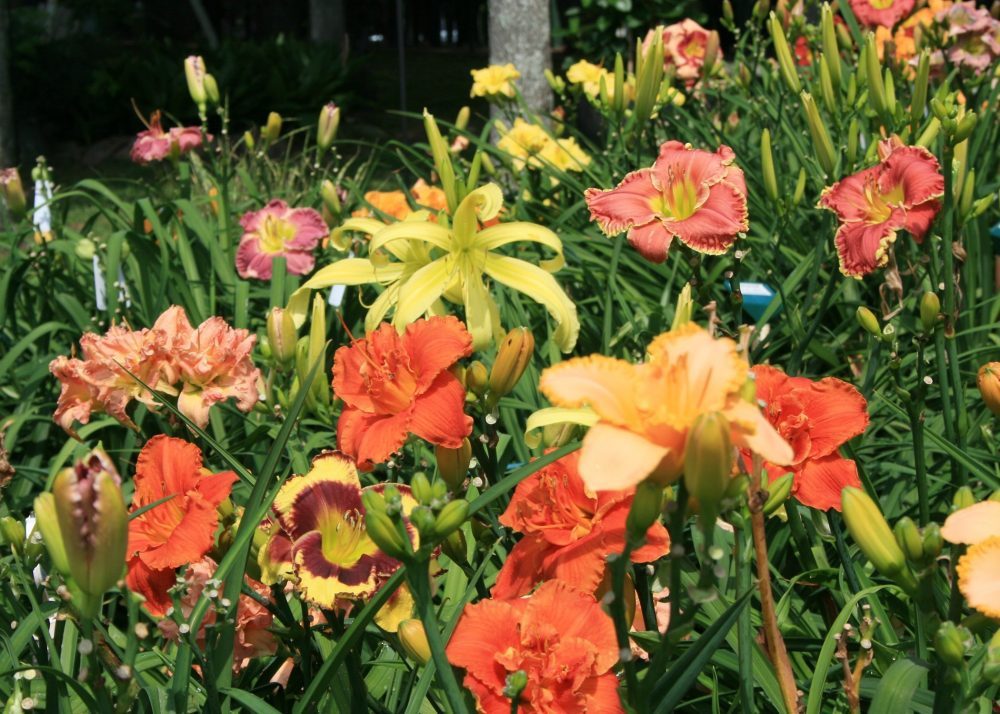
Selecting the Perfect Daylilies: Tips for Choosing the Right Varieties
When it comes to selecting daylilies, there are several factors to consider to ensure their successful growth and blooming in your garden. Understanding your local hardiness zone, sunlight requirements, and desired color and bloom time will help you make informed decisions when choosing the right daylilies for your garden. Here are some popular daylily varieties and their unique characteristics:
- Stella de Oro: This variety is a classic choice for daylily lovers, featuring bright yellow, 3-inch blooms on compact plants. Stella de Oro is a reliable rebloomer and thrives in full sun to partial shade.
- Happy Returns: Known for its prolific blooming habit, Happy Returns produces soft yellow, 3-inch flowers throughout the summer. This variety is drought-tolerant and prefers full sun.
- Lemon Lush: With its soft lemon-yellow blooms and ruffled edges, Lemon Lush is a charming addition to any garden. This daylily prefers partial shade and produces 4-inch flowers from early to mid-summer.
- Black Eyed Stella: This unique variety features bright yellow petals with a striking dark purple eye, adding a touch of drama to any garden. Black Eyed Stella is a rebloomer and thrives in full sun.
By considering these factors and selecting daylilies that suit your specific growing conditions, you can create a stunning and vibrant daylily garden that will bring joy and beauty for years to come.

Planting Daylilies: A Step-by-Step Guide
Planting daylilies correctly is crucial for their growth and development. By following these steps, you can ensure optimal plant health and beautiful blooms:
- Soil preparation: Daylilies thrive in well-draining soil with a pH between 6.0 and 6.5. Amend your soil with organic matter, such as compost or aged manure, to improve drainage and fertility. Remove any weeds, rocks, or debris from the planting area.
- Spacing: Space daylilies 12 to 18 inches apart, depending on their mature size. This allows adequate room for growth and air circulation, reducing the risk of disease.
- Watering: After planting, water the daylilies thoroughly to settle the soil around the roots. Provide approximately 1 inch of water per week, adjusting for rainfall and soil conditions. Avoid overwatering, as this can lead to root rot and other issues.
- Light exposure: Daylilies typically prefer full sun, which means at least 6 hours of direct sunlight per day. However, some varieties can tolerate partial shade, especially in hot climates. Ensure your daylilies receive the appropriate amount of sunlight for their specific needs.
- Mulching: Apply a 2- to 3-inch layer of mulch around the base of the daylilies to conserve moisture, suppress weeds, and regulate soil temperature. Organic mulches, such as shredded bark or straw, are ideal.
By following these guidelines, you can create a thriving daylily garden that will bring beauty and enjoyment for years to come. Remember that proper care and maintenance, including regular watering, fertilizing, and monitoring for pests and diseases, are essential for the long-term health and vitality of your daylilies.
How to Care for Daylilies: Essential Maintenance Tips
Proper care and maintenance are crucial for the health and vitality of your daylilies. By following these essential maintenance tips, you can ensure beautiful blooms and lush foliage:
Watering
Daylilies require consistent moisture for optimal growth. Water your daylilies deeply and regularly, providing approximately 1 inch of water per week. Adjust watering based on rainfall and soil conditions, ensuring the soil remains moist but not waterlogged.
Fertilizing
Fertilize daylilies in early spring, using a balanced, slow-release fertilizer. Follow the manufacturer’s instructions for application rates and timing. Avoid over-fertilizing, as this can lead to weak growth and reduced blooming.
Deadheading
Regularly remove spent flowers from your daylilies to encourage new blooms and maintain a tidy appearance. Pinch or cut off the flower stalks at the base, just above the foliage. Deadheading also helps prevent self-seeding and reduces the risk of disease.
Monitoring for Pests and Diseases
Inspect your daylilies regularly for signs of pests or diseases. Common daylily pests include aphids, thrips, and spider mites. If you notice any issues, address them promptly using organic or chemical treatments, as necessary. Common daylily diseases include daylily rust, daylily leaf streak, and daylily root rot. Prevent diseases by practicing good garden hygiene, such as removing and disposing of infected plant material, and ensuring adequate air circulation around the plants.
By incorporating these essential maintenance tips into your daylily care routine, you can promote healthy growth, beautiful blooms, and long-term plant vitality. Regularly monitoring and addressing any issues will help ensure your daylilies thrive and provide enjoyment for years to come.
Winterizing Daylilies: Preparing Your Plants for Cold Weather
Proper winter care is essential for the health and vitality of your daylilies. By following these guidelines, you can protect your daylilies from cold weather and ensure they thrive in the spring:
Mulching
Apply a 2- to 3-inch layer of mulch around the base of your daylilies to insulate the roots and protect them from freezing temperatures. Organic mulches, such as shredded bark or straw, are ideal. Remove the mulch in early spring to allow the soil to warm up and promote new growth.
Dividing
Divide daylilies every 3 to 5 years to rejuvenate the plants and promote healthy growth. The best time to divide daylilies is in early fall or late winter, just before new growth begins. Use a sharp knife or garden spade to carefully divide the clumps, ensuring each division has several healthy roots and fans. Replant the divisions at the recommended spacing and water them thoroughly.
Pruning
Prune daylily foliage in late winter or early spring, removing any dead or damaged leaves. This not only improves the appearance of the plants but also helps prevent the spread of disease. Avoid cutting back the foliage too early, as the leaves help protect the crown of the plant from cold temperatures.
Protecting from Extreme Cold
In regions with extremely cold winters, consider covering your daylilies with frost blankets or burlap to provide additional insulation. Remove the coverings during milder weather to allow for air circulation and prevent overheating.
By following these winterizing techniques, you can ensure your daylilies receive the proper care and protection they need to thrive in cold weather. Proper winter care is crucial for maintaining the beauty and vitality of your daylily garden, so be sure to make these tasks a part of your regular care and maintenance routine.
Propagating Daylilies: How to Divide and Share Your Plants
Daylilies are known for their easy propagation, making it simple to increase your garden’s collection or share plants with friends and family. The process of dividing daylilies not only helps control the spread of these prolific plants but also rejuvenates their growth and encourages abundant blooming. Here’s how to divide and propagate your daylilies:
When to Divide Daylilies
The best time to divide daylilies is in early fall or late winter, just before new growth begins. Dividing during these times allows the plants to establish new roots and become established before the heat of summer or the cold of winter. Avoid dividing daylilies during their peak blooming season, as this can stress the plants and reduce their flowering for the year.
Tools Needed for Dividing Daylilies
To divide daylilies, you’ll need a few basic tools: a sharp knife or garden spade, a trowel or small shovel, gloves, and a container for the divided plants. Ensure your tools are clean and sharp to minimize damage to the plant’s roots and rhizomes.
Proper Division Techniques
To divide daylilies, follow these steps:
- Using a sharp knife or garden spade, dig up the entire daylily clump, making sure to get as many roots and rhizomes as possible.
- Shake off excess soil and gently separate the clump into smaller sections, ensuring each section has several healthy roots and fans.
- Trim back the foliage to about 3 to 4 inches, making it easier to handle and plant the divisions.
- Replant the divisions at the recommended spacing, water them thoroughly, and apply a layer of mulch to retain moisture and suppress weeds.
Benefits of Dividing Daylilies
Dividing daylilies offers several benefits, including increased plant vigor, improved flowering, and the ability to share plants with others. By dividing your daylilies regularly, you can maintain their health, beauty, and productivity in your garden.
By following these steps and incorporating division into your care and maintenance routine, you can enjoy the rewards of propagating your daylilies and sharing their beauty with others. Remember to divide your daylilies at the appropriate times, use clean and sharp tools, and provide proper care and watering for the best results.

Troubleshooting Common Daylily Problems: Identifying and Addressing Issues
Despite their hardiness and low maintenance requirements, daylilies can occasionally experience issues that affect their health and vitality. By understanding common daylily problems and implementing appropriate solutions, you can ensure your daylilies thrive and continue to provide vibrant blooms. Here are some common daylily issues and how to address them:
Yellowing Leaves
Yellowing leaves can indicate several issues, including overwatering, underwatering, or nutrient deficiencies. Assess your watering practices and adjust as necessary. Fertilize your daylilies with a balanced, slow-release fertilizer to address potential nutrient deficiencies. Yellowing leaves can also be a sign of daylily leaf streak, a fungal disease that can be treated with fungicides.
Poor Blooming
Insufficient sunlight, improper watering, or lack of nutrients can contribute to poor blooming in daylilies. Ensure your daylilies receive at least 6 hours of direct sunlight daily and water them consistently, providing approximately 1 inch of water per week. Fertilize your daylilies with a balanced, slow-release fertilizer to promote healthy growth and abundant blooming.
Pests and Diseases
Daylilies can be susceptible to various pests and diseases, including aphids, thrips, spider mites, daylily rust, and root rot. Monitor your daylilies regularly for signs of infestation or disease, and address any issues promptly using organic or chemical treatments, as necessary. Maintaining good garden hygiene, such as removing and disposing of infected plant material, can help prevent the spread of disease.
By staying vigilant and addressing common daylily problems promptly, you can ensure the health and vitality of your daylily plants. Regular monitoring, proper care and maintenance, and timely intervention can help you maintain a beautiful and thriving daylily garden.
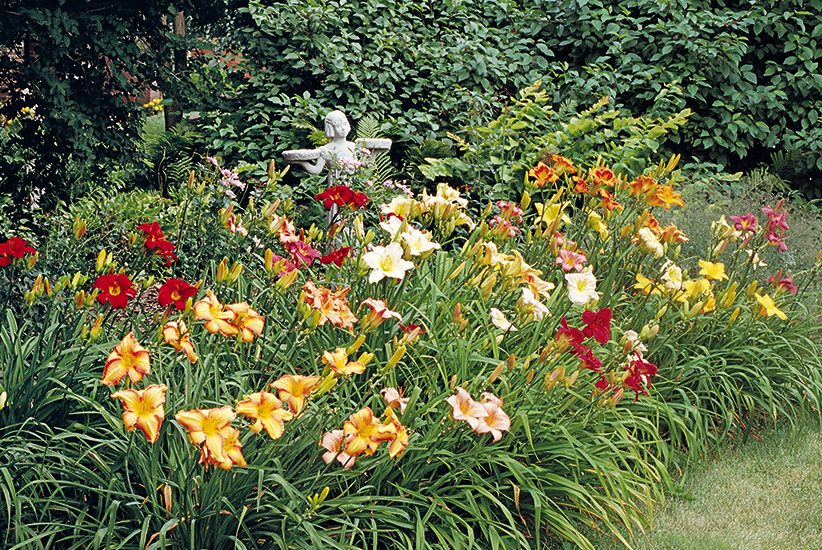
Designing Stunning Daylily Gardens: Incorporating Daylilies into Your Landscape
Daylilies are versatile and hardy plants that can add a burst of color and beauty to any garden. By incorporating daylilies into your landscape design, you can create a stunning and vibrant outdoor space that showcases their unique charm. Here are some tips and ideas for designing a daylily garden that will captivate and inspire:
Choose the Right Location
Daylilies thrive in full sun to partial shade, so select a location that receives at least 6 hours of direct sunlight daily. This will ensure optimal growth and abundant blooming for your daylilies.
Select Complementary Plants
Combine daylilies with other plants that share similar growing requirements and offer contrasting textures, colors, and shapes. Some excellent companion plants for daylilies include ornamental grasses, coneflowers, black-eyed Susans, and Shasta daisies. These plants will create a visually appealing and cohesive garden design.
Create a Color Scheme
Daylilies come in a wide range of colors, from soft pastels to vibrant reds, oranges, and yellows. Select a color scheme that complements your home’s exterior, landscaping, and personal style. Monochromatic, analogous, or complementary color schemes can all work well with daylilies, depending on your preferences and the overall look you want to achieve.
Experiment with Garden Layout
Daylilies can be used in various garden layouts, from formal, structured designs to more natural, free-flowing arrangements. Consider using daylilies as a border, foundation planting, or mass planting for a dramatic effect. You can also create a daylily garden bed, interspersing them with other perennials and annuals for added interest and variety.
Incorporate Decorative Elements
Add decorative elements, such as garden statues, birdbaths, or ornamental stones, to enhance the visual appeal of your daylily garden. These elements can create focal points, add texture, and provide visual interest, making your daylily garden a true outdoor oasis.
By following these tips and getting creative with your daylily garden design, you can enjoy a stunning and vibrant outdoor space that showcases the beauty and charm of these versatile plants. Remember to provide proper care and maintenance for your daylilies, and they will reward you with years of breathtaking blooms and lasting memories.
