Choosing the Right Variety for Your Potted Elephant Ears
When it comes to growing elephant ears in pots, selecting the right variety is crucial for optimal growth and success. With over 1,000 species to choose from, it can be overwhelming to decide which one to bring home. However, by understanding the unique characteristics of popular varieties like ‘Alocasia’, ‘Colocasia’, and ‘Xanthosoma’, you can make an informed decision that suits your indoor space.

Click Image to Find Garden Products
‘Alocasia’ varieties, such as ‘Alocasia Amazonica’ and ‘Alocasia Silver Dragon’, are known for their striking, metallic-colored leaves and compact growth habit, making them ideal for smaller pots and indoor spaces. On the other hand, ‘Colocasia’ varieties, like ‘Colocasia Esculenta’ and ‘Colocasia Black Magic’, boast larger, more dramatic leaves and can thrive in larger pots with plenty of space to spread out.
‘Xanthosoma’ varieties, such as ‘Xanthosoma Lindenii’ and ‘Xanthosoma Albo-marginatum’, offer a unique blend of colorful leaves and robust growth, making them a great choice for those looking to add a pop of color to their indoor space. Regardless of which variety you choose, make sure to select a healthy plant with no signs of pests or diseases, and a pot that provides good drainage and aeration.
By choosing the right variety of elephant ears plant in pot, you’ll be well on your way to creating a stunning and thriving tropical display that will bring a touch of the exotic to your home. With proper care and attention, your potted elephant ears will reward you with beautiful foliage and a unique, eye-catching appearance that’s sure to impress.
:max_bytes(150000):strip_icc()/elephant-ear-plants-2132884-15-c8a2fff099f24f75b9d7c69dc0caa0e0.jpg)
How to Select the Perfect Pot for Your Elephant Ears
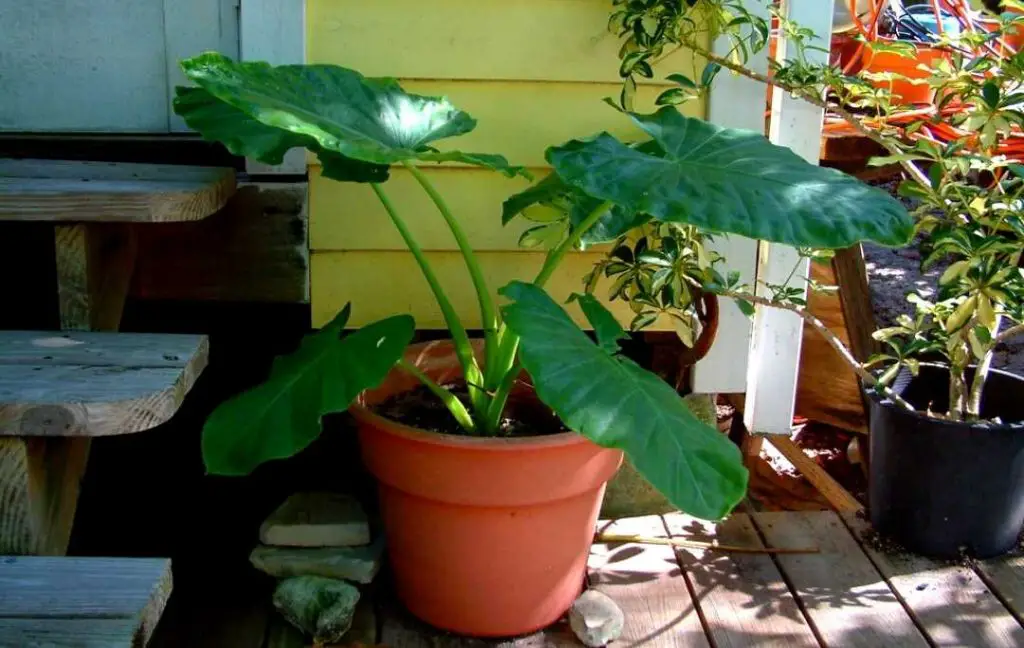
When it comes to growing elephant ears in pots, selecting the right container is crucial for healthy growth and development. The pot you choose will not only affect the aesthetic appeal of your plant, but also its ability to thrive. Here are some tips to help you select the perfect pot for your elephant ears plant in pot.
First and foremost, consider the size of the pot. Elephant ear plants can grow quite large, so it’s essential to choose a pot that provides enough room for the roots to grow. A pot that is at least 12-14 inches deep and 2-3 times the width of the plant’s root ball is ideal. This will give the roots enough space to grow and prevent the plant from becoming pot-bound.
Next, think about the material of the pot. Elephant ear plants prefer well-draining soil, so a pot made from a breathable material such as terracotta or ceramic is ideal. Avoid using plastic or metal pots, as they can retain too much moisture and cause the roots to rot.
In addition to the size and material of the pot, also consider the drainage system. Elephant ear plants don’t like wet feet, so it’s essential to choose a pot with good drainage holes to prevent waterlogged soil. Look for pots with built-in saucers or trays to catch excess water and prevent it from accumulating in the soil.
Finally, think about the style of the pot. Elephant ear plants are a statement piece, so choose a pot that complements their unique foliage. Consider a pot with a decorative design or a bold color to add visual interest to your space.
Some popular pot styles for elephant ears include modern planters with clean lines and minimal ornamentation, traditional terra cotta pots with a rustic charm, and decorative ceramic pots with intricate designs. Ultimately, the style of the pot will depend on your personal preference and the overall aesthetic of your space.
Lighting and Temperature Requirements for Potted Elephant Ears
Elephant ear plants in pots require specific lighting and temperature conditions to thrive. Providing the right environment will ensure your plant grows healthy and strong, with vibrant foliage and robust growth.
Lighting is one of the most critical factors in growing elephant ears in pots. These plants prefer bright, indirect light, but direct sunlight can cause the leaves to become scorched and the plant to become stressed. East- or west-facing windows are ideal for elephant ear plants, as they provide gentle, indirect light that promotes healthy growth.
In terms of temperature, elephant ear plants prefer warm temperatures between 65°F to 75°F (18°C to 24°C). Avoid placing your plant in areas with drafts or extreme temperatures, as this can cause stress and affect growth. If you live in a cooler climate, consider using a space heater or moving your plant to a warmer location during the winter months.
It’s also essential to maintain a consistent temperature, as sudden changes can shock the plant. Keep your elephant ear plant away from air conditioning vents, radiators, and other heat sources that can cause temperature fluctuations.
In addition to lighting and temperature, humidity is also crucial for elephant ear plants. These plants thrive in humid environments, typically above 50%. To maintain the right humidity levels, you can place the pot on a tray filled with water and pebbles or use a humidifier nearby.
By providing the right lighting and temperature conditions, you’ll be able to create an ideal environment for your elephant ears plant in pot to thrive. Remember to monitor your plant’s response to its environment and adjust the conditions as needed to ensure optimal growth and health.
Watering and Humidity Tips for Thriving Elephant Ears
Watering and humidity are crucial factors in growing a healthy elephant ears plant in pot. These plants prefer consistent moisture levels, but overwatering can lead to root rot and other problems. Here are some tips to help you water and humidify your elephant ear plant correctly.
Water your elephant ear plant when the top 1-2 inches of soil feels dry to the touch. Avoid getting water on the leaves or crown of the plant, as this can cause rot and other issues. Instead, water at the soil level, making sure the pot drains well to prevent waterlogged soil.
In terms of humidity, elephant ear plants prefer a humid environment, typically above 50%. To maintain the right humidity levels, you can place the pot on a tray filled with water and pebbles or use a humidifier nearby. This will help to create a microclimate around the plant that mimics its natural habitat.
It’s also essential to monitor the temperature and humidity levels in your home, as these can affect the plant’s watering needs. For example, if your home is particularly dry or hot, you may need to water your elephant ear plant more frequently.
Another way to maintain humidity around your elephant ear plant is to group it with other plants that prefer similar conditions. This will create a microclimate that benefits all the plants, and can help to maintain a consistent humidity level.
By following these watering and humidity tips, you can help to create an ideal environment for your elephant ears plant in pot to thrive. Remember to monitor your plant’s response to its environment and adjust your care routine as needed to ensure optimal growth and health.
Fertilizing and Pruning Your Potted Elephant Ears for Optimal Growth
Fertilizing and pruning are essential steps in maintaining the health and growth of your elephant ears plant in pot. By providing your plant with the right nutrients and pruning it regularly, you can encourage optimal growth and development.
When it comes to fertilizing your elephant ear plant, it’s essential to choose a balanced fertilizer that provides equal amounts of nitrogen, phosphorus, and potassium. A water-soluble fertilizer is ideal, as it allows you to easily adjust the amount of fertilizer you’re providing to your plant.
Apply the fertilizer once a month during the growing season, which typically runs from spring to fall. Dilute the fertilizer to half the recommended strength to avoid burning your plant’s roots. You can also use a fertilizer specifically formulated for tropical plants, as these products often contain additional nutrients that promote healthy growth.
Pruning is also crucial for maintaining the shape and size of your elephant ear plant. Remove any dead or damaged leaves, as these can attract pests and diseases. Cut back the plant to about 6 inches from the soil surface after it finishes blooming, as this will encourage new growth and prevent the plant from becoming leggy.
Use clean, sharp pruning tools to prevent spreading diseases and to make clean cuts. Make cuts just above a node, as this will help the plant heal quickly and reduce the risk of infection.
By fertilizing and pruning your elephant ear plant regularly, you can encourage optimal growth and development. Remember to monitor your plant’s response to fertilization and pruning, and adjust your care routine as needed to ensure the best results.
Common Pests and Diseases to Watch Out for in Potted Elephant Ears
Like any other plant, elephant ears in pots can be susceptible to pests and diseases. Regular monitoring and maintenance can help prevent these issues, but it’s essential to know what to look out for and how to treat common problems.
Spider mites are a common pest that can affect elephant ear plants in pots. These tiny, spider-like insects feed on the plant’s sap, causing yellowing or bronzing of the leaves. To prevent spider mites, keep your plant in a humid environment and avoid over-fertilizing, as this can attract the pests.
Mealybugs are another common pest that can infest elephant ear plants in pots. These small, white insects feed on the plant’s sap, causing stunted growth and yellowing leaves. To treat mealybugs, use insecticidal soap or neem oil, and make sure to isolate the plant to prevent the pests from spreading.
Root rot is a common disease that can affect elephant ear plants in pots. This is often caused by overwatering, which can lead to the roots rotting and the plant dying. To prevent root rot, make sure the pot has good drainage holes and avoid getting water on the leaves or crown of the plant.
Other diseases that can affect elephant ear plants in pots include leaf spot and crown rot. These diseases are often caused by fungal or bacterial infections, and can be treated with fungicides or bactericides.
To prevent pests and diseases from affecting your elephant ears plant in pot, make sure to maintain good hygiene practices, such as washing your hands before handling the plant and disinfecting any pruning tools. Regularly inspect your plant for signs of pests or diseases, and take action promptly if you notice any issues.
Repotting and Propagating Your Elephant Ears for Continued Growth
Elephant ear plants in pots typically need to be repotted every 1-2 years, as they can outgrow their containers quickly. Repotting provides an opportunity to refresh the potting mix, prune the roots, and provide a larger pot if necessary.
To repot your elephant ear plant, choose a pot that is only slightly larger than the previous one. Use a well-draining potting mix and gently remove the plant from its pot, taking care not to damage the roots. Prune the roots to encourage new growth and prevent the plant from becoming pot-bound.
Propagating elephant ear plants is also a great way to share plants with friends or create new plants for your own collection. There are two main methods of propagation: leaf cuttings and division.
To propagate using leaf cuttings, choose a healthy leaf with a long petiole (stem). Cut the leaf from the plant, leaving about 1-2 inches of stem attached to the leaf. Remove lower leaves and plant the cutting in a pot filled with a well-draining mix. Keep the soil consistently moist and warm until roots develop.
Division is another method of propagation, which involves separating the roots of a mature plant to create new plants. This method is best done in the spring or summer when the plant is actively growing. Carefully remove the plant from its pot and gently separate the roots, making sure each section has at least one growing stem. Replant the sections in new pots filled with a well-draining mix and keep the soil consistently moist and warm until new growth appears.
By repotting and propagating your elephant ear plant, you can keep it healthy and thriving for years to come. Remember to monitor your plant’s growth and adjust your care routine as needed to ensure the best results.
Displaying Your Potted Elephant Ears for Maximum Impact
Once you’ve successfully grown your elephant ear plant in a pot, it’s time to think about how to display it for maximum impact. Choosing a decorative pot and arranging your plant with other tropical plants can create a stunning display that adds a touch of the tropics to your home.
When selecting a pot for your elephant ear plant, consider the style and decor of your home. A decorative pot can add a pop of color and texture to your space, and can help to create a cohesive look. Look for pots made from materials like ceramic, terracotta, or wood, which can add a natural and earthy feel to your space.
In addition to choosing a decorative pot, consider arranging your elephant ear plant with other tropical plants to create a stunning display. Plants like bird of paradise, bromeliads, and ferns can complement the unique foliage of your elephant ear plant and create a lush, tropical look.
When arranging your plants, consider the height and texture of each plant. Place taller plants in the back and shorter plants in the front to create a layered look. You can also use plant stands or shelves to add depth and visual interest to your display.
Finally, consider the lighting in your space when displaying your elephant ear plant. Bright, indirect light can help to bring out the colors and textures of your plant, and can create a stunning display. Avoid placing your plant in direct sunlight, which can cause the leaves to become scorched and the plant to become stressed.
By following these tips, you can create a stunning display with your potted elephant ear plant that adds a touch of the tropics to your home. Remember to have fun and be creative with your display, and don’t be afraid to experiment with different arrangements and styles.
