Understanding the Basics of Bulb Planting
Proper bulb planting depth is crucial for the success of your garden. Planting bulbs too deep or too shallow can lead to poor growth, reduced flowering, and even plant death. To ensure optimal growth and blooming, it’s essential to understand how deep to plant a bulb. This guide will provide a comprehensive overview of the process, covering the basics of bulb planting, selecting the right bulbs, preparing the soil, and determining the optimal planting depth.
Bulbs are underground storage organs that contain the embryo of a plant, along with nutrients and energy. When planted at the correct depth, bulbs are able to absorb the necessary water and nutrients to support growth and blooming. However, if planted too deep, bulbs may rot or fail to bloom, while planting too shallow can cause the bulb to dry out or become vulnerable to pests and diseases.
By understanding the basics of bulb planting, gardeners can avoid common mistakes and ensure a successful and thriving garden. Whether you’re a seasoned gardener or just starting out, this guide will provide the necessary information to help you plant bulbs with confidence and achieve optimal results.
In the following sections, we’ll delve deeper into the specifics of bulb planting, including selecting the right bulbs, preparing the soil, and determining the optimal planting depth. By the end of this guide, you’ll have a comprehensive understanding of how to plant bulbs like a pro and be well on your way to creating a stunning and thriving garden.
Choosing the Right Bulbs for Your Garden
With so many types of bulbs available, selecting the right ones for your garden can be overwhelming. However, by considering a few key factors, you can choose bulbs that will thrive in your specific climate and garden conditions. Popular varieties like tulips, daffodils, and hyacinths are great options for many gardens, but it’s essential to consider factors like temperature, sunlight, and soil type when making your selection.
Tulips, for example, are a great choice for gardens with well-draining soil and full sun to partial shade. They come in a wide range of colors and varieties, from classic red and yellow to more exotic options like parrot tulips and viridiflora tulips. Daffodils, on the other hand, are a great choice for gardens with slightly acidic soil and full sun to partial shade. They’re also deer-resistant and naturalize easily, making them a great option for gardens with wildlife.
Hyacinths are another popular option for gardens with well-draining soil and full sun to partial shade. They’re known for their fragrant blooms and come in a range of colors, from classic blue and pink to more exotic options like white and yellow. When selecting bulbs, be sure to read the label carefully and choose varieties that are suitable for your specific climate and garden conditions.
In addition to considering the type of bulb, it’s also essential to think about the timing of your planting. In general, spring-flowering bulbs like tulips and daffodils should be planted in the fall, while summer-flowering bulbs like hyacinths and lilies should be planted in the spring. By choosing the right bulbs for your garden and planting them at the right time, you can enjoy a beautiful and thriving garden all season long.
Preparing the Soil for Bulb Planting
Before planting bulbs, it’s essential to prepare the soil to ensure optimal growth and blooming. The first step is to test the soil pH, as most bulbs prefer a slightly acidic to neutral soil pH (around 6.0-7.0). If your soil is too acidic or alkaline, you can amend it with lime or sulfur to adjust the pH.
In addition to pH, it’s also important to consider the soil’s drainage and fertility. Bulbs prefer well-draining soil that is rich in organic matter. To improve drainage, you can add compost or well-rotted manure to the soil. This will also help to increase the soil’s fertility, providing essential nutrients for bulb growth.
Another key factor to consider is the soil’s structure. Bulbs prefer a loose, well-aerated soil that allows for easy root growth. If your soil is heavy clay or sandy, you can add organic matter like compost or peat moss to improve its structure.
When preparing the soil for bulb planting, it’s also important to remove any debris or weeds that could compete with the bulbs for water and nutrients. This will help to ensure that your bulbs receive the best possible start in life.
By taking the time to prepare the soil before planting bulbs, you can create an optimal environment for growth and blooming. This will help to ensure that your bulbs thrive and provide beautiful flowers for years to come.
Determining the Optimal Planting Depth
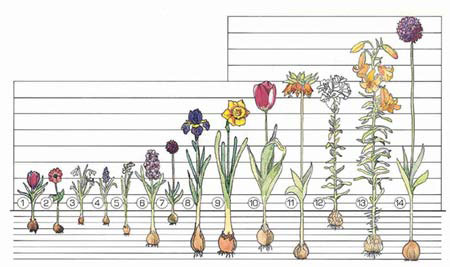
One of the most critical factors in successful bulb planting is determining the optimal planting depth. Planting bulbs too deep or too shallow can lead to poor growth, reduced flowering, and even plant death. So, how deep to plant a bulb? A general guideline is to plant bulbs 2-3 times deeper than the height of the bulb. This allows the bulb to establish a strong root system and receive the necessary nutrients and water.
To determine the optimal planting depth, start by measuring the height of the bulb. For example, if the bulb is 2 inches tall, you would plant it 4-6 inches deep. It’s also important to consider the type of bulb you are planting, as some bulbs may require a deeper or shallower planting depth. For example, tulips and daffodils typically require a deeper planting depth than hyacinths and crocuses.
When calculating the planting depth, be sure to take into account the soil’s texture and composition. Bulbs planted in heavy clay or sandy soils may require a slightly deeper or shallower planting depth than those planted in well-draining soils. By taking the time to determine the optimal planting depth, you can ensure that your bulbs receive the best possible start in life.
It’s also important to note that the planting depth may vary depending on the climate and region you are in. In areas with cold winters, bulbs may need to be planted deeper to protect them from freezing temperatures. In areas with mild winters, bulbs may be planted shallower. By considering these factors, you can determine the optimal planting depth for your specific climate and region.
Planting Bulbs at the Right Depth
Now that you’ve determined the optimal planting depth for your bulbs, it’s time to start planting. Here’s a step-by-step guide on how to plant bulbs at the correct depth:
Step 1: Dig the Planting Hole – Use a garden fork or trowel to dig a hole that is 2-3 times deeper than the height of the bulb. Make sure the hole is wide enough to accommodate the bulb and any additional soil or compost you plan to add.
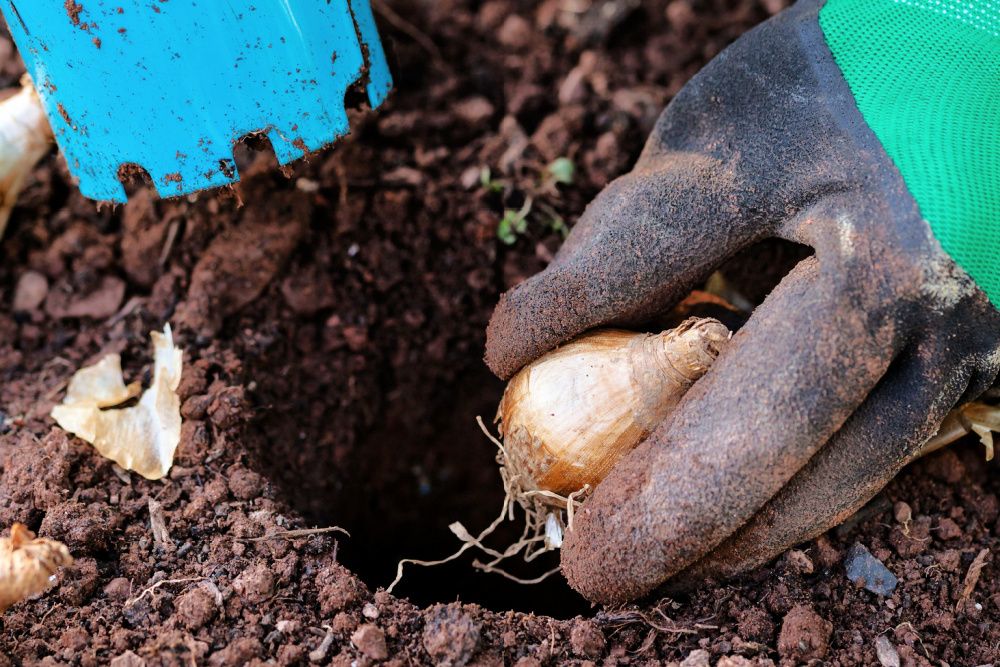
Step 2: Place the Bulb – Gently place the bulb in the hole, making sure it’s centered and the base of the bulb is facing downwards. If you’re planting multiple bulbs, space them 3-6 inches apart, depending on the variety.
Step 3: Add Soil and Compost – Fill the hole with a mixture of soil and compost, making sure to cover the bulb completely. You can also add a layer of mulch or straw to help retain moisture and suppress weeds.
Step 4: Water and Settle – Water the soil gently but thoroughly, making sure the bulb is settled in its new home. You can also use a gentle fertilizer to promote healthy growth.
Tips to Avoid Common Mistakes:
– Make sure to plant the bulb at the correct depth to avoid rot and poor growth.
– Avoid planting bulbs too close together, as this can lead to overcrowding and reduced growth.
– Use a well-draining potting mix to prevent waterlogged soil and root rot.
– Avoid planting bulbs in areas with standing water or where water tends to collect.
By following these steps and tips, you can ensure that your bulbs are planted at the right depth and receive the best possible start in life.
Post-Planting Care for Bulbs
After planting your bulbs, it’s essential to provide them with the right conditions to thrive. Proper post-planting care can make all the difference in the success of your bulb garden. Here are some tips to help you provide the best care for your bulbs:
Watering: Bulbs need consistent moisture, especially during the first growing season. Water them regularly, but avoid overwatering, which can lead to rot and other problems.
Fertilizing: Feed your bulbs with a balanced fertilizer in the spring when they start to grow. Avoid using high-nitrogen fertilizers, as they can promote weak growth and reduce flowering.
Deadheading: Remove the flower heads as soon as they fade to encourage the bulb to focus its energy on re-growing and storing energy for next year’s bloom.
Mulching: Mulch around the base of the bulbs to retain moisture, suppress weeds, and regulate soil temperature.
Pest and Disease Control: Keep an eye out for pests like aphids, slugs, and snails, and diseases like tulip fire and narcissus fly. Use organic or chemical controls as needed to prevent infestations and infections.
Divide and Replant: After 3-4 years, bulbs can become congested and need to be divided and replanted. This will help maintain their vigor and promote healthy growth.
By following these post-planting care tips, you can ensure that your bulbs receive the best possible care and thrive in your garden.
Troubleshooting Common Bulb Planting Mistakes
Even with the best intentions, mistakes can happen when planting bulbs. Here are some common mistakes people make when planting bulbs, along with solutions to these problems:
Planting too deep: If you’ve planted your bulbs too deep, they may not receive enough sunlight or water. To rescue bulbs that have been planted too deep, carefully dig them up and replant them at the correct depth.
Planting too shallow: On the other hand, if you’ve planted your bulbs too shallow, they may be exposed to extreme temperatures or moisture. To rescue bulbs that have been planted too shallow, add a layer of soil or mulch to cover the bulb and provide protection.
Not providing enough water: Bulbs need consistent moisture, especially during the first growing season. If you’ve forgotten to water your bulbs, make sure to provide them with a good soaking to encourage growth.
Not providing enough sunlight: Most bulbs need full sun to partial shade to bloom well. If you’ve planted your bulbs in a spot that’s too shady, consider moving them to a sunnier location.
Not deadheading: Deadheading is an important step in encouraging bulbs to bloom again next year. If you’ve forgotten to deadhead your bulbs, make sure to remove the flower heads as soon as they fade to encourage the bulb to focus its energy on re-growing and storing energy for next year’s bloom.
By being aware of these common mistakes and taking steps to correct them, you can ensure that your bulbs thrive and provide beautiful blooms for years to come.
Conclusion: Planting Bulbs with Confidence
Planting bulbs can be a fun and rewarding experience, but it requires careful planning and attention to detail. By following the steps outlined in this guide, you can ensure that your bulbs are planted at the right depth and receive the best possible care.
Remember, the key to successful bulb planting is to provide the right conditions for growth and blooming. This includes choosing the right bulbs for your climate and garden conditions, preparing the soil properly, and planting the bulbs at the correct depth.
By following these tips and guidelines, you can plant bulbs with confidence and enjoy beautiful blooms for years to come. Don’t be afraid to experiment and try new things – and don’t hesitate to reach out for advice if you need it.
Final Tips and Reminders:
– Plant bulbs in the fall for spring blooming, and in the spring for summer blooming.
– Choose bulbs that are suitable for your climate and garden conditions.
– Prepare the soil properly before planting bulbs.
– Plant bulbs at the correct depth to ensure proper growth and blooming.
– Provide proper post-planting care, including watering, fertilizing, and deadheading.
By following these tips and guidelines, you can enjoy beautiful blooms and a thriving garden. Happy planting!


