Preparing the Soil for a Bountiful Harvest
When it comes to how do u plant potatoes, soil preparation is a crucial step that sets the stage for a successful harvest. The quality of the soil can significantly impact the health and productivity of potato plants. To give your potatoes the best possible start, it’s essential to prepare the soil well in advance of planting.

Click Image to Find Garden Products
The ideal soil type for potatoes is well-draining, loose, and rich in organic matter. A pH level between 4.5 and 7.0 is suitable for most potato varieties. Additionally, potatoes require adequate nutrients, including nitrogen, phosphorus, and potassium, to promote healthy growth.
To prepare the soil, start by removing any debris, rocks, and weeds. Then, till the soil to a depth of about 12 inches to loosen and aerate it. Next, add a 2-inch layer of compost or well-rotted manure to provide essential nutrients. If your soil is heavy clay or sandy, mix in some organic matter to improve its structure. Finally, rake the soil to create a smooth, even surface. By following these steps, you’ll be well on your way to creating a fertile and welcoming environment for your potatoes to thrive.
Choosing the Right Potato Variety for Your Climate
When it comes to how do u plant potatoes, selecting the right variety is crucial for a successful harvest. With hundreds of potato varieties to choose from, it can be overwhelming to decide which one to plant. However, by understanding the different types of potato varieties and their characteristics, you can make an informed decision that suits your region’s climate.
Early potato varieties, such as ‘Nicola’ and ‘Maris Bard’, mature quickly, typically within 70-100 days. They are ideal for regions with short growing seasons or for growers who want to harvest their potatoes early. Mid-season varieties, like ‘Shetland Black’ and ‘Kerr’s Pink’, take around 100-120 days to mature and are suitable for most climates. Late varieties, such as ‘King Edward’ and ‘Desiree’, take the longest to mature, typically within 120-140 days, and are best suited for regions with long growing seasons.
In addition to the maturity date, consider factors like disease resistance, tuber size, and flavor when selecting a potato variety. Some varieties, like ‘Sarpo Mira’, are bred to be resistant to late blight, while others, like ‘Charlottes’, are prized for their buttery flavor. By choosing a variety that is well-suited to your climate and meets your specific needs, you’ll be more likely to enjoy a bountiful harvest.
Obtaining High-Quality Seed Potatoes
When it comes to how do u plant potatoes, starting with high-quality seed potatoes is essential for a successful harvest. Seed potatoes are small, whole potatoes or pieces of potatoes that are certified disease-free and suitable for planting. To ensure a healthy crop, it’s crucial to source seed potatoes from reputable suppliers and inspect them for signs of disease or damage.
Look for suppliers that are certified by a recognized potato certification program, such as the United States Department of Agriculture (USDA) or the Canadian Food Inspection Agency (CFIA). These programs ensure that seed potatoes meet strict standards for disease resistance and quality. Additionally, consider purchasing seed potatoes from local nurseries or gardening stores that specialize in potatoes, as they often have a better understanding of the specific growing conditions in your area.
Before planting, inspect your seed potatoes for signs of disease or damage. Check for soft spots, cracks, or discoloration, and discard any seed potatoes that show these signs. It’s also essential to store seed potatoes in a cool, dark place until planting to prevent sprouting or rotting. By taking the time to source high-quality seed potatoes and inspect them carefully, you’ll be well on your way to growing a healthy and productive potato crop.
![]()
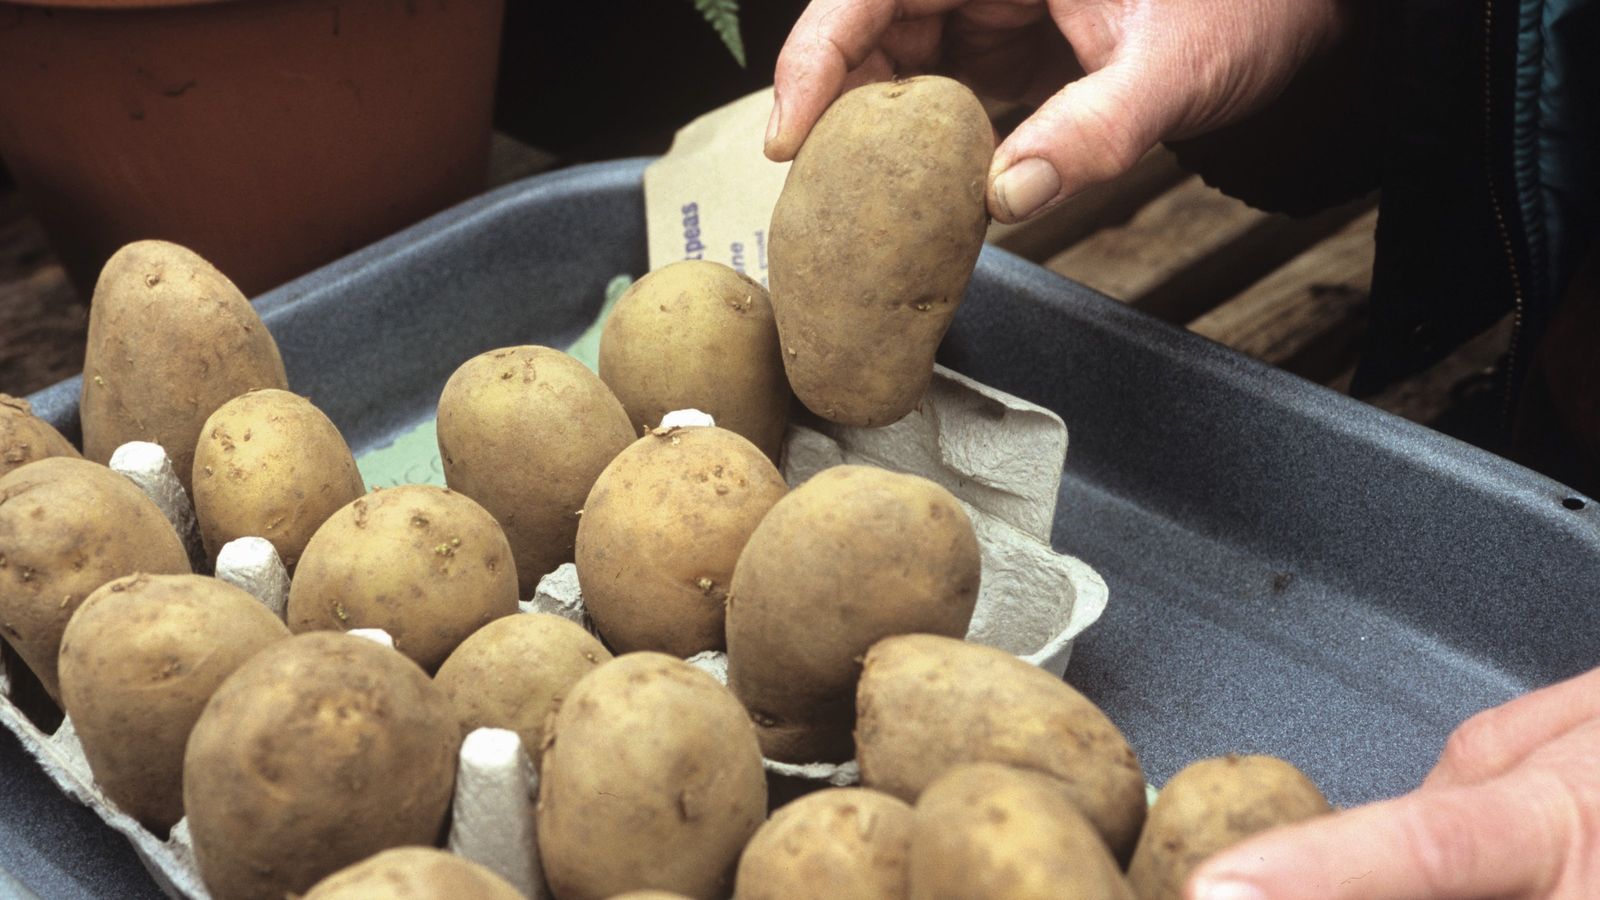
How to Chit Your Potatoes for a Head Start
Before learning how do u plant potatoes, it’s essential to understand the process of chitting potatoes. Chitting, also known as pre-sprouting, is a simple technique that gives your potatoes a head start on the growing season. By allowing your seed potatoes to sprout before planting, you can increase yields, improve disease resistance, and get a jumpstart on the growing season.
To create a chitting station, you’ll need a light, cool place with temperatures between 40°F and 50°F (4°C and 10°C). Place your seed potatoes with the “eyes” facing upwards in a tray or box, and cover them with a layer of paper towels or a cloth. Ensure the potatoes are not in direct sunlight, as this can cause them to become leggy and weak.
Check on your seed potatoes regularly, and remove any that show signs of rot or mold. After 2-4 weeks, your seed potatoes should have developed short, green sprouts. Once the sprouts are about 1-2 inches (2.5-5 cm) long, your potatoes are ready to plant. By chitting your potatoes, you’ll be able to plant them earlier in the season, giving them a head start on the growing season and increasing your chances of a successful harvest.
Planting Potatoes: A Step-by-Step Process
Now that you’ve prepared your soil, chosen the right potato variety, obtained high-quality seed potatoes, and chitted them for a head start, it’s time to learn how do u plant potatoes. Planting potatoes requires careful attention to detail to ensure a successful harvest. Follow these steps to get your potatoes off to a great start.
Begin by digging a trench that is about 6-8 inches (15-20 cm) deep and 3-4 inches (7.5-10 cm) wide. Space the trenches about 3 feet (90 cm) apart, depending on the variety of potato you’re planting. Place the chitted seed potatoes in the trench, with the “eyes” facing upwards, and cover them with a layer of soil.
Space the seed potatoes about 12 inches (30 cm) apart, and cover them with a layer of soil. As the plants grow, add more soil or mulch to the trench, leaving only a few inches of the leaves exposed. This will help to protect the tubers from sunlight, which can turn them green and toxic.
Once you’ve planted your potatoes, water them well to settle the soil. Keep the soil consistently moist during the first few weeks after planting, but avoid overwatering, which can lead to rot and other diseases. With proper care and attention, your potatoes will be ready to harvest in about 70-100 days.

Caring for Your Potato Crop: Watering, Fertilizing, and Pest Control
After learning how do u plant potatoes, it’s essential to provide proper care to ensure a healthy and productive crop. Potato plants require consistent moisture, especially during tuber formation. Water your potato plants deeply once or twice a week, depending on weather conditions. Avoid overwatering, which can lead to rot and other diseases.
Fertilizing your potato crop is also crucial for optimal growth. Apply a balanced fertilizer (e.g., 10-10-10 NPK) at planting time, and again when the plants are about 6 inches (15 cm) tall. You can also side-dress with a high-phosphorus fertilizer (e.g., 10-20-10 NPK) to promote tuber formation.
Pest control is another critical aspect of caring for your potato crop. Keep an eye out for common pests like aphids, Colorado potato beetles, and wireworms. Use organic or integrated pest management (IPM) strategies to minimize the risk of pesticide resistance and environmental harm. For example, introduce beneficial insects like ladybugs or lacewings to prey on aphids, or use neem oil to control beetle populations.
Regularly inspect your potato plants for signs of disease, such as yellowing leaves, black spots, or powdery mildew. Remove and dispose of any infected plants to prevent the spread of disease. Practice good sanitation, and rotate your potato crop annually to reduce the risk of disease buildup.
Identifying and Managing Common Potato Diseases
As you learn how do u plant potatoes, it’s essential to be aware of common potato diseases that can affect your crop. Two of the most prevalent diseases are late blight and scab. Late blight, caused by the fungus-like organism Phytophthora infestans, can lead to rapid defoliation and tuber rot. Scab, caused by the bacterium Streptomyces scabies, results in rough, scabby patches on the tubers.
To identify late blight, look for yellowing or blackening leaves, often accompanied by a white, cottony growth on the underside. Scab, on the other hand, typically appears as small, rough patches on the tubers. Both diseases can be managed through a combination of cultural, chemical, and biological controls.
Cultural controls include practices like crop rotation, removing infected plants, and improving soil drainage. Chemical controls involve applying fungicides or bactericides specifically designed to target the disease-causing organisms. Biological controls, such as introducing beneficial microorganisms, can also help to suppress disease development.
In addition to these diseases, potatoes are also susceptible to other issues like blackleg, powdery scab, and potato virus X. Regularly inspect your potato plants for signs of disease, and take prompt action to prevent the spread of infection. By being proactive and using a combination of control methods, you can minimize the impact of disease on your potato crop.

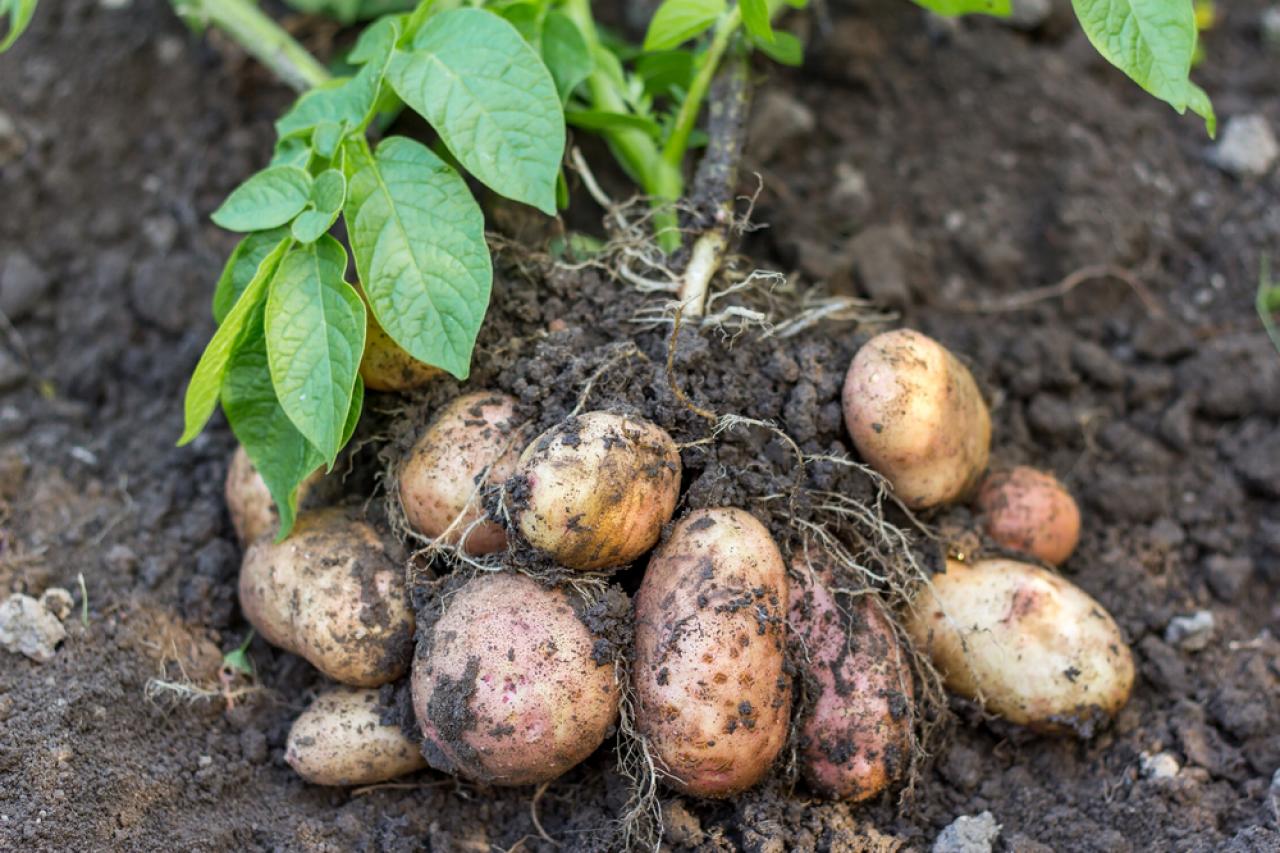
Harvesting Your Potato Crop: Timing and Techniques
After learning how do u plant potatoes, it’s essential to know when to harvest your crop to ensure optimal flavor and texture. The timing of harvest depends on the potato variety, weather conditions, and tuber maturity. For early varieties, harvest about 7-10 weeks after planting, while mid-season and late varieties take around 10-14 weeks and 14-18 weeks, respectively.
Check for tuber maturity by gently digging around the plants with a fork, being careful not to damage the tubers. Look for tubers that are firm, smooth, and free of bruises or cracks. If you’re unsure, wait a few more days and check again. It’s better to err on the side of caution, as immature tubers may not store well.
When harvesting, use a fork to carefully loosen the soil around the tubers, working your way outward from the plant. Lift the tubers out of the ground, and gently brush off any excess soil. Handle the tubers carefully to avoid bruising or damaging them.
For maincrop potatoes, you can use a technique called “lifting and storing.” This involves digging up the tubers, allowing them to dry in the sun for a few hours, and then storing them in a cool, dark place. This helps to heal any wounds and reduces the risk of rot.
Remember to harvest your potatoes during the cooler part of the day, as this helps to reduce moisture loss and prevent tuber rot. By following these guidelines, you’ll be able to enjoy a bountiful harvest of delicious, homegrown potatoes.
