Unlocking the Secrets of Sunchokes: An Introduction
Jerusalem artichokes, also known as sunchokes, are a type of root vegetable that has been gaining popularity in recent years due to their unique characteristics and numerous health benefits. Native to North America, these underground tubers have been cultivated for centuries, prized for their nutty flavor and high nutritional value. They are an excellent source of fiber, potassium, and iron, making them a great addition to a healthy diet. With their versatility in cooking and potential to thrive in a variety of climates, many gardeners are eager to learn how to grow Jerusalem artichokes. In fact, understanding the basics of how do you grow Jerusalem artichokes is crucial for a successful harvest, and with the right techniques, you can enjoy these delicious tubers year-round. Whether you’re looking to add a new crop to your garden or simply want to learn more about this fascinating vegetable, this comprehensive guide will provide you with the knowledge you need to get started on cultivating delicious Jerusalem artichokes.

Click Image to Find Garden Products

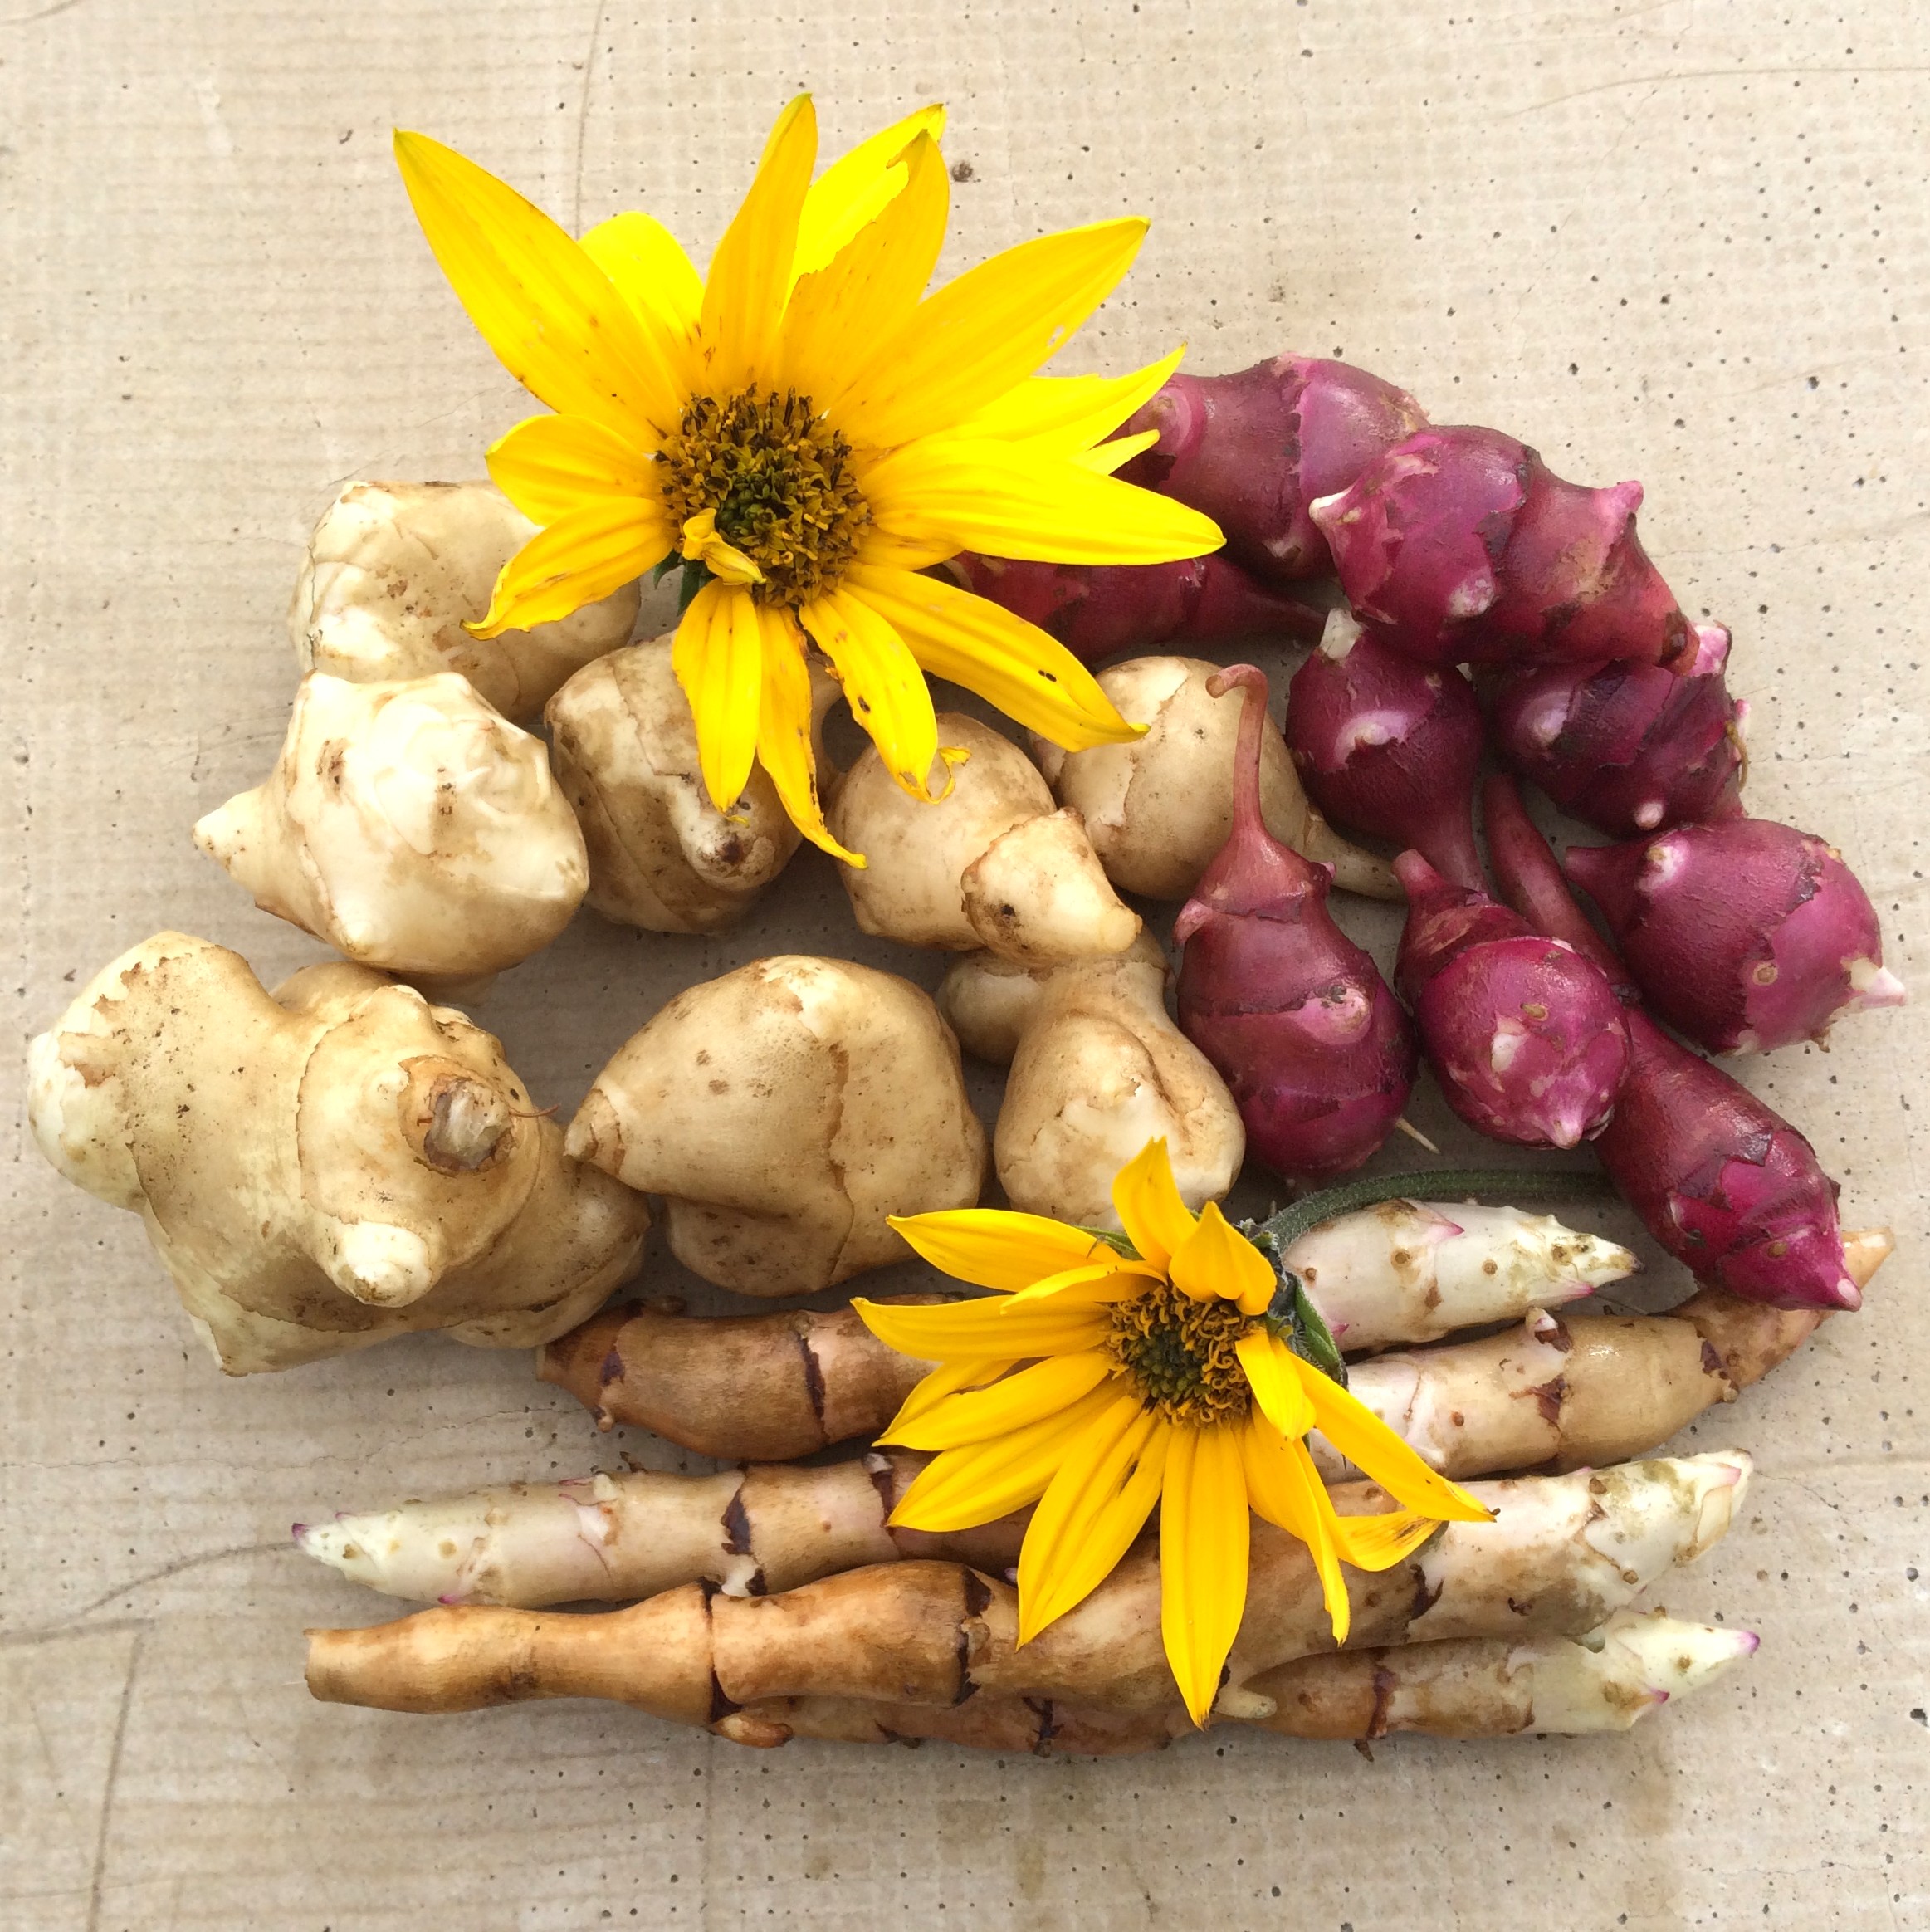
Choosing the Right Variety for Your Climate
When it comes to growing Jerusalem artichokes, selecting the right variety is crucial for a successful harvest. With over 20 different varieties to choose from, each with its unique growth habits and characteristics, it’s essential to choose a variety that is well-suited to your climate and region. Some popular varieties include ‘Mammoth White’, ‘Red Fuseau’, and ‘Violet de Rennes’, each with its own strengths and weaknesses. For example, ‘Mammoth White’ is a popular choice for its high yield and tolerance to cold temperatures, while ‘Red Fuseau’ is prized for its sweet, nutty flavor. Understanding the specific growing requirements of each variety, including their maturity days, sun requirements, and soil preferences, will help you make an informed decision and ensure a bountiful harvest. By choosing the right variety, you’ll be one step closer to learning how to grow Jerusalem artichokes that thrive in your local climate.
Preparing the Soil for Optimal Growth
Before planting Jerusalem artichokes, it’s essential to prepare the soil to ensure optimal growth. Jerusalem artichokes prefer well-draining, fertile soil with a pH between 6.0 and 7.0. To achieve this, start by testing the pH level of your soil and adjusting it if necessary. Add organic matter such as compost or well-rotted manure to improve soil structure and fertility. A mix of 2/3 topsoil, 1/3 compost, and a handful of perlite or vermiculite will provide the ideal growing conditions. Additionally, Jerusalem artichokes are heavy feeders and will benefit from regular fertilization. Understanding how to prepare the soil is a crucial step in learning how to grow Jerusalem artichokes that thrive. By providing the right soil conditions, you’ll be well on your way to a bountiful harvest.

How to Plant Jerusalem Artichokes for Maximum Yield
Planting Jerusalem artichokes is a straightforward process that requires some planning and attention to detail. To get started, choose a location that receives full sun to partial shade and has well-draining soil. Jerusalem artichokes can be planted in the spring or fall, depending on your climate. In areas with mild winters, fall planting is recommended, while in colder climates, spring planting is best. When planting, dig a trench that is 6-8 inches deep and 3-4 inches wide. Place the tubers in the trench, spacing them 12-18 inches apart, and cover with 2-3 inches of soil. As the plants grow, add more soil to the trench, leaving only a few inches of the leaves exposed. Understanding how to plant Jerusalem artichokes correctly is crucial for a successful harvest. By following these steps, you’ll be well on your way to learning how to grow Jerusalem artichokes that thrive. Remember, proper planting is key to maximizing your yield and enjoying a bountiful harvest.

Watering and Mulching Strategies for Healthy Growth
Consistent moisture levels are crucial for healthy Jerusalem artichoke growth. Aim to provide about 1 inch of water per week, either through rainfall or irrigation. It’s essential to avoid overwatering, which can lead to rot and other diseases. When watering, use a soaker hose or drip irrigation to deliver water directly to the roots, reducing evaporation and runoff. Mulching is another key strategy for promoting healthy growth. Apply a 2-3 inch layer of organic mulch, such as straw or wood chips, around the base of the plants. This will help retain moisture, suppress weeds, and regulate soil temperature. As you learn how to grow Jerusalem artichokes, you’ll find that proper watering and mulching are critical components of a successful harvest. By following these strategies, you’ll be well on your way to growing delicious and nutritious sunchokes.
Nourishing Your Sunchokes: Fertilization and Pest Management
Fertilizing Jerusalem artichokes is essential for promoting healthy growth and maximizing yields. A balanced fertilizer with a ratio of 10-10-10 (nitrogen-phosphorus-potassium) is ideal for sunchokes. Apply the fertilizer at planting time, and again when the plants are about 6 inches tall. Additionally, consider adding organic matter such as compost or well-rotted manure to the soil to provide slow-release nutrients. When it comes to pest management, Jerusalem artichokes are relatively low-maintenance. However, they can be susceptible to pests like aphids, slugs, and snails. To manage these pests, use organic control methods such as neem oil, diatomaceous earth, or copper tape. Regularly inspect your plants for signs of infestation, and take action promptly to prevent the pests from spreading. By following these fertilization and pest management strategies, you’ll be well on your way to growing thriving Jerusalem artichokes. Remember, understanding how to grow Jerusalem artichokes requires attention to detail and a commitment to providing optimal growing conditions.

Supporting Tall Stems and Encouraging Blooming
Jerusalem artichokes can grow quite tall, often reaching heights of 6-10 feet. To prevent them from toppling over in the wind, provide support using stakes or a trellis. This will also help to keep the plants upright and encourage better air circulation, reducing the risk of disease. Additionally, supporting the stems will make it easier to harvest the tubers, as they will be more accessible. To encourage blooming and seed production, make sure to provide full sun and well-draining soil. Jerusalem artichokes typically bloom in late summer to early fall, producing small, yellowish flowers. Allow the flowers to bloom and go to seed, as this will help to propagate new plants and increase yields. By understanding how to grow Jerusalem artichokes and providing the necessary support, you can enjoy a bountiful harvest of delicious and nutritious sunchokes. Remember, with proper care and attention, Jerusalem artichokes can thrive and provide a sustainable source of food for years to come.
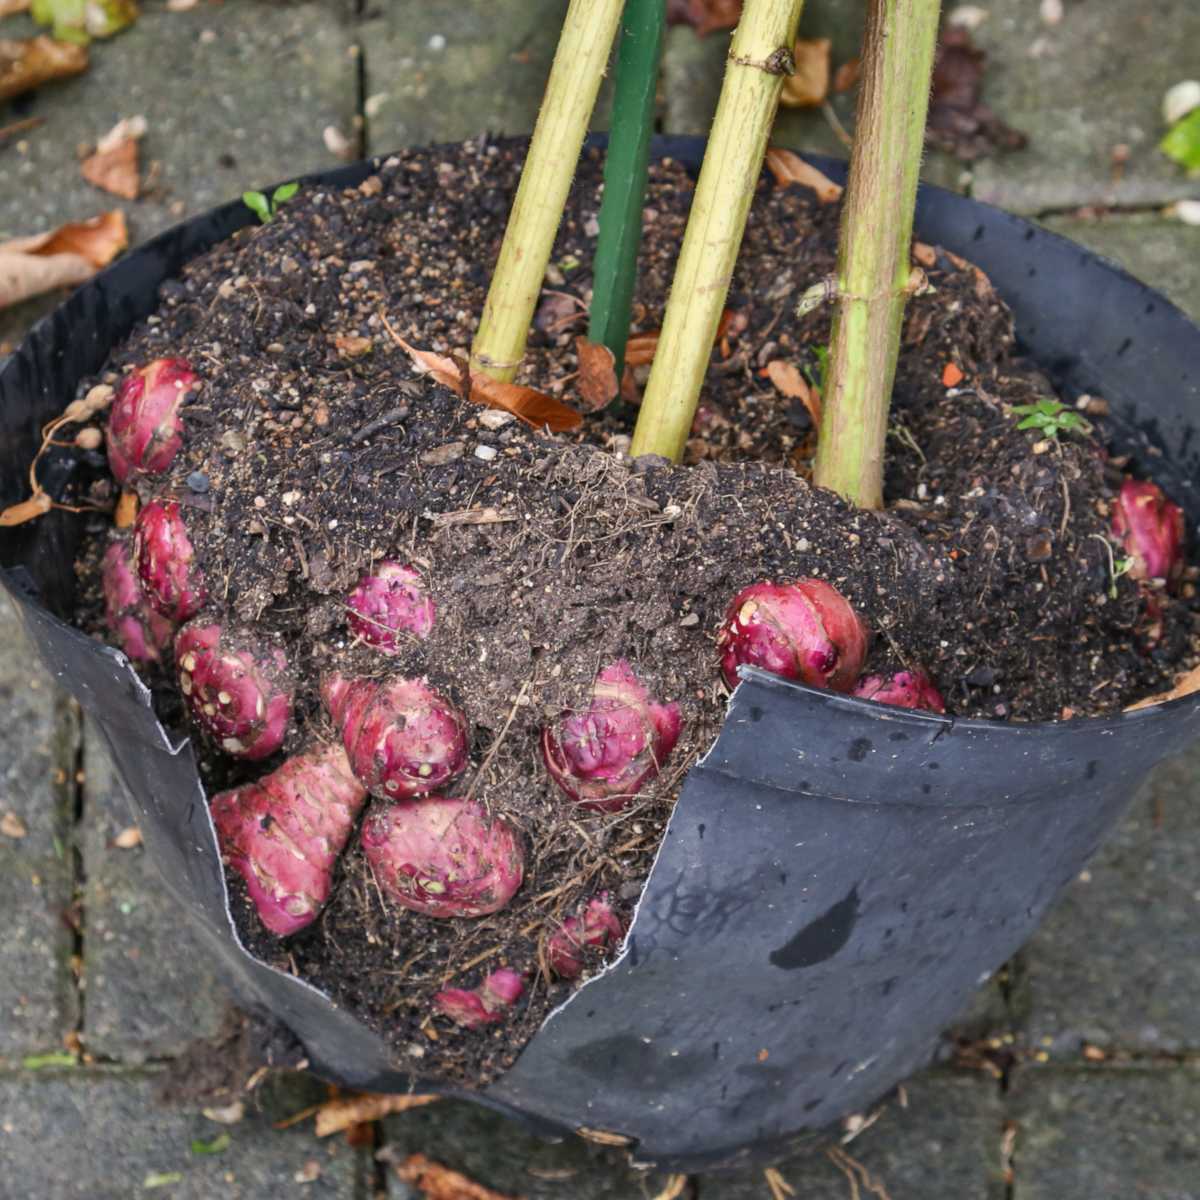
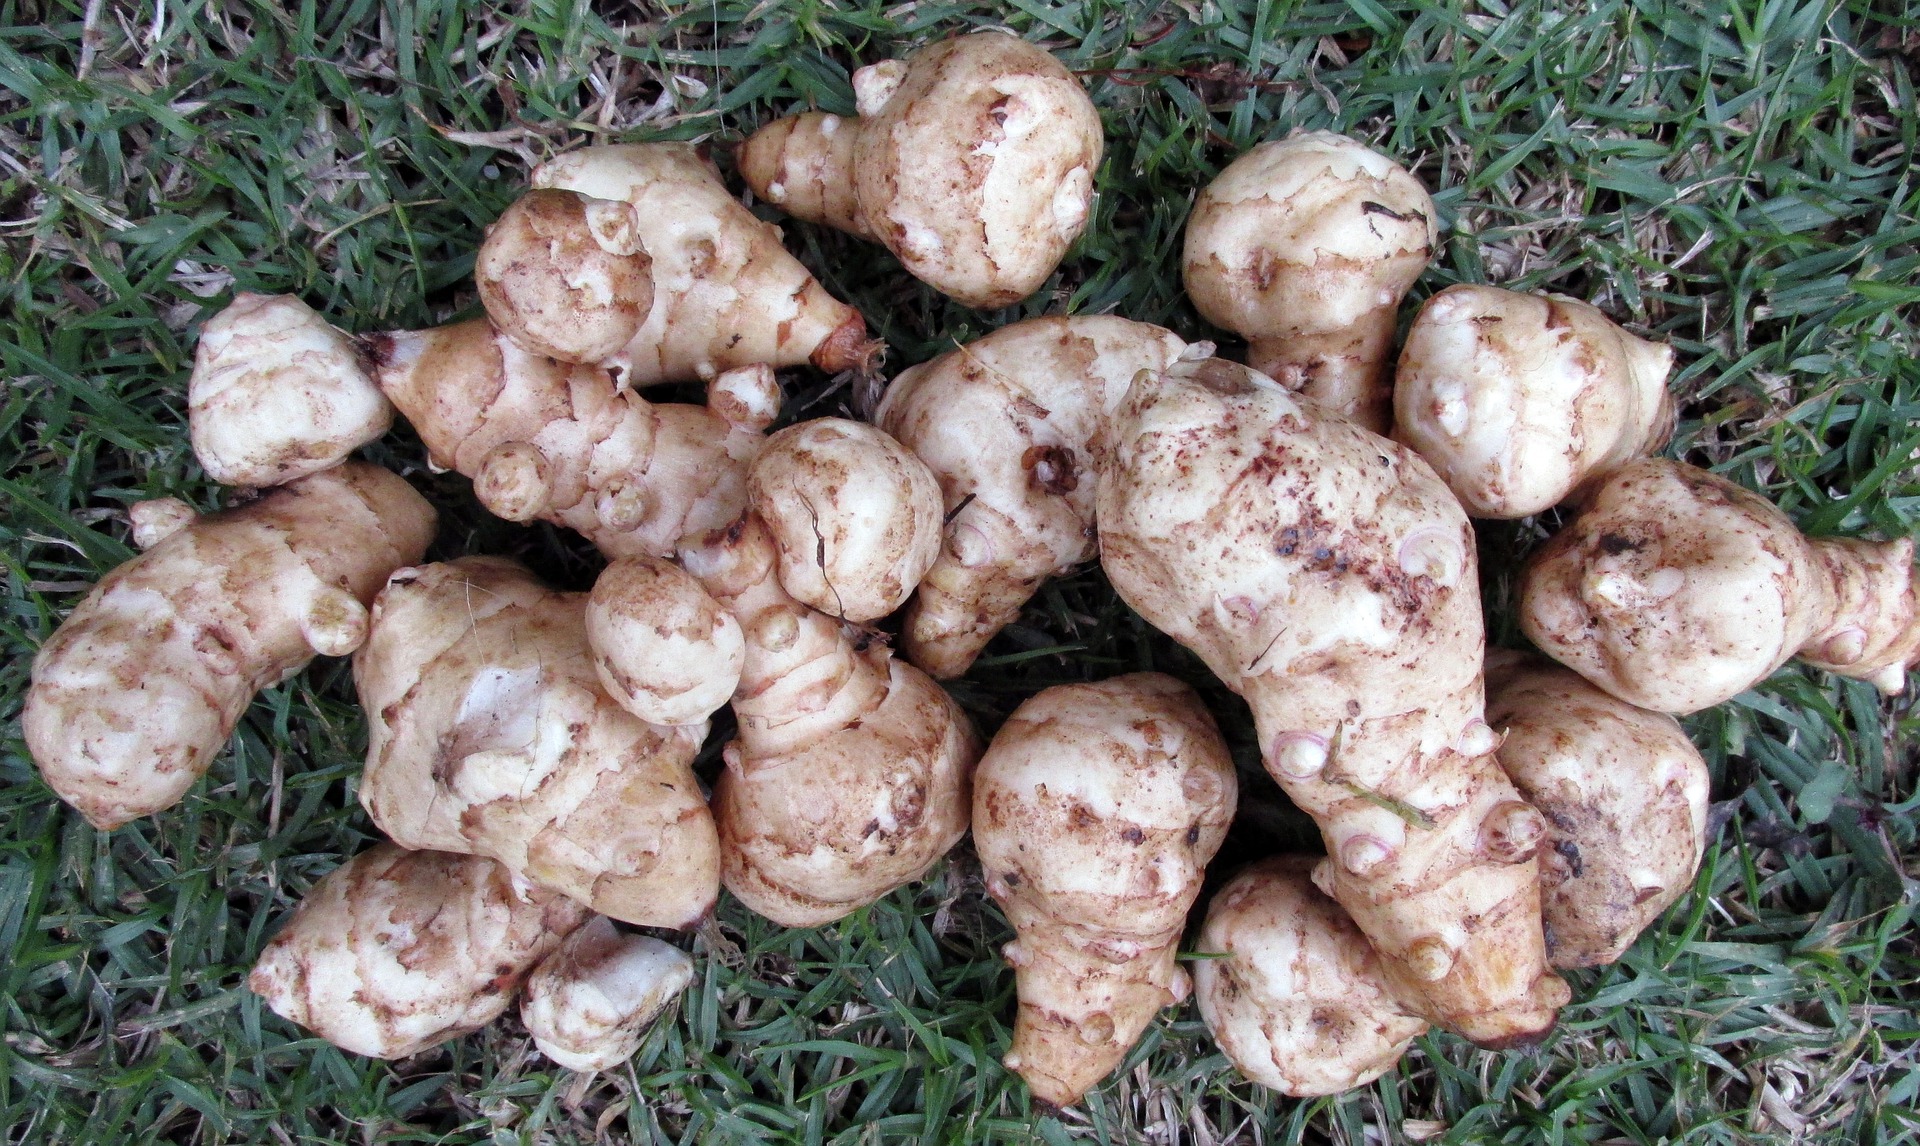
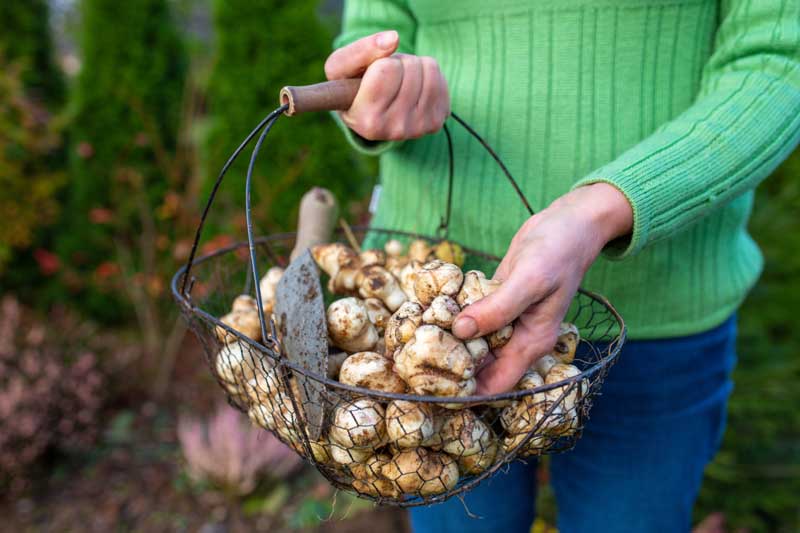
Harvesting and Storing Jerusalem Artichokes for Year-Round Enjoyment
Jerusalem artichokes are ready to harvest when the tops of the plants begin to yellow and fall over, usually around 3-4 months after planting. Carefully dig up the tubers, making sure not to damage them. Use a fork to gently loosen the soil around the tubers, and then lift them out of the ground. Wash the tubers thoroughly to remove any dirt or debris. To store Jerusalem artichokes, keep them in a cool, dark place with good ventilation. They can be stored in a paper bag, breathable container, or even in the ground in a cold frame. Make sure to keep them away from direct sunlight and moisture. Jerusalem artichokes can be stored for several months, providing a delicious and nutritious source of food throughout the year. By understanding how to grow Jerusalem artichokes and following these harvesting and storage tips, you can enjoy a bountiful harvest of sunchokes all year round. Remember, with proper care and attention, Jerusalem artichokes can thrive and provide a sustainable source of food for years to come.