Why Cactus Cuttings are a Great Way to Multiply Your Favorite Succulents
For succulent enthusiasts, propagating cacti through cuttings is an exciting way to share plants with friends, create new varieties, and increase the number of plants in their collection. By learning how to plant a cactus cutting, individuals can enjoy the benefits of plant multiplication without the need for seeds or extensive gardening experience. This method of propagation is particularly useful for cacti, as it allows for the creation of new plants with the same characteristics as the parent plant. With a little patience and care, anyone can successfully plant a cactus cutting and enjoy the rewards of nurturing a new succulent.
One of the main advantages of using cactus cuttings for propagation is the ability to reproduce plants quickly and efficiently. Unlike seed propagation, which can be a lengthy and unpredictable process, cuttings can be rooted and grown into mature plants in a relatively short period. This makes it an ideal method for succulent enthusiasts who want to rapidly expand their collection or share plants with others. Additionally, cactus cuttings can be taken from a variety of sources, including mature plants, offsets, and even damaged or broken segments.
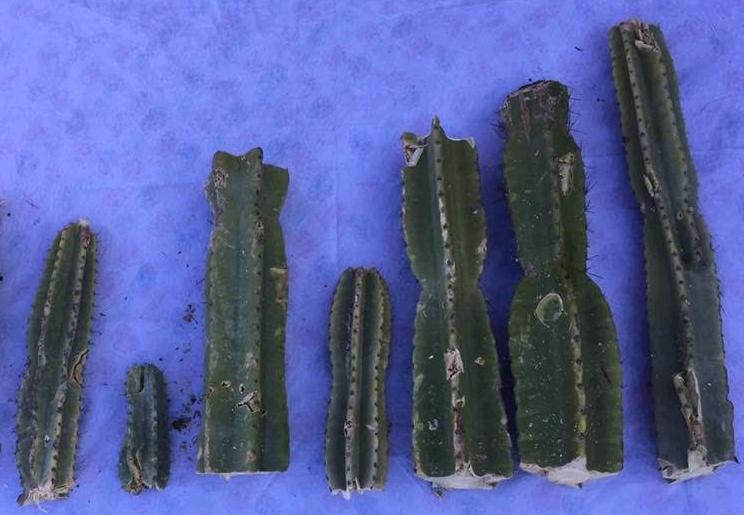
When it comes to selecting a cactus cutting for propagation, it’s essential to choose a healthy segment with the potential for successful rooting. Look for cuttings with a sturdy stem, vibrant color, and a robust texture. Avoid taking cuttings from weak or damaged plants, as they may not have the necessary energy reserves to support new growth. By selecting a healthy cutting and following proper propagation techniques, individuals can increase their chances of success and enjoy the rewards of growing a new succulent.
Choosing the Right Cactus Cutting: What to Look for in a Healthy Segment
When it comes to selecting a cactus cutting for propagation, it’s essential to choose a healthy segment with the potential for successful rooting. A healthy cactus cutting should have a sturdy stem, vibrant color, and a robust texture. One of the key characteristics to look for is the presence of areoles, which are the small, round areas on the stem where the spines and flowers emerge. Areoles are a sign of a healthy, actively growing plant, and they play a crucial role in the rooting process.
In addition to the presence of areoles, the color and texture of the stem are also important indicators of a healthy cactus cutting. A healthy stem should be firm and slightly flexible, with a vibrant green or blue-green color. Avoid cuttings with soft, mushy, or discolored stems, as these can be signs of rot or disease. It’s also essential to inspect the cutting for any signs of pests or diseases, such as mealybugs, spider mites, or fungal infections.
When selecting a cactus cutting, it’s also important to consider the size and shape of the segment. A cutting that is too small may not have enough energy reserves to support new growth, while a cutting that is too large may be more difficult to root. Aim for a cutting that is around 3-6 inches long, with a diameter of around 1-2 inches. This will provide the best balance between energy reserves and rooting potential.
By choosing a healthy cactus cutting with the right characteristics, you can increase your chances of success when planting a cactus cutting. Remember to handle the cutting carefully, as it can be easily damaged, and make sure to follow proper propagation techniques to give your new plant the best start in life.
Preparing the Cactus Cutting for Planting: Tips for Success
Once you have selected a healthy cactus cutting, it’s essential to prepare it for planting. This involves allowing the cutting to dry out for a few days to form a callus, removing any weak or damaged segments, and treating the cutting with a rooting hormone. By following these steps, you can increase the chances of successful rooting and give your new plant the best start in life.
The first step in preparing the cactus cutting is to allow it to dry out for a few days. This will help to form a callus over the cut end of the stem, which will protect the plant from infection and promote rooting. Place the cutting in a warm, dry location, such as a sunny windowsill or a propagation tray, and allow it to dry out for 3-5 days.
After the cutting has dried out, inspect it for any weak or damaged segments. Remove any segments that are soft, mushy, or discolored, as these can be signs of rot or disease. Use a sharp, sterile knife or pruning tool to make clean cuts, and make sure to disinfect the tool between cuts to prevent the spread of disease.
Once you have removed any weak or damaged segments, treat the cutting with a rooting hormone. This will help to stimulate root growth and increase the chances of successful rooting. Dip the cut end of the stem into the rooting hormone powder or liquid, following the instructions on the label for the recommended application rate.
By following these steps, you can prepare your cactus cutting for planting and give it the best chance of success. Remember to handle the cutting carefully, as it can be easily damaged, and make sure to follow proper propagation techniques to give your new plant the best start in life. When you’re ready to plant the cutting, make sure to choose a well-draining potting mix and a container that is suitable for cacti.
Selecting the Right Soil and Container for Your Cactus Cutting
When it comes to planting a cactus cutting, the right soil and container can make all the difference in the success of the propagation. Cacti and succulents have unique soil requirements, and using a well-draining potting mix specifically designed for these plants is essential. A good potting mix should be able to retain moisture but also drain excess water quickly, preventing waterlogged soil that can lead to root rot.
A shallow pot is also recommended for planting cactus cuttings. Cacti have a shallow root system, and a shallow pot will allow the roots to grow and spread out without becoming waterlogged. A pot that is too deep can cause the soil to become too wet, leading to root rot and other problems. Look for a pot that is specifically designed for cacti and succulents, with good drainage holes to prevent water from accumulating in the soil.
In addition to the right potting mix and container, it’s also important to consider the size of the pot. A pot that is too small can cause the soil to dry out too quickly, while a pot that is too large can cause the soil to become too wet. A good rule of thumb is to choose a pot that is only slightly larger than the cactus cutting itself. This will allow the roots to grow and spread out without becoming too wet or too dry.
Some popular potting mixes for cacti and succulents include those that are specifically designed for these plants, such as Miracle-Gro Cactus, Palm & Succulent Potting Mix or Black Gold Cactus Mix. These potting mixes are designed to provide the right balance of moisture and drainage for cacti and succulents, and can help to ensure the success of your propagation.
By choosing the right soil and container for your cactus cutting, you can give it the best chance of success and help it to grow and thrive. Remember to handle the cutting carefully, and make sure to follow proper propagation techniques to give your new plant the best start in life.
Planting the Cactus Cutting: A Step-by-Step Guide
Now that you have prepared the cactus cutting and selected the right soil and container, it’s time to plant the cutting. Planting a cactus cutting is a relatively simple process, but it does require some care and attention to detail. Here’s a step-by-step guide on how to plant a cactus cutting:
Step 1: Fill the container with the well-draining potting mix, leaving about 1-2 inches of space at the top. This will allow for easy watering and prevent the soil from becoming too wet.
Step 2: Gently remove the cactus cutting from its wrapping or container, taking care not to damage the roots or the stem.
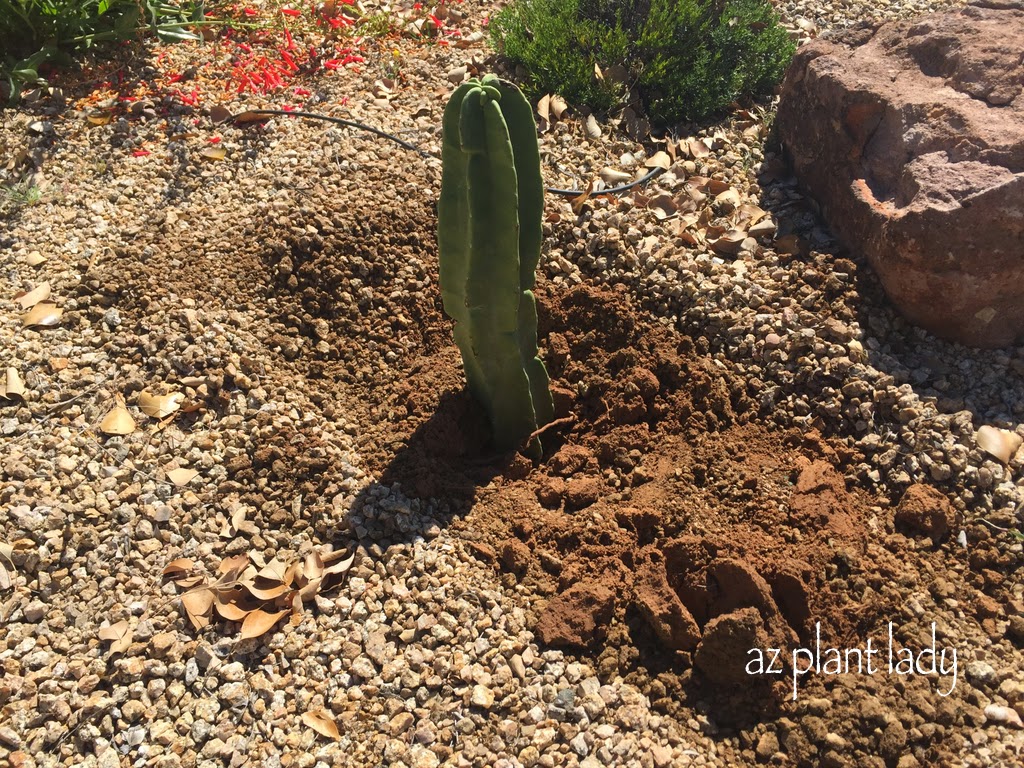
Step 3: Place the cactus cutting in the container, making sure that the base of the stem is level with the soil surface. If necessary, gently firm the soil around the base of the stem to secure it in place.
Step 4: Water the soil gently but thoroughly, making sure that the soil is moist but not waterlogged. This will help to settle the soil and provide enough moisture for the cutting to establish itself.
Step 5: Place the container in a bright, sunny location, but not in direct sunlight. Cacti prefer bright, indirect light, especially when they are newly planted.
Step 6: Water the cactus cutting sparingly over the next few weeks, making sure that the soil is kept moist but not waterlogged. As the cutting establishes itself, you can gradually increase the frequency of watering.
By following these steps, you can successfully plant a cactus cutting and give it the best chance of establishing itself and growing into a healthy, thriving plant. Remember to be patient and provide the right care and attention, and you will be rewarded with a beautiful and unique new plant.
Caring for Your Newly Planted Cactus Cutting: Tips for Success
Caring for a newly planted cactus cutting requires attention to its watering, lighting, and nutrient needs. To ensure the cutting establishes itself and grows into a healthy plant, follow these tips:
Lighting: Cacti prefer bright, indirect light, especially when they are newly planted. Place the cutting in a sunny location, but not in direct sunlight, which can cause the soil to become too hot and dry out the cutting.
Watering: Water the cutting sparingly, making sure the soil is moist but not waterlogged. Overwatering can lead to root rot, while underwatering can cause the cutting to dry out and die. Water the cutting when the top inch of soil feels dry to the touch.
Nutrients: Feed the cutting with a balanced, water-soluble fertilizer during the growing season (spring and summer). Dilute the fertilizer to half the recommended strength to avoid burning the roots.
Temperature: Keep the cutting in a location with a consistent temperature between 65-75°F (18-24°C). Avoid placing the cutting near heating or cooling vents, fireplaces, or drafty windows.
Pest control: Check the cutting regularly for pests, such as mealybugs, spider mites, and scale. If you notice any pests, treat the cutting with insecticidal soap or neem oil according to the product’s instructions.
Monitoring: Keep an eye on the cutting’s progress, watching for signs of stress, disease, or pests. If you notice any problems, take action promptly to prevent the issue from becoming more serious.
By following these care tips, you can help your newly planted cactus cutting establish itself and grow into a healthy, thriving plant. Remember to be patient, as cacti can take time to mature and produce flowers.
Common Mistakes to Avoid When Planting Cactus Cuttings
When planting cactus cuttings, there are several common mistakes to avoid in order to ensure the success of the propagation. Here are some of the most common mistakes to watch out for:
Overwatering: One of the most common mistakes when planting cactus cuttings is overwatering. Cacti are adapted to dry conditions and can be susceptible to root rot if the soil is too moist. Make sure to water the cutting sparingly, allowing the soil to dry out completely between waterings.
Underwatering: On the other hand, underwatering can also be a problem when planting cactus cuttings. If the soil is too dry, the cutting may not be able to establish itself properly. Make sure to water the cutting regularly, but avoid getting the soil too wet.
Extreme Temperatures: Cacti are sensitive to extreme temperatures, so make sure to avoid placing the cutting in a location that is too hot or too cold. Most cacti prefer daytime temperatures between 65-75°F (18-24°C) and nighttime temperatures around 55-65°F (13-18°C).
Incorrect Soil: Using the wrong type of soil can also be a mistake when planting cactus cuttings. Make sure to use a well-draining potting mix that is specifically designed for cacti and succulents.
Insufficient Light: Cacti need bright, indirect light to photosynthesize and grow. Make sure to place the cutting in a location that receives plenty of light, but avoid direct sunlight which can cause the soil to become too hot.
By avoiding these common mistakes, you can increase the chances of success when planting a cactus cutting. Remember to be patient and provide the right care and attention, and you will be rewarded with a beautiful and thriving new plant.
Conclusion: With a Little Care and Patience, You Can Successfully Plant a Cactus Cutting
Planting a cactus cutting can be a rewarding experience, especially when done correctly. By following the steps outlined in this article, you can increase your chances of success and enjoy the benefits of propagating your favorite succulents. Remember to choose a healthy cutting, prepare it properly, and provide the right care and attention. With a little patience and care, you can successfully plant a cactus cutting and enjoy a beautiful and thriving new plant.
Whether you’re a seasoned succulent enthusiast or just starting out, planting a cactus cutting is a great way to multiply your favorite plants and share them with friends. By following the tips and guidelines outlined in this article, you can ensure the success of your propagation and enjoy the many benefits of growing cacti and succulents.
So why not give it a try? With a little care and patience, you can successfully plant a cactus cutting and enjoy a beautiful and thriving new plant. Happy planting!


