Choosing the Right Sedum Variety for Your Garden
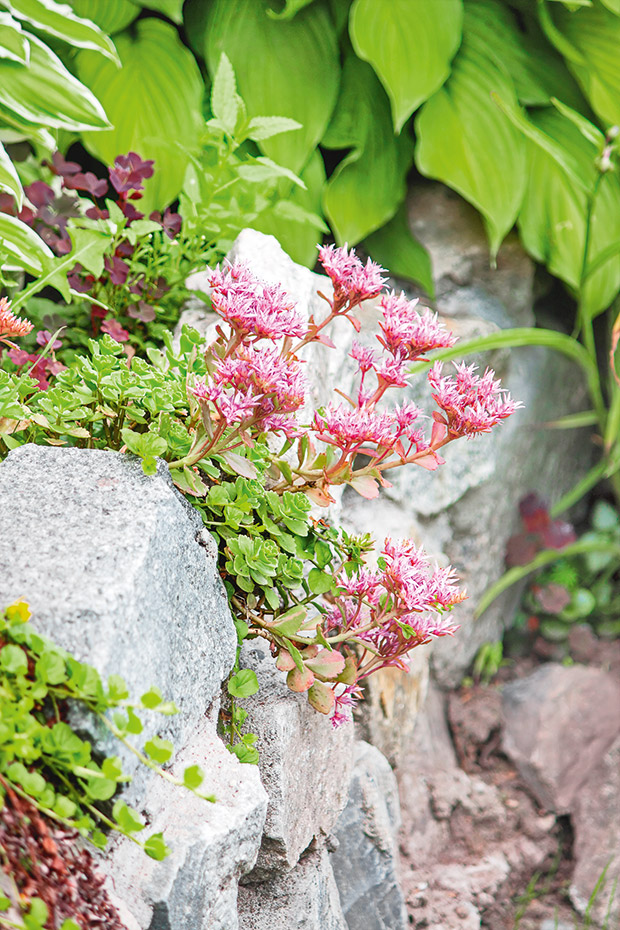
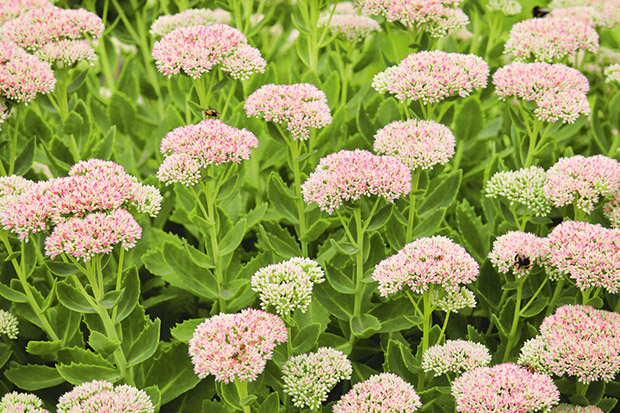
When it comes to planting sedum, selecting the right variety for your garden is crucial for success. With over 400 species of sedum, it can be overwhelming to choose the perfect one. However, by understanding the different types of sedum, you can make an informed decision that suits your climate and garden conditions. Tall sedum, also known as upright sedum, is ideal for adding height and structure to your garden. Creeping sedum, on the other hand, is perfect for ground cover and can thrive in poor soil. Trailing sedum is great for hanging baskets and containers, adding a beautiful cascade of foliage. When selecting a sedum variety, consider factors such as growth rate, leaf color, and hardiness zone. By choosing the right sedum variety, you’ll be well on your way to creating a thriving and beautiful garden. Remember, understanding how to plant sedum is just the first step – selecting the right variety is key to long-term success.
Preparing the Soil for Sedum Planting
Before learning how to plant sedum, it’s essential to prepare the soil to ensure optimal growth and health. Sedum plants thrive in well-draining soil, which prevents waterlogged soil conditions that can lead to root rot. To prepare the soil, start by testing its pH level. Sedum plants prefer a slightly acidic to neutral soil pH, ranging from 6.0 to 7.0. If your soil is too alkaline, add elemental sulfur or peat moss to lower the pH. Next, assess the nutrient levels in your soil. Sedum plants require minimal fertilization, but a balanced fertilizer applied during the growing season can promote healthy growth. Finally, incorporate organic matter such as compost or well-rotted manure into the soil to improve its structure and drainage. By following these steps, you’ll be able to create a well-draining soil environment that’s perfect for sedum plants. Remember, proper soil preparation is crucial when learning how to plant sedum, as it sets the foundation for a thriving and healthy plant.
How to Plant Sedum: A Step-by-Step Guide
Now that you’ve prepared the soil, it’s time to learn how to plant sedum. Follow these simple steps to ensure a successful planting experience. First, choose a location with well-draining soil and full sun to partial shade, depending on the sedum variety. Next, dig a hole that is twice as wide and just as deep as the sedum plant‘s root ball. Gently remove the sedum plant from its container and loosen the roots to encourage growth. Place the sedum plant in the hole, making sure the soil level is the same as it was in the container. Fill the hole with soil, gently firming it around the roots to prevent air pockets. Water the sedum plant thoroughly after planting, and continue to keep the soil consistently moist during the first few weeks. When learning how to plant sedum, it’s essential to remember that proper spacing is crucial. Plant sedum varieties 6-12 inches apart, depending on their mature size. By following these steps, you’ll be able to enjoy the beautiful, low-maintenance benefits of sedum plants in your garden.
Tips for Watering and Caring for Your Sedum Plants
After learning how to plant sedum, it’s essential to understand how to properly care for your sedum plants. Watering is a critical aspect of sedum care, as these plants are susceptible to root rot if the soil is too moist. Water your sedum plants sparingly, allowing the soil to dry out completely between waterings. The frequency of watering will depend on the climate and soil type, but as a general rule, sedum plants require about 1 inch of water per week. When watering, make sure to water at the base of the plant, avoiding the leaves to prevent fungal diseases. In addition to watering, fertilizing is also crucial for healthy sedum growth. Feed your sedum plants with a balanced fertilizer during the growing season, and prune them regularly to maintain shape and encourage new growth. Pruning also helps to prevent pest infestations, such as mealybugs and spider mites. By following these simple tips, you’ll be able to enjoy the beautiful, low-maintenance benefits of sedum plants in your garden.
Common Mistakes to Avoid When Planting Sedum
When learning how to plant sedum, it’s essential to be aware of common mistakes that can lead to poor growth or even plant death. One of the most critical mistakes is overwatering, which can cause root rot and other problems. To avoid this, make sure to water sparingly, allowing the soil to dry out completely between waterings. Underwatering is also a common mistake, especially during the first few weeks after planting. Keep the soil consistently moist during this period to ensure the sedum plant establishes a strong root system. Inadequate soil preparation is another mistake to avoid. Sedum plants require well-draining soil, so make sure to add organic matter and perlite to the soil to improve its structure. Additionally, failing to provide enough sunlight can hinder sedum growth. Most sedum varieties require at least 6 hours of direct sunlight per day, so choose a location that receives sufficient sunlight. By avoiding these common mistakes, you’ll be able to enjoy the beautiful, low-maintenance benefits of sedum plants in your garden.
Creating a Sedum-Friendly Environment: Sun, Shade, and Temperature
When learning how to plant sedum, it’s essential to understand the ideal growing conditions for these plants. Sedum plants require full sun to partial shade, depending on the variety. Most sedum plants thrive in areas that receive at least 6 hours of direct sunlight per day, but some varieties can tolerate partial shade. When choosing a location for your sedum plants, consider the amount of sunlight the area receives and select a variety that matches those conditions. In addition to sunlight, sedum plants also require well-draining soil and moderate temperatures. Most sedum plants prefer temperatures between 65°F and 75°F (18°C and 24°C), but some varieties can tolerate extreme temperatures. To create a sedum-friendly environment, choose a location with good air circulation to prevent fungal diseases, and avoid planting in low-lying areas where water may collect. By providing the right growing conditions, you’ll be able to enjoy the beautiful, low-maintenance benefits of sedum plants in your garden. For example, if you’re wondering how do you plant sedum in a hot and sunny area, choose a variety that’s tolerant of high temperatures and provide extra watering during the hottest months. With the right environment, your sedum plants will thrive and provide beauty and interest to your garden.
Pest and Disease Control for Sedum Plants
When learning how to plant sedum, it’s essential to be aware of common pests and diseases that can affect these plants. Sedum plants are generally low-maintenance and resistant to many pests and diseases, but they can still be susceptible to certain issues. One common pest that affects sedum plants is mealybugs, which can cause white, cottony patches to appear on the leaves and stems. To control mealybugs, spray the plants with insecticidal soap or neem oil. Another common pest is spider mites, which can cause yellowing or bronzing of the leaves. To control spider mites, spray the plants with water or insecticidal soap. Root rot is a common disease that affects sedum plants, especially if the soil is too moist. To prevent root rot, ensure the soil is well-draining and avoid overwatering. If root rot does occur, remove the affected roots and repot the plant in fresh, well-draining soil. By being aware of these common pests and diseases, you can take steps to prevent and control them, ensuring your sedum plants remain healthy and thriving. For example, if you’re wondering how do you plant sedum in an area with high humidity, take extra precautions to prevent root rot by using a well-draining potting mix and avoiding overwatering. With proper care and attention, your sedum plants will remain pest- and disease-free, providing beauty and interest to your garden.
Propagation and Division: Expanding Your Sedum Collection
Once you’ve learned how to plant sedum and have a thriving collection, you may want to expand your sedum family. Sedum plants are easily propagated and divided, making it simple to increase your collection and share plants with friends. One way to propagate sedum is through leaf cuttings. Simply twist or cut off a healthy leaf from the mother plant, allowing it to dry for a few days to form a callus. Then, plant the leaf in well-draining soil and water sparingly until roots develop. Stem cuttings are another option, where you cut a section of stem from the mother plant, remove lower leaves, and plant it in soil. Division is also a great way to expand your sedum collection. Dig up the entire plant, gently separating the roots and replanting the separated sections in new soil. When dividing sedum plants, make sure each section has at least one “eye” or growing point to ensure successful growth. By propagating and dividing your sedum plants, you can quickly increase your collection and enjoy the beauty of these low-maintenance plants in your garden. For example, if you’re wondering how do you plant sedum in a large container, consider dividing a mature sedum plant and replanting the sections in the container. With proper care, your new sedum plants will thrive and provide beauty and interest to your garden.


:max_bytes(150000):strip_icc()/growing-sedum-showy-stonecrop-1402861-04-a1526d15809d4b08b2d047cd7b547ae1.jpg)

