Why Repotting is Crucial for Orchid Health
Orchids require regular repotting to maintain optimal health and prevent common problems like root bound and nutrient deficiencies. Fresh potting media provides a clean slate for the roots to grow, allowing the orchid to absorb essential nutrients and water more efficiently. Moreover, repotting allows for improved drainage, which is critical for orchids, as they are prone to root rot if the potting media is too dense or waterlogged. By repotting, orchid enthusiasts can ensure their plants receive the necessary oxygen and nutrients to promote healthy growth and blooming. In fact, understanding how often to repot orchids is essential to maintaining their overall health and preventing common problems. By repotting at the right frequency, orchid enthusiasts can take the necessary steps to provide their plants with the best possible care.
Signs Your Orchid Needs a New Home
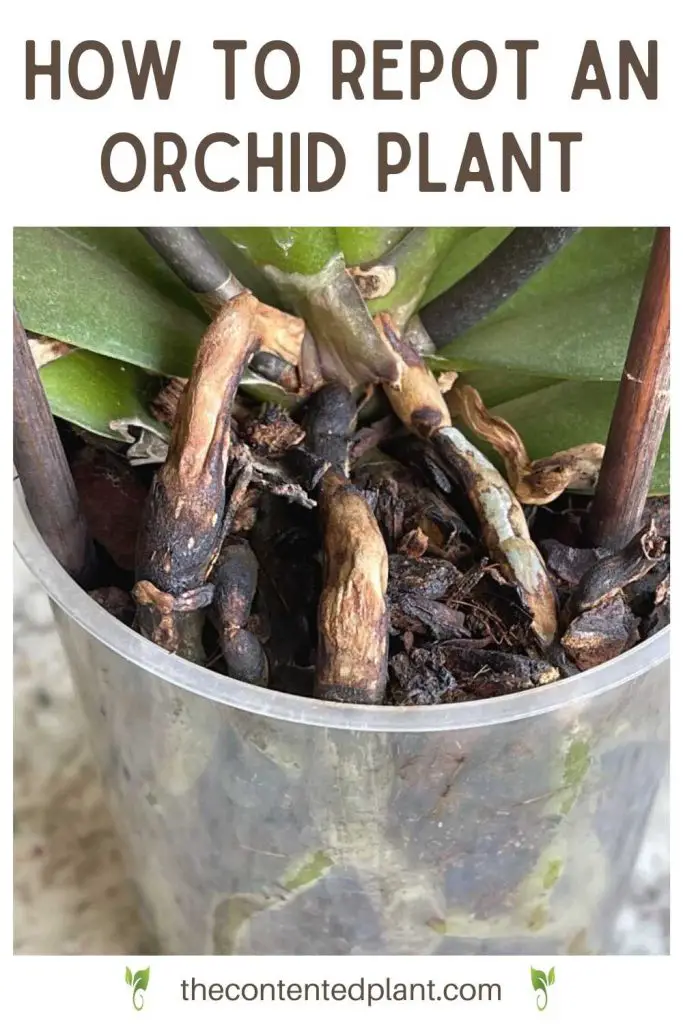
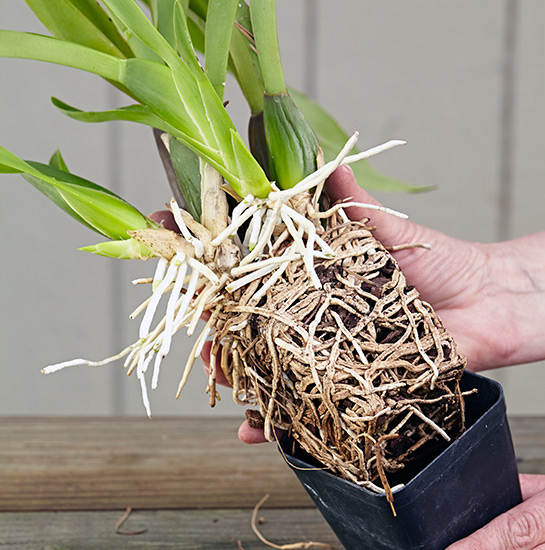
Orchids often exhibit subtle signs that indicate they need to be repotted. One of the most common signs is slow growth, which can be a result of the orchid outgrowing its pot or the potting media breaking down. Yellowing leaves or stems can also be a sign that the orchid needs to be repotted, as this can indicate that the roots are rotting due to waterlogged potting media. Other signs may include visible roots growing out of the pot, a decrease in flowering, or a soft and mushy stem. If you notice any of these signs, it’s likely that your orchid needs to be repotted to provide it with fresh potting media and a larger pot to accommodate its growth. By recognizing these signs, you can take action to repot your orchid and provide it with the best possible care. Remember, understanding how often to repot orchids is crucial to maintaining their health and preventing common problems.
How to Determine the Right Repotting Frequency
Determining the right repotting frequency for orchids is crucial to maintaining their health and promoting optimal growth. The frequency of repotting depends on several factors, including the type of orchid, potting media, and growing conditions. For example, orchids that grow rapidly, such as Phalaenopsis, may need to be repotted every 6-12 months, while slower-growing orchids, like Cattleya, may only need to be repotted every 2-3 years. The quality of the potting media also plays a significant role, as high-quality media can last longer than low-quality media. Additionally, growing conditions, such as temperature, humidity, and light, can affect the frequency of repotting. Understanding how often to repot orchids is essential to providing them with the best possible care. By considering these factors, orchid enthusiasts can determine the right repotting frequency for their plants and ensure they receive the necessary care to thrive.
The Role of Potting Media in Orchid Repotting
Choosing the right potting media is a critical aspect of orchid repotting. Orchids require well-draining media that allows for good aeration and moisture retention. Regular potting soil is not suitable for orchids, as it can retain too much water and cause root rot. Instead, orchid enthusiasts should opt for media specifically designed for orchids, such as sphagnum moss, fir bark, or a combination of both. These media provide excellent drainage, allowing the roots to breathe and absorb the necessary nutrients. When selecting a potting media, it’s essential to consider the type of orchid, as some species have specific requirements. For example, Phalaenopsis orchids prefer a more moisture-retentive media, while Cattleya orchids require a well-draining media. By choosing the right potting media, orchid enthusiasts can ensure their plants receive the necessary care to thrive. Remember, understanding how often to repot orchids and using the right potting media are crucial to maintaining their health and promoting optimal growth.
A Step-by-Step Guide to Repotting Your Orchid
Repotting an orchid can seem like a daunting task, but with the right guidance, it can be a straightforward process. Here’s a step-by-step guide to help you repot your orchid with confidence:
Step 1: Prepare the New Pot – Choose a pot that is slightly larger than the previous one, and make sure it has good drainage holes. Sterilize the pot with soap and water to prevent the spread of disease.
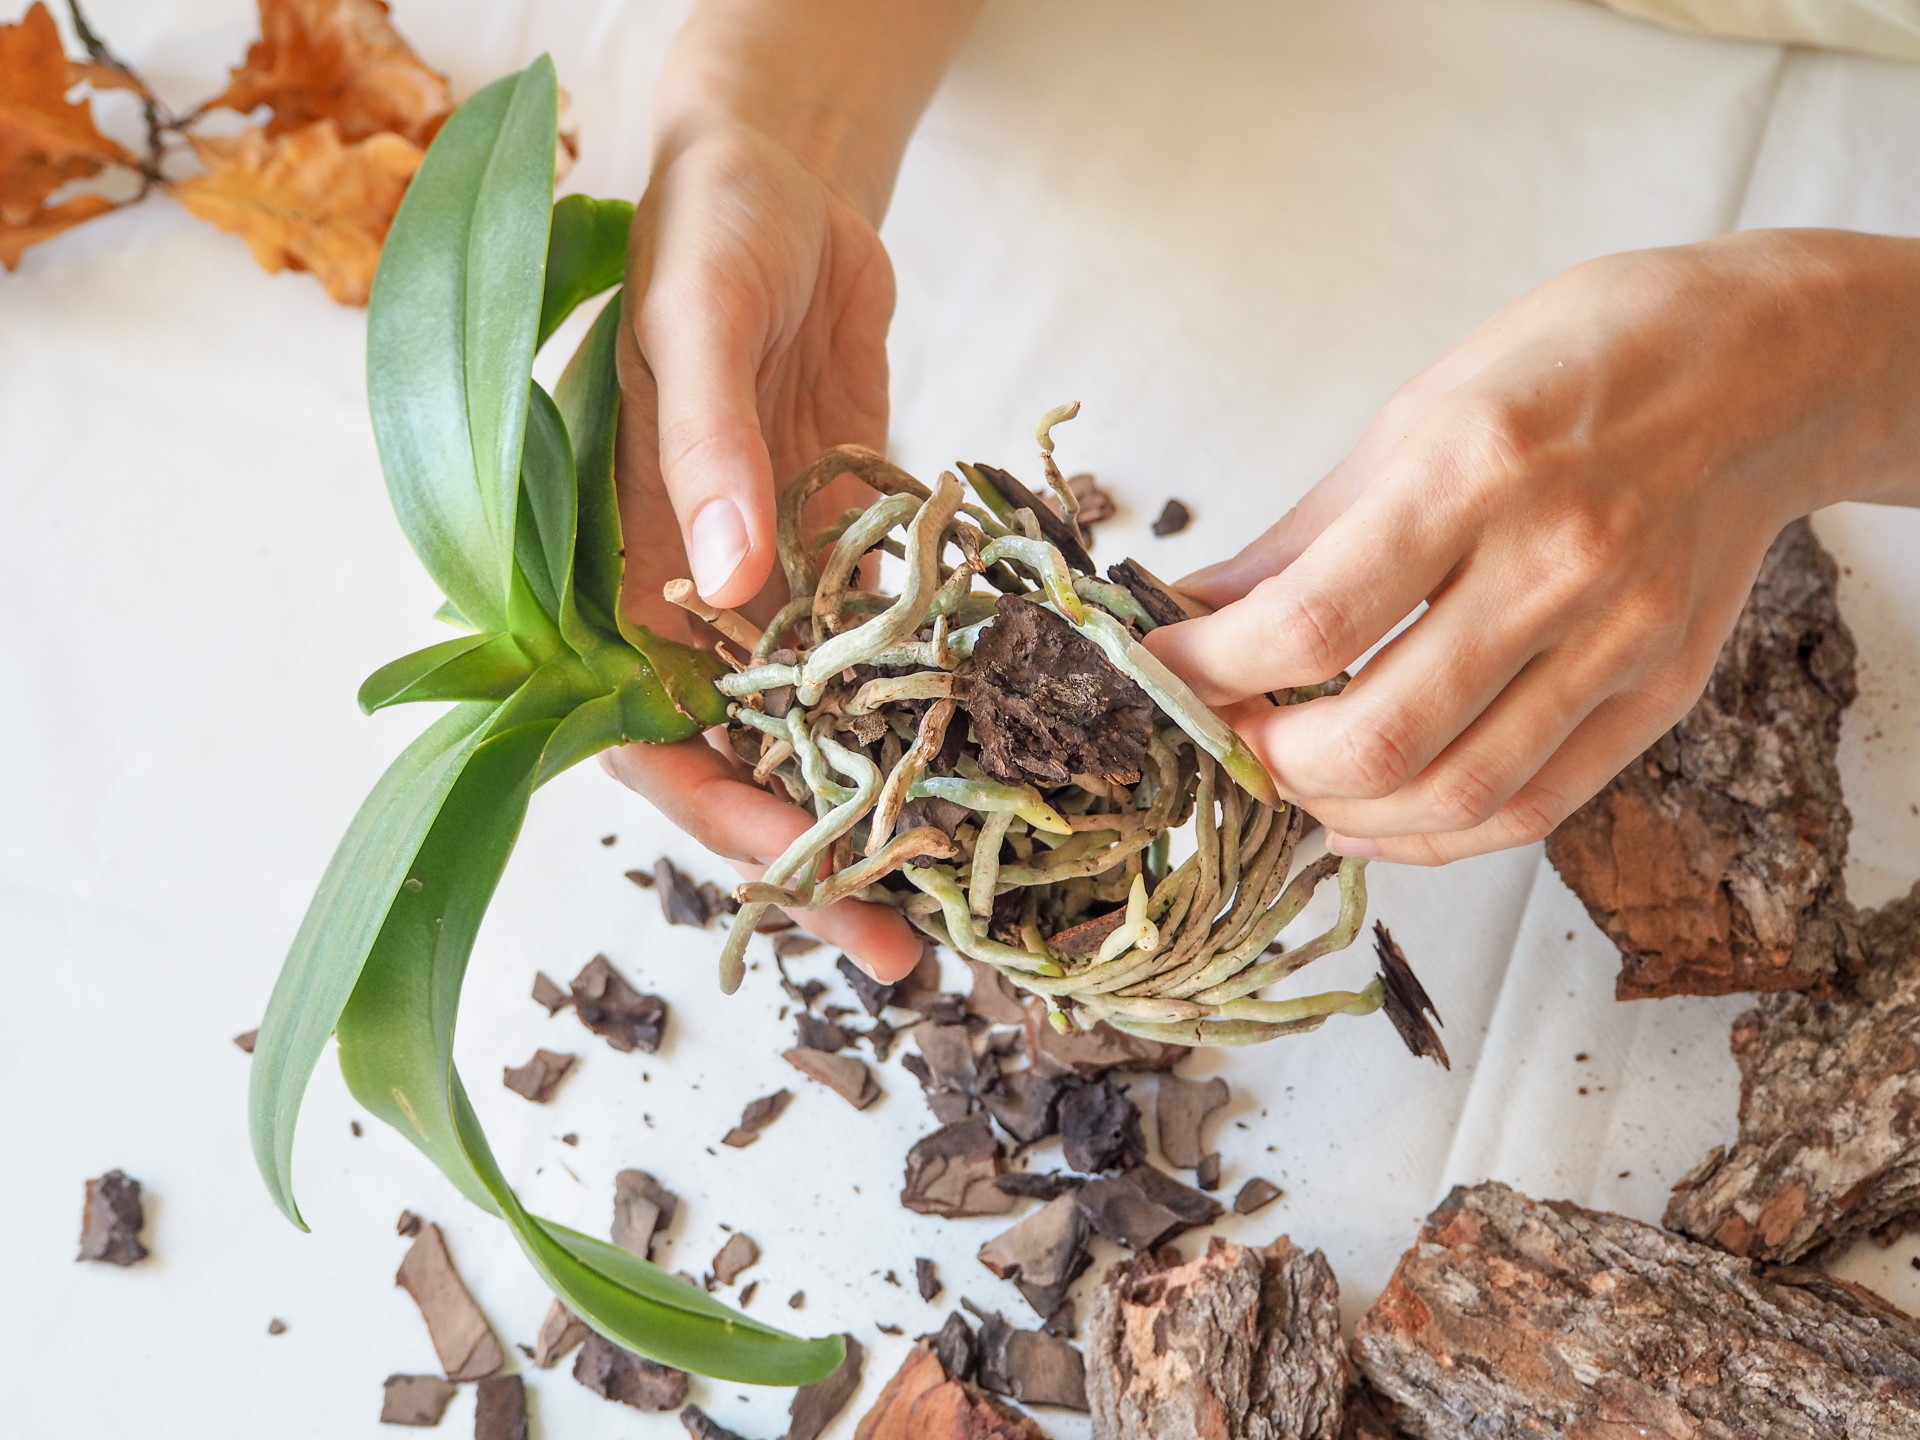
Step 2: Remove the Plant from the Old Pot – Gently remove the orchid from its old pot, taking care not to damage the roots or stems. If the plant is stuck, gently rock it back and forth to loosen it.
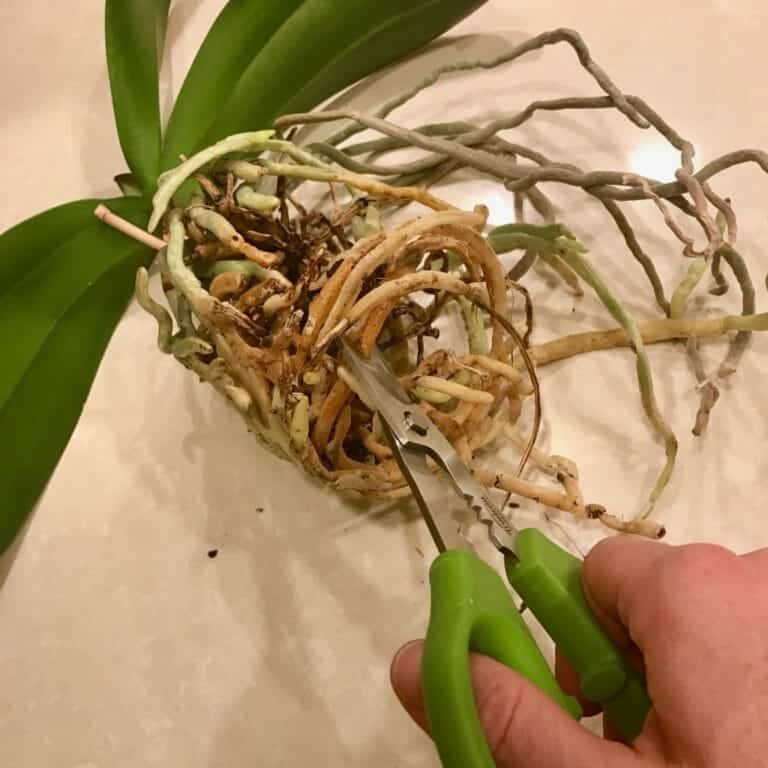
Step 3: Inspect the Roots – Inspect the roots to see if they are pot-bound or if there are any signs of rot. Trim away any dead or damaged roots with sterile scissors or clippers.
Step 4: Add Fresh Potting Media – Add a layer of fresh potting media to the new pot, making sure to leave enough space for the roots to spread out.
Step 5: Settle the Roots – Gently place the orchid in the new pot, making sure the rhizome (the thick stem that produces new growth) is level with the surface of the potting media. Add more potting media around the roots, gently firming it in place as you go.
Step 6: Water and Provide Aftercare – Water the orchid thoroughly after repotting, and then reduce watering to once a week for the first few weeks. Monitor the plant for signs of stress or disease, and adjust your care routine accordingly.
By following these steps, you can ensure a successful repotting experience for your orchid. Remember, understanding how often to repot orchids and providing the right care can make all the difference in their health and longevity.
Common Mistakes to Avoid When Repotting Orchids
When it comes to repotting orchids, it’s essential to avoid common mistakes that can cause more harm than good. By being aware of these mistakes, orchid enthusiasts can ensure a successful repotting experience and promote healthy growth. Here are some common mistakes to avoid:
Over-Handling the Roots – Orchid roots are delicate and can be easily damaged. Avoid handling the roots excessively, as this can cause stress to the plant and lead to disease or rot.
Using Too Much Water – Waterlogged potting media can be detrimental to orchids. Make sure to water sparingly after repotting, and avoid getting water on the plant’s crown or leaves.
Not Providing Enough Light – Orchids need sufficient light to photosynthesize and grow. Ensure that your orchid is placed in a spot with bright, indirect light, and adjust its position as needed.
Not Sterilizing the Pot and Tools – Failing to sterilize the pot and tools can spread disease and pests to the new potting media. Always clean and sterilize your equipment before repotting.
Repotting at the Wrong Time – Repotting an orchid at the wrong time, such as when it’s in bloom or during extreme weather conditions, can cause stress to the plant. Choose a time when the orchid is dormant or actively growing.
By avoiding these common mistakes, orchid enthusiasts can ensure a successful repotting experience and promote healthy growth. Remember, understanding how often to repot orchids and providing the right care can make all the difference in their health and longevity.
Aftercare Tips for a Successful Repotting
After repotting an orchid, it’s essential to provide the right care to ensure a successful transition. By following these aftercare tips, orchid enthusiasts can promote healthy growth and prevent common post-repotting issues:
Adjust Watering Schedules – Reduce watering to once a week for the first few weeks after repotting. This allows the plant to adjust to the new potting media and prevents waterlogged roots.
Monitor for Signs of Stress or Disease – Keep a close eye on your orchid’s condition, watching for signs of stress, disease, or pests. Adjust your care routine accordingly to prevent any issues from escalating.
Fertilize Sparingly – Avoid fertilizing your orchid immediately after repotting. Instead, wait a few weeks to allow the plant to settle into its new environment. Then, fertilize sparingly to promote healthy growth.
Provide Bright, Indirect Light – Ensure your orchid is receiving sufficient light to photosynthesize and grow. Adjust its position as needed to provide the right amount of light.
Prune Dead or Damaged Roots – If you notice any dead or damaged roots after repotting, prune them away to prevent the spread of disease. This will also encourage healthy growth and promote a strong root system.
By following these aftercare tips, orchid enthusiasts can ensure a successful repotting experience and promote healthy growth. Remember, understanding how often to repot orchids and providing the right care can make all the difference in their health and longevity.
Conclusion: Repotting Orchids with Confidence
Repotting orchids is a crucial aspect of their care, and by understanding the importance of fresh potting media, improved drainage, and increased oxygen availability to the roots, orchid enthusiasts can provide their plants with the best possible conditions for growth and thriving. By recognizing the signs that indicate an orchid needs to be repotted, determining the right repotting frequency, and choosing the right potting media, orchid enthusiasts can ensure a successful repotting experience.
By following the step-by-step guide to repotting an orchid and avoiding common mistakes, orchid enthusiasts can promote healthy growth and prevent common post-repotting issues. Additionally, by providing the right aftercare, including adjusting watering and fertilization schedules, and monitoring for signs of stress or disease, orchid enthusiasts can ensure a successful transition to the new potting media.
Remember, understanding how often to repot orchids and providing the right care can make all the difference in their health and longevity. With confidence and practice, orchid enthusiasts can master the art of repotting and enjoy the beauty and elegance of their orchids for years to come.


