Unlocking the Secrets of Tillandsia Care
Tillandsia air plants have become increasingly popular among plant enthusiasts due to their unique characteristics and low-maintenance requirements. These epiphytes, which absorb moisture and nutrients through their leaves, can thrive in a variety of environments with proper care. However, many people are unsure of how to care for tillandsia air plants, leading to common mistakes that can hinder their growth and health.
Understanding the specific needs of tillandsia air plants is crucial to providing them with the right conditions to flourish. By learning how to care for tillandsia air plants, you can enjoy their beautiful blooms and unique foliage for years to come. In this article, we will delve into the essential requirements for tillandsia care, including light, water, humidity, and temperature, as well as provide tips on how to assess the specific needs of your air plant.
One of the most common mistakes people make when caring for tillandsia air plants is overwatering. Tillandsia air plants are adapted to absorb moisture through their leaves, but excessive water can lead to root rot and other problems. On the other hand, underwatering can cause the plant to become dehydrated and stressed. By understanding the right watering techniques and schedules, you can ensure your tillandsia air plant receives the right amount of moisture to thrive.
In addition to proper watering, tillandsia air plants also require adequate light, humidity, and temperature to grow and bloom. By providing your air plant with the right conditions, you can encourage healthy growth and prevent common problems. In the following sections, we will explore each of these essential requirements in more detail, providing you with the knowledge and skills necessary to care for your tillandsia air plant with confidence.
By following the tips and guidelines outlined in this article, you can learn how to care for tillandsia air plants and enjoy their unique beauty and benefits. Whether you are a seasoned plant enthusiast or just starting out, this comprehensive guide will provide you with the knowledge and skills necessary to keep your tillandsia air plant happy and thriving.
Understanding the Needs of Your Air Plant
To provide the best care for your tillandsia air plant, it’s essential to understand its specific needs. Tillandsia air plants require a combination of light, water, humidity, and temperature to thrive. By assessing the specific needs of your air plant, you can create an environment that promotes healthy growth and prevents common problems.
Light is one of the most critical factors in caring for tillandsia air plants. Most tillandsia species require bright, indirect light to photosynthesize and grow. However, some species can tolerate low light conditions, while others require full sun. To determine the right light conditions for your air plant, research the specific species’ requirements or observe its response to different light levels.
Water is another crucial factor in caring for tillandsia air plants. Tillandsia air plants absorb moisture through their leaves, so it’s essential to provide them with the right amount of water. Overwatering can lead to root rot, while underwatering can cause the plant to become dehydrated. To determine the right watering schedule for your air plant, consider factors such as humidity, temperature, and light levels.
Humidity is also an essential factor in caring for tillandsia air plants. Tillandsia air plants thrive in humid environments, typically between 40-60% relative humidity. To maintain the right humidity levels, you can place the air plant on a tray filled with water and pebbles or use a humidifier nearby.
Temperature is another critical factor in caring for tillandsia air plants. Most tillandsia species prefer daytime temperatures between 65-75°F (18-24°C) and nighttime temperatures around 55-65°F (13-18°C). Avoid placing your air plant near heating or cooling vents, fireplaces, or drafty windows.
By understanding the specific needs of your tillandsia air plant, you can create an environment that promotes healthy growth and prevents common problems. Remember to research the specific requirements for your air plant species and observe its response to different conditions to ensure you’re providing the best care possible.
Watering Your Air Plant: The Right Techniques
Watering is one of the most critical aspects of caring for tillandsia air plants. These epiphytes absorb moisture through their leaves, so it’s essential to provide them with the right amount of water. Overwatering can lead to root rot, while underwatering can cause the plant to become dehydrated. In this section, we’ll explore the different methods for watering tillandsia air plants, including soaking, misting, and submerging.
Soaking is a popular method for watering tillandsia air plants. To soak your air plant, simply submerge it in a bowl of water for 1-2 hours. This method is ideal for air plants that are dry and need a thorough watering. However, be careful not to overwater, as this can lead to root rot.
Misting is another effective method for watering tillandsia air plants. To mist your air plant, simply spray it with a water spray bottle 2-3 times a week. This method is ideal for air plants that are already moist and need a light watering. Misting also helps to maintain humidity around the plant, which is essential for healthy growth.
Submerging is a method that involves fully submerging the air plant in water for a short period. To submerge your air plant, simply place it in a bowl of water for 30 minutes to 1 hour. This method is ideal for air plants that are extremely dry and need a thorough watering.
Regardless of the method you choose, it’s essential to avoid overwatering your tillandsia air plant. Overwatering can lead to root rot, which can be fatal to the plant. To avoid overwatering, make sure to check the moisture levels of your air plant regularly. If the plant is already moist, it’s best to wait a few days before watering again.
By following these watering techniques, you can provide your tillandsia air plant with the right amount of moisture to thrive. Remember to research the specific watering requirements for your air plant species, as some may require more or less water than others.
Fertilizing Your Air Plant for Optimal Growth
Fertilizing is an essential part of caring for tillandsia air plants. These epiphytes require a balanced diet of nutrients to thrive, and fertilizing can provide them with the necessary boost to promote healthy growth and blooming. In this section, we’ll discuss the benefits of fertilizing tillandsia air plants and recommend suitable fertilizers.
Tillandsia air plants can benefit from fertilizing in several ways. Fertilizing can promote healthy growth, encourage blooming, and enhance the overall appearance of the plant. However, it’s essential to use the right type of fertilizer and follow the recommended application instructions to avoid damaging the plant.
When it comes to fertilizing tillandsia air plants, it’s best to use a balanced, water-soluble fertilizer. A balanced fertilizer contains equal amounts of nitrogen, phosphorus, and potassium, which are essential nutrients for plant growth. Some good options for fertilizing tillandsia air plants include Miracle-Gro, Schultz, and Dyna-Gro.
To fertilize your tillandsia air plant, simply mix the recommended amount of fertilizer with water according to the manufacturer’s instructions. Then, soak the plant in the fertilizer solution for 1-2 hours. After soaking, rinse the plant thoroughly with water to remove any excess fertilizer.
It’s also essential to note that tillandsia air plants have different fertilizing needs at different stages of their growth cycle. For example, during the blooming stage, it’s best to use a fertilizer that is high in phosphorus to promote blooming. During the growth stage, a balanced fertilizer is recommended to promote healthy growth.
By fertilizing your tillandsia air plant regularly, you can provide it with the necessary nutrients to thrive. Remember to follow the recommended application instructions and use a balanced, water-soluble fertilizer to avoid damaging the plant.
Pruning and Grooming for a Healthy Air Plant
Pruning and grooming are essential parts of caring for tillandsia air plants. These epiphytes require regular pruning to maintain their shape and promote healthy growth. In this section, we’ll discuss the importance of pruning and grooming tillandsia air plants and provide step-by-step instructions on how to do it.
Pruning is necessary to remove dead or damaged leaves, which can help prevent the spread of disease and encourage healthy growth. It’s also important to prune your air plant to maintain its shape and promote blooming. By pruning your air plant regularly, you can encourage it to produce more blooms and maintain its natural shape.
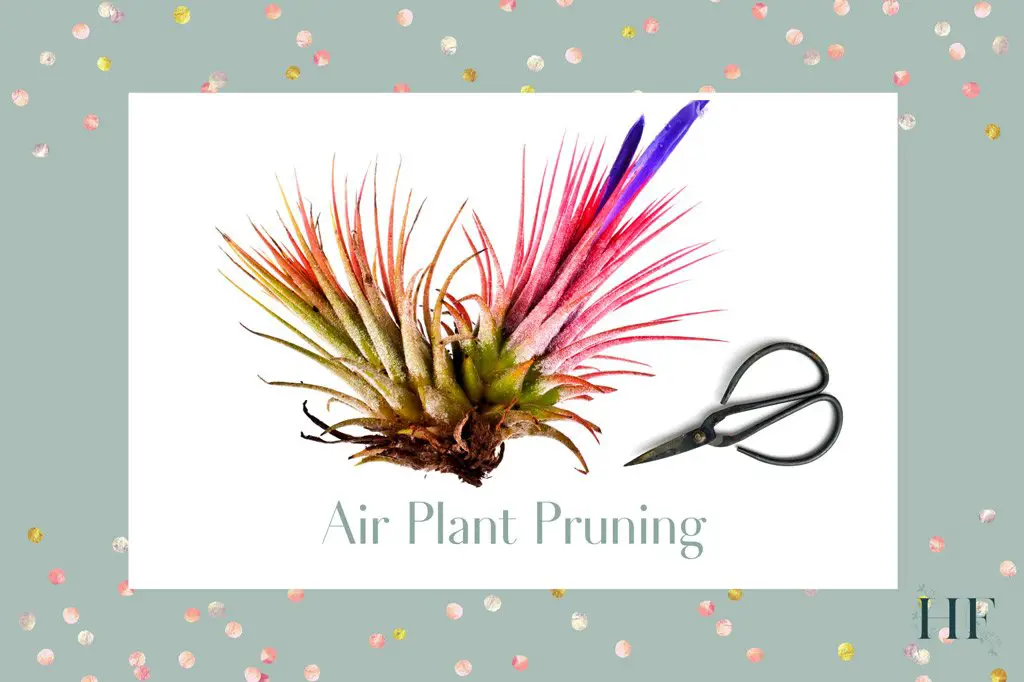
To prune your tillandsia air plant, you’ll need a pair of sharp, clean scissors or pruning shears. Start by removing any dead or damaged leaves, cutting them off at the base of the plant. Then, trim back any overgrown leaves or stems to maintain the plant’s shape.
Grooming is also an important part of caring for tillandsia air plants. Grooming involves removing any debris or dust that may have accumulated on the plant’s leaves. This can help prevent the spread of disease and encourage healthy growth. To groom your air plant, simply use a soft-bristled brush or a cotton swab to gently remove any debris or dust from the leaves.
Here’s a step-by-step guide to pruning and grooming your tillandsia air plant:
1. Remove any dead or damaged leaves, cutting them off at the base of the plant.
2. Trim back any overgrown leaves or stems to maintain the plant’s shape.
3. Use a soft-bristled brush or a cotton swab to gently remove any debris or dust from the leaves.
4. Inspect your air plant regularly to ensure it’s healthy and thriving.
By following these steps, you can keep your tillandsia air plant healthy and thriving. Remember to prune and groom your air plant regularly to maintain its shape and promote healthy growth.
Common Pests and Diseases: How to Identify and Treat
Tillandsia air plants are generally hardy and resistant to pests and diseases, but they can still be affected by certain issues. In this section, we’ll discuss common pests and diseases that can affect tillandsia air plants and provide tips on how to identify and treat them.
Spider mites are one of the most common pests that can affect tillandsia air plants. These tiny, spider-like insects can cause yellowing or bronzing of the leaves and can be difficult to spot. To treat spider mites, use a gentle insecticidal soap or neem oil and spray the plant thoroughly.
Mealybugs are another common pest that can affect tillandsia air plants. These small, white insects can cause a sticky substance to form on the leaves and can be difficult to remove. To treat mealybugs, use a gentle insecticidal soap or neem oil and spray the plant thoroughly.
Root rot is a common disease that can affect tillandsia air plants. This disease is caused by overwatering and can cause the roots to rot, leading to the death of the plant. To treat root rot, remove the plant from the water and let it dry out for a few days. Then, trim back any dead or damaged roots and repot the plant in a well-draining potting mix.
Other common pests and diseases that can affect tillandsia air plants include scale, aphids, and leaf spot. To prevent these issues, make sure to provide your air plant with good air circulation, water it properly, and fertilize it regularly.
Here are some tips for identifying and treating common pests and diseases in tillandsia air plants:
1. Inspect your air plant regularly for signs of pests or diseases.
2. Use a gentle insecticidal soap or neem oil to treat pests.
3. Remove the plant from the water and let it dry out for a few days to treat root rot.
4. Trim back any dead or damaged roots and repot the plant in a well-draining potting mix.
5. Provide your air plant with good air circulation, water it properly, and fertilize it regularly to prevent pests and diseases.
Propagation and Division: Sharing Your Air Plant with Others
Propagation and division are great ways to share your tillandsia air plant with friends and family. These epiphytes can be easily propagated by separating the pups that form around the base of the mother plant. In this section, we’ll discuss the process of propagating and dividing tillandsia air plants and provide instructions on how to do it.
To propagate a tillandsia air plant, you’ll need to wait until the mother plant has produced pups. Pups are small, immature plants that form around the base of the mother plant. Once the pups have formed, you can separate them from the mother plant and pot them up in a well-draining potting mix.
Here’s a step-by-step guide to propagating and dividing tillandsia air plants:
1. Wait until the mother plant has produced pups. This can take several months to a year, depending on the species and growing conditions.
2. Once the pups have formed, separate them from the mother plant by gently twisting them away from the base of the plant.
3. Pot the pups up in a well-draining potting mix, such as a mix specifically designed for cacti and succulents.
4. Water the pups sparingly until they are established, then water them as you would the mother plant.
5. Provide the pups with bright, indirect light and maintain a temperature of 50-90°F (10-32°C).
By following these steps, you can easily propagate and divide your tillandsia air plant and share it with friends and family. Remember to provide the pups with the right growing conditions and care, and they will thrive and produce their own pups in time.
Displaying Your Air Plant: Creative Ideas for Showcasing
Once you’ve learned how to care for your tillandsia air plant, it’s time to think about how to display it. There are many creative ways to showcase your air plant, and the right display can add to the plant’s natural beauty. In this section, we’ll discuss some creative ideas for displaying your tillandsia air plant.
One popular way to display tillandsia air plants is in a terrarium. A terrarium is a closed container that creates a miniature ecosystem, perfect for showcasing your air plant. Simply place the air plant in the terrarium, add some decorative rocks or moss, and seal the container.
Another creative way to display tillandsia air plants is in a glass container. Glass containers come in a variety of shapes and sizes, and can be used to create a beautiful display for your air plant. Simply place the air plant in the container, add some decorative rocks or pebbles, and place the container on a shelf or table.
Wire mounts are also a great way to display tillandsia air plants. Wire mounts allow you to attach the air plant to a wall or other surface, creating a unique and visually appealing display. Simply attach the air plant to the wire mount, and hang it on the wall or place it on a shelf.
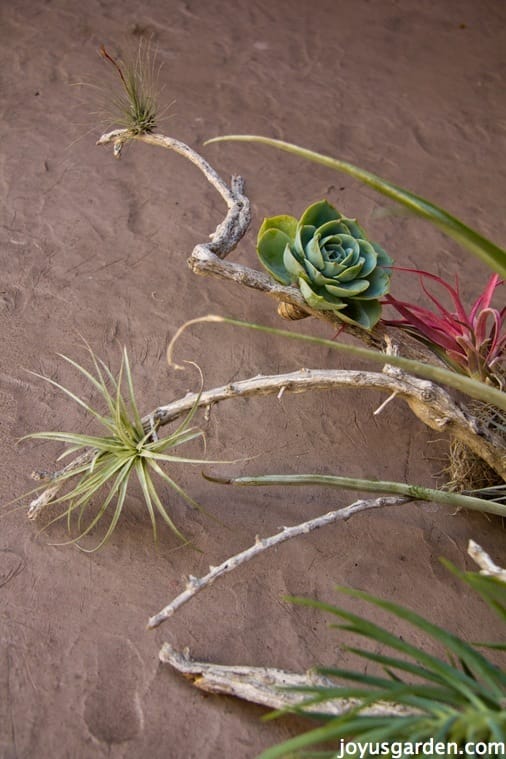
Other creative ways to display tillandsia air plants include using a wooden or bamboo mount, creating a living wreath, or even using a vintage or antique container. The possibilities are endless, and the right display can add to the natural beauty of your air plant.
Here are some tips for displaying your tillandsia air plant:
1. Choose a display that complements the natural beauty of your air plant.
2. Consider the size and shape of the display, and choose one that fits your air plant perfectly.
3. Add some decorative elements, such as rocks or moss, to enhance the display.
4. Place the display in a location with bright, indirect light, and maintain a temperature of 50-90°F (10-32°C).
By following these tips, you can create a beautiful and unique display for your tillandsia air plant. Remember to have fun and be creative, and don’t be afraid to experiment with different displays and arrangements.


:max_bytes(150000):strip_icc()/grow-air-plants-1902663-07-f1aeb3c5e29a4fa08c13a09432764536.jpg)
