Cultivating Vibrant Canna Lilies: A Comprehensive Guide
Unlocking the Secrets of Canna Lily Care
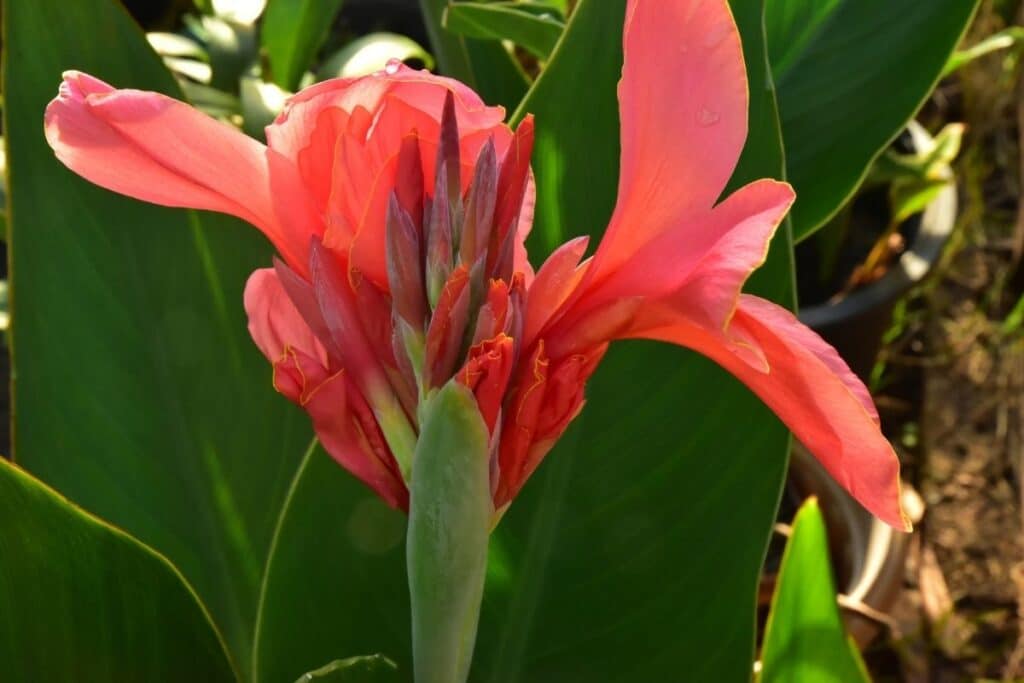
Canna lilies are a stunning addition to any garden or indoor space, boasting vibrant colors and low-maintenance requirements. With their ability to thrive in a variety of environments, it’s no wonder why they’re a popular choice among gardeners and plant enthusiasts. However, to truly appreciate the beauty of canna lilies, it’s essential to understand how to grow them properly. This comprehensive guide will walk you through the step-by-step process of growing canna lilies, providing you with the knowledge and skills needed to cultivate these stunning flowers. Whether you’re looking to add a pop of color to your garden or simply want to learn how to grow canna lily, this article will provide you with the necessary guidance to ensure success.

Click Image to Find Garden Products
Choosing the Right Environment for Your Canna Lilies
Selecting the right location for your canna lilies is crucial for their optimal growth and development. Canna lilies require a spot that receives full sun to partial shade, with temperatures ranging from 65°F to 85°F (18°C to 30°C). Humidity also plays a vital role, with ideal levels ranging from 50% to 70%. To create an ideal environment, consider the following tips: choose a location with good air circulation to prevent fungal diseases, avoid planting in low-lying areas where water may collect, and ensure the soil is well-draining. By providing your canna lilies with the right environment, you’ll be well on your way to growing thriving, vibrant flowers. Remember, understanding how to grow canna lily requires attention to detail, and selecting the right environment is a critical step in the process.
How to Plant Canna Lilies: A Step-by-Step Process
Planting canna lilies is a straightforward process that requires some preparation and attention to detail. To ensure successful growth, follow these steps: prepare the soil by loosening it to a depth of 12 inches and mixing in a 2-inch layer of compost or well-rotted manure. Next, select healthy rhizomes with at least one “eye” each, and plant them 2-3 inches deep in the soil, with the eyes facing upwards. Space the rhizomes 12-18 inches apart, depending on the variety. Water the soil gently but thoroughly after planting, and keep the soil consistently moist during the first few weeks. To prevent rot, make sure the rhizomes are not planted too deeply, and avoid overwatering. By following these steps, you’ll be well on your way to growing thriving canna lilies. Remember, understanding how to grow canna lily requires attention to detail, and proper planting is a critical step in the process.
:max_bytes(150000):strip_icc()/growing-canna-lilies-in-containers-847913-03-06ae3c6920b342c78abd5d2791923f17.jpg)
Nourishing Your Canna Lilies: Fertilization and Watering Tips
Fertilization and watering are crucial aspects of canna lily care. To promote healthy growth and vibrant blooms, it’s essential to provide your canna lilies with the right nutrients. A balanced fertilizer with a ratio of 10-10-10 (nitrogen-phosphorus-potassium) is ideal for canna lilies. Apply the fertilizer once a month during the growing season, taking care not to overfertilize, which can lead to weak growth and poor flowering. When it comes to watering, canna lilies require consistent moisture, especially during hot weather. Water your canna lilies deeply once or twice a week, depending on the weather conditions. However, avoid overwatering, which can lead to root rot and other problems. To ensure proper watering, check the soil moisture by inserting your finger into the soil up to the first knuckle. If the soil feels dry, it’s time to water. By following these fertilization and watering tips, you’ll be well on your way to growing thriving canna lilies. Remember, understanding how to grow canna lily requires attention to detail, and proper nourishment is a critical step in the process.
Pruning and Deadheading: Maintaining Your Canna Lilies’ Appearance
Pruning and deadheading are essential practices for maintaining the appearance and promoting healthy growth of your canna lilies. Pruning helps to control the height and shape of your plants, while deadheading encourages more blooms and prevents seed production. To prune your canna lilies, simply cut back the stems to about 6 inches from the ground after they have finished blooming. This will help to promote new growth and encourage more blooms. When it comes to deadheading, remove the spent flowers as soon as they begin to fade. This will help to direct the plant’s energy towards producing new blooms rather than seeds. Additionally, remove any dead or damaged leaves to prevent the spread of disease and pests. By pruning and deadheading your canna lilies regularly, you’ll be able to enjoy their vibrant blooms and lush foliage throughout the growing season. Remember, understanding how to grow canna lily requires attention to detail, and proper pruning and deadheading are critical steps in the process.
Pest and Disease Management: Common Issues and Solutions
As with any plant, canna lilies are susceptible to pests and diseases that can hinder their growth and beauty. To ensure the health and success of your canna lily plants, it’s essential to be aware of common issues and know how to prevent and treat them. Aphids, whiteflies, and spider mites are common pests that can infest canna lilies, causing damage to the leaves and stems. To prevent infestations, maintain good garden hygiene, remove weeds, and use organic pest control methods such as neem oil or insecticidal soap. Fungal infections, such as root rot and leaf spot, can also affect canna lilies. These diseases are often caused by overwatering, poor drainage, and high humidity. To prevent fungal infections, ensure good air circulation, water carefully, and remove infected plants to prevent the spread of disease. If you do encounter pests or diseases, treat them promptly using organic or chemical methods, depending on the severity of the issue. By being proactive and taking preventative measures, you can minimize the risk of pest and disease problems and enjoy thriving, healthy canna lilies. Remember, understanding how to grow canna lily requires attention to detail, and proper pest and disease management is a critical step in the process.
Propagation and Division: Expanding Your Canna Lily Collection
One of the most exciting aspects of growing canna lilies is the ability to propagate and divide them to expand your collection. By dividing the rhizomes, you can create new plants that will thrive and produce beautiful blooms. To propagate canna lilies, start by digging up the rhizomes in the fall or early spring, when the plants are dormant. Gently wash the soil from the rhizomes, and then divide them into sections, making sure each section has at least one “eye” or growing point. Replant the divided rhizomes in well-draining soil, and water thoroughly. Keep the soil consistently moist during the first few weeks after planting, and then reduce watering to encourage healthy growth. With proper care, your new canna lily plants will thrive and provide you with an abundance of vibrant blooms. By learning how to grow canna lily through propagation and division, you can share these beautiful plants with friends and family, or expand your own collection. Remember to always handle the rhizomes with care, as they are delicate and can be prone to rot if not handled properly.
Troubleshooting Common Problems: Ensuring Success with Your Canna Lilies
Despite their low-maintenance requirements, canna lilies can still encounter problems that hinder their growth and beauty. To ensure success with your canna lily plants, it’s essential to be aware of common issues and know how to troubleshoot them. One common problem is yellowing leaves, which can be caused by overwatering, underwatering, or nutrient deficiencies. To address this issue, adjust your watering schedule, fertilize regularly, and provide adequate sunlight. Slow growth can also be a problem, often due to inadequate light, poor soil quality, or insufficient fertilization. To promote healthy growth, ensure your canna lilies receive at least 6 hours of direct sunlight, use well-draining soil, and fertilize regularly. Pest infestations, such as aphids and whiteflies, can also affect canna lily growth. To prevent infestations, maintain good garden hygiene, remove weeds, and use organic pest control methods. By being aware of these common problems and knowing how to troubleshoot them, you can ensure success with your canna lily plants and enjoy their vibrant blooms all season long. Remember, learning how to grow canna lily requires attention to detail and a willingness to troubleshoot common issues that may arise.