Unlocking the Secrets of Cleome Seeds: Preparation and Planning
Starting a garden from scratch can be a rewarding experience, and growing cleome from seed is no exception. By understanding the benefits of growing cleome from seed, gardeners can set themselves up for success and enjoy a bountiful harvest of these stunning flowers. One of the main advantages of growing cleome from seed is the cost-effectiveness. Seeds are often less expensive than buying established plants, making it a budget-friendly option for gardeners. Additionally, growing cleome from seed allows gardeners to have complete control over the growing process, from soil preparation to pruning and harvesting. This level of control can be especially important for gardeners who want to ensure their plants are grown organically or using specific techniques. Furthermore, growing cleome from seed can be a fun and educational experience, allowing gardeners to learn about the life cycle of plants and the importance of proper care and maintenance. By learning how to grow cleome from seed, gardeners can develop a deeper appreciation for the beauty and complexity of these flowers.

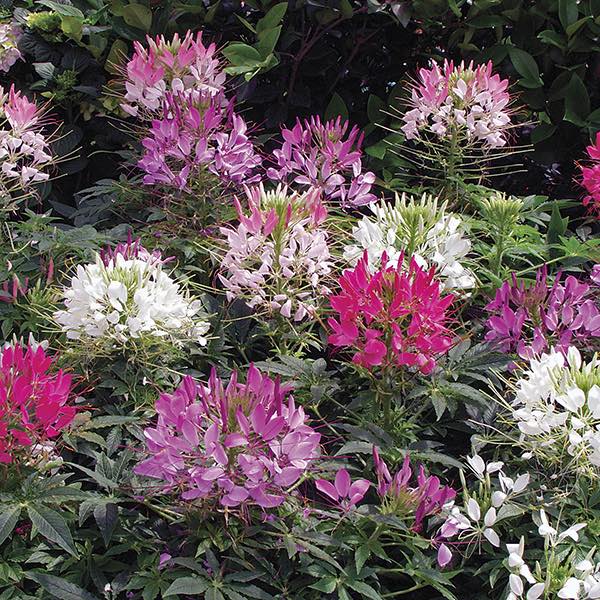
Click Image to Find Garden Products

Choosing the Right Cleome Seeds for Your Garden
With numerous types of cleome seeds available, selecting the right ones for your garden can be a daunting task. However, by understanding the characteristics, growth habits, and blooming periods of different cleome varieties, gardeners can make informed decisions and set themselves up for success. For instance, some cleome varieties, such as ‘Pink Queen’ and ‘White Sparkler’, are known for their compact growth habits and are ideal for small gardens or containers. Others, like ‘Lavender Queen’ and ‘Rose Queen’, are taller and more sprawling, making them perfect for adding a pop of color to larger gardens. Additionally, some cleome varieties, such as ‘Spider Flower’ and ‘Grandiflora’, are known for their extended blooming periods, making them ideal for gardeners who want to enjoy a longer flowering season. When selecting cleome seeds, it’s also important to consider your specific climate and garden conditions. For example, gardeners in warmer climates may want to opt for heat-tolerant varieties, while those in cooler climates may want to choose varieties that are more cold-hardy. By taking the time to research and select the right cleome seeds for your garden, you can ensure a successful and thriving harvest.

How to Sow Cleome Seeds: A Beginner’s Guide
When it comes to sowing cleome seeds, timing and technique are crucial. To ensure successful germination, it’s essential to provide the right conditions for your seeds to thrive. Start by preparing a seed tray or small pots with a well-draining seed starting mix. Sow the seeds about 1/8 inch deep and 1-2 inches apart, depending on the variety. Cover the seeds with a thin layer of the seed starting mix and gently firm the soil. Water the soil gently but thoroughly, making sure not to wash away the tiny seeds. For optimal germination, maintain a consistent soil temperature of around 70-75°F (21-24°C). Cleome seeds typically take 7-10 days to germinate, so be patient and keep the soil consistently moist during this period. To prevent overwatering, water the soil only when the top inch of soil feels dry to the touch. Once the seeds have germinated, provide them with bright, indirect light and maintain a consistent temperature of around 65-70°F (18-21°C). By following these simple steps, you’ll be well on your way to successfully growing cleome from seed. Remember, with a little patience and practice, you’ll be enjoying a bountiful harvest of these stunning flowers in no time. When learning how to grow cleome from seed, it’s essential to understand the importance of proper sowing techniques to ensure a successful harvest.

Creating the Perfect Environment for Cleome Seedlings
Once your cleome seeds have germinated, it’s essential to provide the right environment for your seedlings to thrive. Cleome seedlings require bright, indirect light to promote healthy growth and development. Placing them near a south-facing window or under grow lights can provide the necessary light. However, be cautious not to expose them to direct sunlight, which can cause scorching. Maintaining a consistent temperature between 65-70°F (18-21°C) is also crucial for optimal growth. Humidity levels should be moderate, around 40-50%, to prevent fungal diseases. To achieve this, you can cover the seedlings with a clear plastic bag or a cloche. Soil moisture is also critical, as cleome seedlings are prone to drying out. Water them gently but thoroughly, making sure not to wash away the tiny roots. A well-draining potting mix can help prevent waterlogged soil and root rot. By providing the right environment, you’ll be able to give your cleome seedlings the best possible start in life, setting them up for success as they grow and mature. When learning how to grow cleome from seed, understanding the importance of creating the perfect environment is crucial for achieving a successful harvest.
Nurturing Your Cleome Plants: Watering, Fertilizing, and Pruning
As your cleome plants grow, it’s essential to provide them with the right care to promote healthy growth and encourage blooming. Watering is a critical aspect of cleome care, as these plants require consistent moisture to thrive. Water them deeply once or twice a week, depending on the weather, making sure not to overwater, which can lead to root rot. Fertilizing is also crucial, as cleome plants are heavy feeders. Use a balanced fertilizer once a month to provide them with the necessary nutrients. Pruning is another essential technique to promote healthy growth and encourage blooming. Remove any weak or spindly growth, and trim back the plant to encourage bushy growth. This will also help prevent legginess and promote a more compact growth habit. Additionally, pruning will encourage the plant to produce more blooms, making it a crucial step in how to grow cleome from seed. By following these simple tips, you’ll be able to provide your cleome plants with the care they need to thrive and produce an abundance of beautiful blooms. Remember, proper care is key to achieving a successful harvest of cleome flowers.

Common Challenges and Solutions: Troubleshooting Cleome Seedlings
When learning how to grow cleome from seed, it’s essential to be aware of the common challenges that may arise during the process. Slow germination, weak seedlings, and pest infestations are just a few of the obstacles that gardeners may face. To overcome these challenges, it’s crucial to identify the root cause of the problem and take prompt action. For slow germination, check the soil temperature and ensure it’s within the ideal range for cleome seeds. If the seeds are not germinating, try using a heating mat or warm location to stimulate growth. Weak seedlings can be strengthened by providing them with adequate light and nutrients. Fertilize the seedlings with a balanced fertilizer, and ensure they receive sufficient light to promote healthy growth. Pest infestations can be prevented by maintaining good garden hygiene, removing weeds, and using organic pest control methods. By being aware of these common challenges and taking proactive steps to prevent them, gardeners can increase their chances of success when growing cleome from seed. With patience, persistence, and the right techniques, it’s possible to overcome any obstacles and enjoy a bountiful harvest of beautiful cleome blooms.
Enjoying the Fruits of Your Labor: Harvesting and Maintaining Cleome Blooms
After successfully learning how to grow cleome from seed, the next step is to enjoy the fruits of your labor by harvesting and maintaining the beautiful blooms. Deadheading is a crucial step in encouraging continuous flowering in cleome plants. Remove spent blooms regularly to promote new flower growth and prevent seed production. Pruning is also essential to maintain the shape and size of the plant, as well as to encourage bushy growth. Cut back the plant by about one-third to one-half after it finishes blooming to promote new growth and prevent legginess. Cleome flowers can also be harvested for arrangements and crafts. Simply cut the stems at the base of the plant, and dry the flowers by hanging them upside down in a warm, dry location. Once dry, the flowers can be used in potpourri, wreaths, and other craft projects. By following these simple tips, gardeners can enjoy the beauty of cleome blooms for months to come, and even share them with friends and family through creative arrangements and crafts.

Tips and Variations: Experimenting with Cleome in Your Garden
Once you’ve mastered the basics of how to grow cleome from seed, it’s time to get creative and experiment with new and innovative ways to showcase these beautiful flowers in your garden. One unique idea is to create a cleome tower, where you train the stems to grow up a trellis or obelisk, creating a stunning vertical display of blooms. Another option is to use cleome as a cut flower, where you can harvest the blooms and arrange them in bouquets or vases for a beautiful and fragrant centerpiece. You can also incorporate cleome into container gardens and arrangements, where they can add a pop of color and texture to your outdoor spaces. For a more whimsical touch, try using cleome in a “flower bomb” arrangement, where you plant a cluster of cleome seeds in a small pot or container, and then let them bloom and spill over the edges. By experimenting with these advanced techniques and variations, gardeners can take their cleome game to the next level and create truly show-stopping displays in their gardens.
