Unlocking the Secrets of Garlic Growth
Growing garlic from a clove is a simple and rewarding process that offers numerous benefits, including cost-effectiveness and control over the growing process. By understanding the basics of garlic cultivation, gardeners can enjoy a bountiful harvest of flavorful and aromatic garlic bulbs. One of the key factors in successfully growing garlic from a clove is choosing the right variety for your climate and desired flavor profile. With over 600 varieties of garlic to choose from, selecting the perfect one can be overwhelming. However, by considering factors such as climate, soil type, and desired flavor profile, gardeners can narrow down their options and select a variety that is well-suited to their needs.

Click Image to Find Garden Products
For example, gardeners living in cooler climates may prefer to grow varieties such as ‘Rocambole’ or ‘Silverskin’, which are known for their cold hardiness and rich, nutty flavor. In contrast, gardeners living in warmer climates may prefer to grow varieties such as ‘Creole’ or ‘Asian’, which are known for their heat tolerance and sweet, mild flavor. By selecting a variety that is well-suited to their climate and desired flavor profile, gardeners can ensure a successful harvest and enjoy the many benefits of homegrown garlic.
In addition to choosing the right variety, gardeners should also consider the benefits of growing garlic from a clove. This method offers several advantages over traditional seed-based cultivation, including faster growth rates, improved disease resistance, and increased yields. By growing garlic from a clove, gardeners can also enjoy a more controlled growing process, as they can carefully select and plant individual cloves to ensure optimal growth and development.
Overall, growing garlic from a clove is a simple and rewarding process that offers numerous benefits for gardeners. By understanding the basics of garlic cultivation and selecting the right variety for their climate and desired flavor profile, gardeners can enjoy a bountiful harvest of flavorful and aromatic garlic bulbs. Whether you’re a seasoned gardener or just starting out, growing garlic from a clove is a great way to add some excitement and variety to your garden.
Preparing the Soil for Optimal Garlic Growth
When it comes to growing garlic from a clove, soil preparation is crucial for optimal growth and development. Garlic requires a well-draining, fertile soil with a pH between 6.0 and 7.0. To achieve this, gardeners can take several steps to prepare their soil for garlic cultivation.
First, it’s essential to test the soil pH to determine if any amendments are necessary. A soil test kit can be purchased at most gardening stores, or a sample can be sent to a laboratory for analysis. If the soil pH is too low or too high, amendments such as lime or sulfur can be added to adjust the pH.
In addition to adjusting the pH, gardeners can also add organic matter to the soil to improve its structure and fertility. Compost, well-rotted manure, or peat moss can be incorporated into the soil to provide nutrients and improve drainage. A 2-inch layer of organic matter can be added to the soil and mixed in to a depth of 8-10 inches.
Garlic also requires a well-draining environment to prevent waterlogged soil and root rot. To achieve this, gardeners can create a raised bed or mound the soil to improve drainage. A raised bed can be created by mounding the soil 4-6 inches high and 3-4 feet wide. This will allow excess water to drain away from the garlic cloves and prevent waterlogged soil.
Finally, gardeners can also use mulch to retain moisture and suppress weeds. A 2-inch layer of organic mulch such as straw or wood chips can be applied to the soil surface. This will help retain moisture, suppress weeds, and regulate soil temperature.
By following these steps, gardeners can create a well-draining, fertile soil that is ideal for growing garlic from a clove. With proper soil preparation, garlic cloves can be planted with confidence, and a healthy and productive crop can be expected.

Breaking Down the Garlic Clove: A Step-by-Step Guide
Once you have selected the right garlic variety for your climate and desired flavor profile, it’s time to break down the garlic clove into individual cloves. This process is crucial for successful garlic growth, as it allows each clove to develop into a healthy and productive plant.
To break down the garlic clove, start by gently separating the individual cloves from the parent bulb. This can be done by hand or with the aid of a small tool, such as a fork or a specialized garlic separator. Be careful not to damage the cloves during this process, as this can lead to poor growth and reduced yields.
Once the cloves are separated, inspect each one for any signs of damage or disease. Remove any cloves that are damaged or show signs of disease, as these can infect the rest of the crop and reduce yields.
Next, prepare the cloves for planting by trimming the base of each clove to create a flat surface. This will help the clove to sit upright in the soil and promote healthy growth.
Finally, sort the cloves by size and quality, and select the best ones for planting. This will help to ensure a healthy and productive crop, and reduce the risk of disease and pests.
By following these steps, you can successfully break down the garlic clove into individual cloves, and set yourself up for a healthy and productive garlic crop. Remember to handle the cloves with care, and to select only the best ones for planting, to ensure a successful harvest.
When growing garlic from a clove, it’s essential to understand the different parts of the clove and how they contribute to the growth of the plant. The clove is made up of several layers, including the outer skin, the inner skin, and the basal plate. The basal plate is the flat surface at the base of the clove, and it’s from this area that the roots and shoots will emerge.
By understanding the anatomy of the garlic clove, you can better appreciate the importance of proper handling and care during the breaking down process. This will help to ensure a healthy and productive crop, and reduce the risk of disease and pests.

Planting Garlic Cloves: Timing, Depth, and Spacing
When it comes to planting garlic cloves, timing, depth, and spacing are crucial for optimal growth and development. The ideal time for planting garlic cloves depends on the climate and region you are in. In general, garlic cloves should be planted in the fall, about 6-8 weeks before the first frost. This allows the cloves to establish themselves in the soil before the winter, and then send up green shoots in the spring.
In warmer climates, garlic cloves can be planted in the early spring, as soon as the soil can be worked. However, in areas with harsh winters, it’s best to plant garlic cloves in the fall to give them a head start on the growing season.
When planting garlic cloves, it’s essential to plant them at the right depth. The cloves should be planted 2-3 inches deep, with the pointed end facing upwards. This allows the clove to grow upwards towards the sunlight, and prevents the bulb from forming too close to the surface.
Spacing is also critical when planting garlic cloves. The cloves should be planted 4-6 inches apart, in rows that are 12-18 inches apart. This allows for good air circulation and prevents the spread of disease.
It’s also important to consider the soil temperature when planting garlic cloves. The ideal soil temperature for garlic growth is between 40-50°F (4-10°C). If the soil is too cold, the cloves may not germinate, and if it’s too warm, the bulbs may form too quickly.
By planting garlic cloves at the right time, depth, and spacing, you can set yourself up for a successful harvest. Remember to choose a variety that is well-suited to your climate and desired flavor profile, and to handle the cloves with care to prevent damage.
When growing garlic from a clove, it’s essential to understand the different stages of growth and development. The first stage is germination, which occurs when the clove is planted and begins to grow. The second stage is vegetative growth, which occurs when the green shoots emerge from the soil. The third stage is bulb formation, which occurs when the plant begins to form a bulb underground.
By understanding these different stages of growth and development, you can better appreciate the importance of proper planting techniques and care. This will help to ensure a healthy and productive crop, and reduce the risk of disease and pests.

Caring for Your Garlic Crop: Watering, Fertilizing, and Pest Management
Once your garlic cloves are planted, it’s essential to provide them with the right care to promote healthy growth and development. This includes watering, fertilizing, and managing pests and diseases.
Watering is critical for garlic growth, especially during the first few weeks after planting. Garlic needs about 1-2 inches of water per week, either from rainfall or irrigation. However, it’s essential to avoid overwatering, which can lead to rot and other diseases.
Fertilizing is also important for garlic growth. Garlic is a heavy feeder and benefits from regular fertilization. A balanced fertilizer with a ratio of 10-10-10 (nitrogen-phosphorus-potassium) can be applied at planting time and again at the beginning of the growing season.
Pest management is also crucial for garlic growth. Garlic is susceptible to several pests, including aphids, spider mites, and nematodes. Organic pest control methods, such as neem oil and diatomaceous earth, can be used to control these pests.
Diseases are also a common problem for garlic growers. Garlic is susceptible to several diseases, including powdery mildew, downy mildew, and botrytis. Organic disease control methods, such as copper-based fungicides and bicarbonate-based fungicides, can be used to control these diseases.
Regular monitoring is essential for detecting pests and diseases early, when they are easier to control. Garlic growers should regularly inspect their plants for signs of pests or diseases and take action promptly to prevent the problem from spreading.
By providing your garlic crop with the right care, you can promote healthy growth and development and ensure a successful harvest. Remember to water, fertilize, and manage pests and diseases regularly to keep your garlic crop healthy and thriving.
When growing garlic from a clove, it’s essential to understand the different stages of growth and development. The first stage is germination, which occurs when the clove is planted and begins to grow. The second stage is vegetative growth, which occurs when the green shoots emerge from the soil. The third stage is bulb formation, which occurs when the plant begins to form a bulb underground.
By understanding these different stages of growth and development, you can better appreciate the importance of proper care and management. This will help to ensure a healthy and productive crop, and reduce the risk of disease and pests.

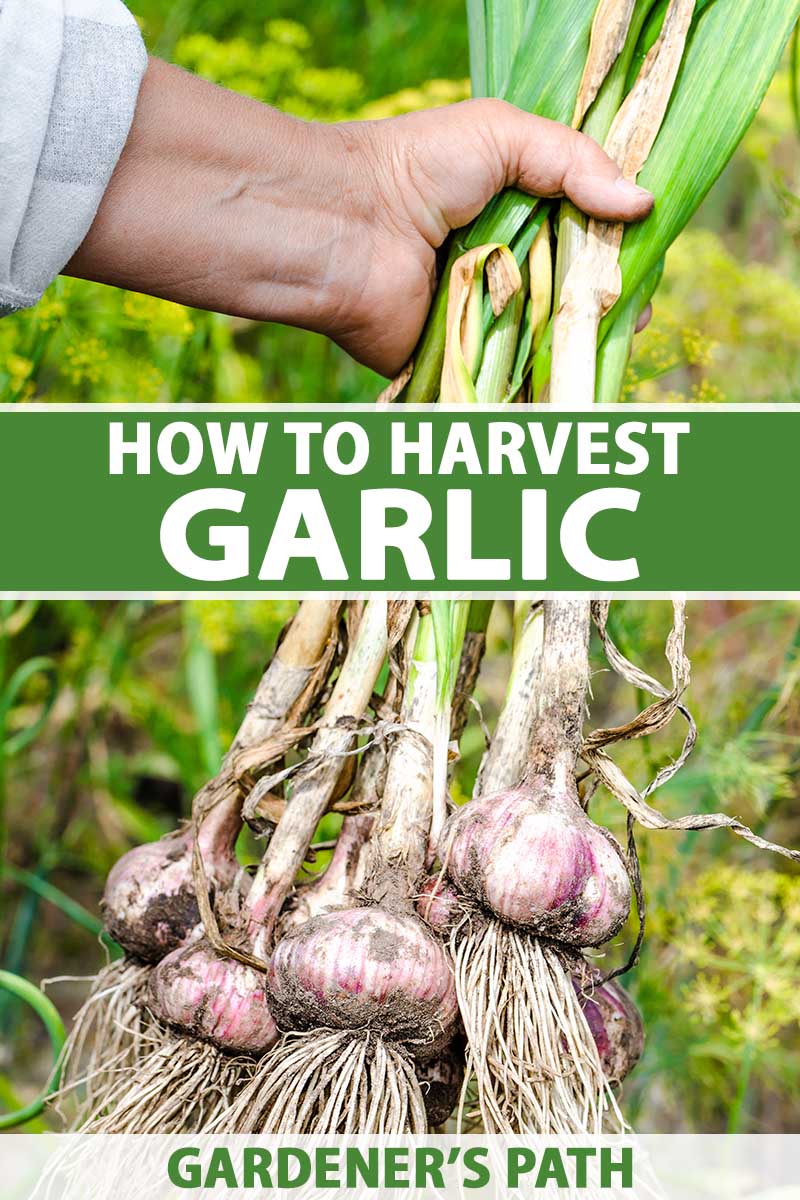
Harvesting Your Garlic Crop: Knowing When and How
Harvesting garlic is a crucial step in the growing process, and it’s essential to know when and how to do it correctly. Garlic is typically ready to harvest in mid to late summer, when the tops of the plants begin to yellow and fall over.
There are several signs to look for to determine if your garlic is ready to harvest. One of the most obvious signs is the yellowing of the tops of the plants. This indicates that the garlic bulbs are mature and ready to be harvested. Another sign is the formation of a papery wrapper around the bulb, which indicates that the garlic is fully formed and ready to be harvested.
When harvesting garlic, it’s essential to dig carefully to avoid damaging the bulbs. Use a fork to gently loosen the soil around the garlic bulb, and then lift it out of the ground. Be careful not to bruise or damage the bulb, as this can affect its quality and storage life.
After harvesting, it’s essential to dry the garlic bulbs to remove excess moisture and prevent rot. This can be done by spreading the bulbs out in a single layer on a wire rack or tray, and allowing them to air dry for several days. Once the bulbs are dry, they can be stored in a cool, dry place to enjoy throughout the year.
When growing garlic from a clove, it’s essential to understand the different stages of growth and development. The first stage is germination, which occurs when the clove is planted and begins to grow. The second stage is vegetative growth, which occurs when the green shoots emerge from the soil. The third stage is bulb formation, which occurs when the plant begins to form a bulb underground.
By understanding these different stages of growth and development, you can better appreciate the importance of proper harvesting techniques. This will help to ensure a healthy and productive crop, and reduce the risk of disease and pests.
Harvesting garlic is a rewarding experience, and with the right techniques, you can enjoy a bountiful crop of delicious and flavorful garlic. Whether you’re a seasoned gardener or just starting out, growing garlic from a clove is a great way to add some excitement and variety to your garden.
Troubleshooting Common Garlic Growing Issues
When growing garlic from a clove, several common issues can arise that can affect the health and productivity of the crop. Bolting, rot, and pests are some of the most common problems that garlic growers face. In this section, we will discuss these issues and provide solutions and preventative measures to ensure a healthy and productive garlic crop.
Bolting is a common problem that occurs when the garlic plant produces a flower stalk, which can reduce the size and quality of the bulb. To prevent bolting, it’s essential to remove the flower stalk as soon as it appears. This will direct the plant’s energy towards bulb formation and prevent the reduction of bulb size.
Rot is another common problem that can affect garlic crops. Rot is caused by fungal diseases that thrive in moist environments. To prevent rot, it’s essential to ensure good air circulation and drainage around the plants. This can be achieved by planting the garlic cloves in well-draining soil and providing adequate spacing between the plants.
Pests are also a common problem that can affect garlic crops. Aphids, spider mites, and nematodes are some of the most common pests that can affect garlic. To prevent pest infestations, it’s essential to use organic pest control methods such as neem oil and diatomaceous earth. These methods are safe for the environment and can effectively control pest populations.
By understanding the common issues that can arise when growing garlic from a clove, you can take preventative measures to ensure a healthy and productive crop. Regular monitoring and maintenance are essential to prevent these issues and ensure a successful harvest.
When growing garlic from a clove, it’s essential to be aware of the potential problems that can arise and take preventative measures to ensure a healthy and productive crop. By following the tips and advice provided in this article, you can successfully grow garlic from a clove and enjoy a bountiful harvest of delicious and flavorful garlic.

Storing and Preserving Your Garlic Harvest
After harvesting your garlic crop, it’s essential to store and preserve the bulbs properly to enjoy them throughout the year. Garlic can be stored in various ways, including drying, freezing, and dehydrating.
Drying is a popular method for storing garlic, as it allows the bulbs to be stored for several months. To dry garlic, simply tie the bulbs in small bunches and hang them upside down in a warm, dry place. This will allow the bulbs to dry slowly, preserving their flavor and aroma.
Freezing is another effective method for storing garlic. To freeze garlic, simply chop the bulbs into small pieces and place them in an airtight container or freezer bag. Frozen garlic can be used in cooking and will retain its flavor and aroma for several months.
Dehydrating is a great way to preserve garlic, as it allows the bulbs to be stored for several years. To dehydrate garlic, simply slice the bulbs thinly and place them in a dehydrator or oven on the lowest heat setting. Dehydrated garlic can be stored in airtight containers and used in cooking.
When storing garlic, it’s essential to keep the bulbs in a cool, dry place to prevent spoilage. Garlic can be stored in a variety of containers, including paper bags, mesh bags, and airtight containers. It’s also important to keep the bulbs away from direct sunlight and moisture.
By storing and preserving your garlic harvest properly, you can enjoy your homegrown garlic throughout the year. Whether you choose to dry, freeze, or dehydrate your garlic, you can be sure that it will retain its flavor and aroma for several months.
When growing garlic from a clove, it’s essential to consider the storage and preservation methods that will work best for you. By choosing the right method, you can enjoy your garlic harvest for several months and make the most of your homegrown garlic.
:max_bytes(150000):strip_icc()/harvesting-garlic-1402402-05-6b8496a35f2f426598da3bd4e599b4b4.jpg)