Choosing the Right Gladiolus Bulbs for Your Garden
When it comes to growing gladiolus, selecting the right bulbs is crucial for a successful harvest. With over 250 species of gladiolus, choosing the perfect variety can be overwhelming. However, by understanding the different types of gladiolus bulbs available, you can make an informed decision that suits your garden’s specific needs.

Click Image to Find Garden Products
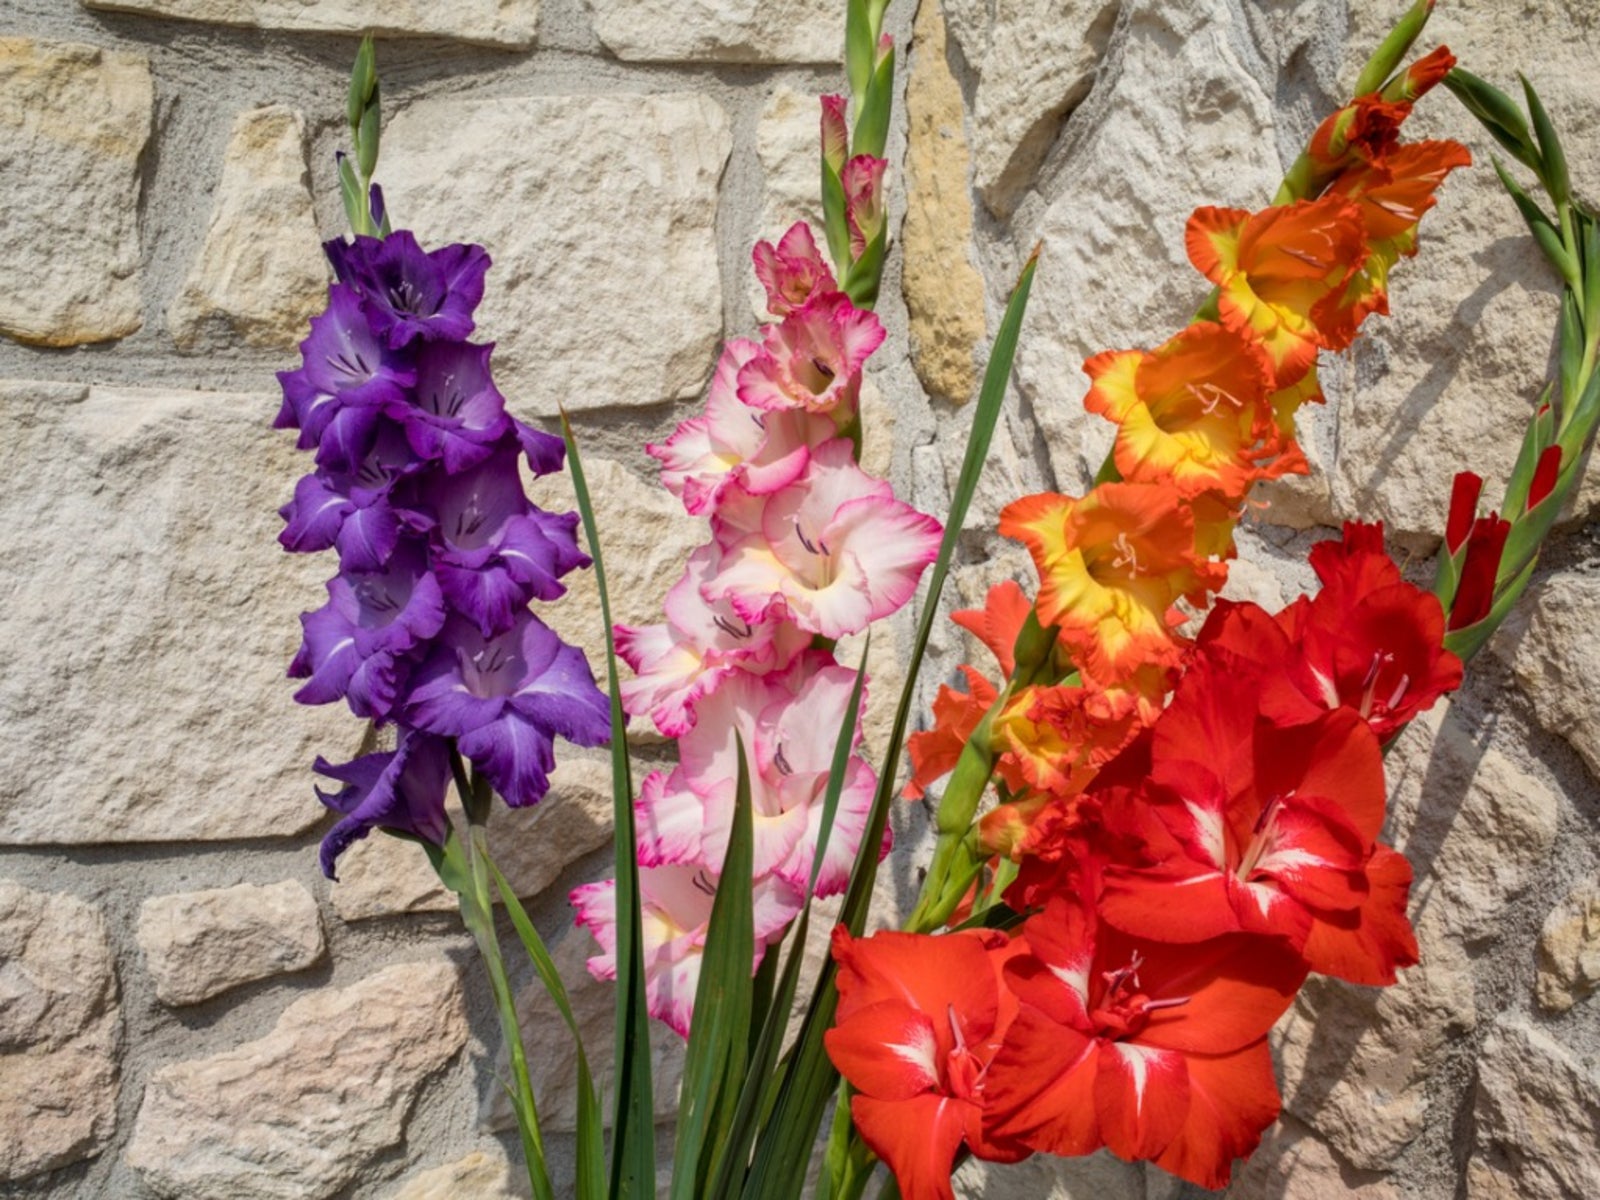
Gladiolus bulbs come in a range of colors, from vibrant reds and oranges to soft pastels and whites. Some popular varieties include the Gladiolus communis, known for its tall, stately spikes, and the Gladiolus nanus, which produces delicate, bell-shaped flowers. When selecting gladiolus bulbs, consider the growing conditions in your garden, including the amount of sunlight, temperature, and soil type.
For example, if you live in an area with hot summers, look for heat-tolerant varieties like the Gladiolus dalenii. For cooler climates, opt for varieties like the Gladiolus byzantinus, which thrive in temperate conditions. Additionally, think about the amount of space you have available, as some gladiolus varieties can grow quite tall and require staking.
When purchasing gladiolus bulbs, make sure to choose healthy, firm bulbs with no signs of mold or mildew. Avoid bulbs that are soft, bruised, or have visible signs of damage. By selecting the right gladiolus bulbs for your garden, you’ll be well on your way to growing vibrant, thriving gladiolus that will bloom beautifully and provide a stunning display of color. By following these tips, you’ll learn how to grow gladiolus bulbs that will thrive in your garden.
Preparing the Soil for Gladiolus Bulb Planting
Before planting gladiolus bulbs, it’s essential to prepare the soil to ensure optimal growth and blooming. Gladiolus bulbs thrive in well-draining soil with a pH between 6.0 and 7.0. To test your soil pH, use a soil testing kit or send a sample to a laboratory for analysis.
Remove any weeds, debris, or rocks from the planting area to prevent competition for nutrients and water. Add organic matter such as compost or well-rotted manure to improve soil structure and fertility. Mix in a 2-inch layer of organic matter into the top 6-8 inches of soil.
Create a well-draining soil mix by combining equal parts of peat moss, perlite, and vermiculite. This mix will help prevent waterlogged soil and ensure that the gladiolus bulbs receive the right amount of moisture. If your soil is heavy clay or sandy, amend it with organic matter and perlite to improve drainage.
When planting gladiolus bulbs, make sure the soil is moist but not waterlogged. Water the soil gently but thoroughly after planting, and keep the soil consistently moist during the first growing season. By preparing the soil correctly, you’ll be well on your way to growing healthy, thriving gladiolus that will bloom beautifully. By following these tips, you’ll learn how to grow gladiolus bulbs that will thrive in your garden.

How to Plant Gladiolus Bulbs for Maximum Growth
Planting gladiolus bulbs is a straightforward process that requires some care and attention to detail. To ensure maximum growth and blooming, follow these steps to plant your gladiolus bulbs correctly.
Before planting, inspect the bulbs for any signs of damage or mold. Choose a location with full sun to partial shade, depending on the variety, and well-draining soil. If planting in containers, use a deep pot with good drainage holes to accommodate the tall stems of the gladiolus.
Plant the gladiolus bulbs at a depth of 2-4 times their height, depending on the variety. Space them 3-6 inches apart, depending on the mature size of the plants. If planting in rows, space the rows 12-18 inches apart. Plant the bulbs with the pointed end facing upwards and the flat base facing downwards.
Fill the planting hole with a mixture of soil and organic matter, such as compost or well-rotted manure. Water the soil gently but thoroughly after planting, and keep the soil consistently moist during the first growing season. By following these steps, you’ll be well on your way to growing healthy, thriving gladiolus that will bloom beautifully. By learning how to grow gladiolus bulbs, you’ll be able to enjoy these stunning flowers in your garden.
When planting in containers, make sure to use a well-draining potting mix and a container that is at least 6-8 inches deep. Plant the bulbs at the same depth as in the ground, and water thoroughly after planting. Keep the soil consistently moist, but not waterlogged, to prevent root rot.
By following these tips and guidelines, you’ll be able to plant your gladiolus bulbs correctly and enjoy a beautiful display of flowers in your garden. Remember to provide optimal growing conditions, including sunlight, temperature, and watering requirements, to ensure maximum growth and blooming. By learning how to grow gladiolus bulbs, you’ll be able to enjoy these stunning flowers for years to come.
Providing Optimal Growing Conditions for Gladiolus
Gladiolus bulbs require specific growing conditions to thrive and produce vibrant blooms. By providing optimal conditions, you can encourage healthy growth and maximize blooming.
Sunlight is essential for gladiolus, with most varieties requiring full sun to partial shade. Choose a location that receives at least 6 hours of direct sunlight per day. If you’re planting in a container, make sure it’s placed in a sunny spot.
Temperature also plays a crucial role in gladiolus growth. Most varieties prefer temperatures between 65°F and 75°F (18°C and 24°C) during the day and no lower than 55°F (13°C) at night. Avoid planting in areas with extreme temperature fluctuations.
Watering is critical for gladiolus, especially during the first growing season. Water the soil gently but thoroughly, making sure the soil is consistently moist but not waterlogged. Reduce watering during the winter months when the bulbs are dormant.
Tall gladiolus varieties may require staking to prevent them from toppling over in the wind. Use stakes or trellises to provide support, especially in areas with strong winds or heavy rainfall. By providing optimal growing conditions, you’ll be able to enjoy a stunning display of gladiolus blooms in your garden. By learning how to grow gladiolus bulbs, you’ll be able to create a beautiful and thriving garden.
In addition to sunlight, temperature, and watering, gladiolus also require good air circulation to prevent fungal diseases. Plant them in a location with good air movement, and avoid planting in areas with high humidity.
By following these guidelines, you’ll be able to provide optimal growing conditions for your gladiolus bulbs. Remember to plant them in well-draining soil, fertilize and mulch regularly, and deadhead flowers to encourage repeat blooming. With proper care and attention, your gladiolus bulbs will thrive and produce stunning blooms for years to come.

Nourishing Your Gladiolus with Fertilizers and Mulch
Fertilizing and mulching are essential steps in how to grow gladiolus bulbs, as they provide the necessary nutrients and moisture for healthy growth and blooming. By understanding the benefits of fertilizing and mulching, you can create a thriving environment for your gladiolus bulbs.
Fertilizers provide essential nutrients for gladiolus growth, including nitrogen, phosphorus, and potassium. Choose a balanced fertilizer with a ratio of 10-10-10 (nitrogen-phosphorus-potassium) and apply it according to the manufacturer’s instructions. You can also use a high-phosphorus fertilizer to promote blooming.
Apply fertilizers at the right time to maximize their effectiveness. For gladiolus, it’s best to fertilize during the growing season, when the plants are actively producing foliage and flowers. Avoid fertilizing during the dormant season, as this can cause the bulbs to rot.
Mulching is another crucial step in how to grow gladiolus bulbs. Mulch helps to retain moisture, suppress weeds, and regulate soil temperature. Use a layer of 2-3 inches of organic mulch, such as straw, bark chips, or grass clippings, around the base of the plants.
When choosing a mulch, select one that is free of weeds and diseases, and that won’t attract pests. Apply the mulch after planting, and replenish it as needed throughout the growing season. By fertilizing and mulching your gladiolus bulbs, you’ll be able to create a healthy and thriving environment that promotes maximum growth and blooming.
In addition to fertilizing and mulching, it’s also important to water your gladiolus bulbs regularly. Water them deeply once or twice a week, depending on weather conditions. Avoid overwatering, which can cause the bulbs to rot.
By following these tips on fertilizing, mulching, and watering, you’ll be able to create a thriving environment for your gladiolus bulbs. Remember to plant them in well-draining soil, provide optimal growing conditions, and deadhead flowers to encourage repeat blooming. With proper care and attention, your gladiolus bulbs will thrive and produce stunning blooms for years to come.
Pest and Disease Management for Healthy Gladiolus
When learning how to grow gladiolus bulbs, it’s essential to be aware of the common pests and diseases that can affect these beautiful flowers. By taking preventative measures and knowing how to control infestations, you can ensure healthy growth and blooming.
Aphids are one of the most common pests that affect gladiolus. These small, soft-bodied insects can cause curled or distorted leaves and stems. To control aphids, use neem oil or insecticidal soap. Slugs and snails can also be a problem, especially in moist environments. Use copper tape or crushed eggshells around the plants to deter these pests.
Fungal infections, such as botrytis and powdery mildew, can cause significant damage to gladiolus plants. To prevent these diseases, ensure good air circulation around the plants, and avoid overwatering. Remove any infected leaves or stems to prevent the spread of the disease.
Other pests that can affect gladiolus include thrips, spider mites, and nematodes. To control these pests, use organic or chemical pesticides as needed. Always follow the manufacturer’s instructions and take necessary safety precautions when using pesticides.
In addition to controlling pests and diseases, it’s essential to maintain good garden hygiene. Remove any debris or weeds from the garden, and disinfect any tools or equipment used on the plants. By taking these preventative measures, you can reduce the risk of pest and disease infestations and ensure healthy growth and blooming.
When growing gladiolus, it’s also important to monitor the plants regularly for signs of pests or diseases. Catching infestations early can make a significant difference in the health and productivity of the plants. By combining good garden hygiene with effective pest and disease management, you can enjoy vibrant and healthy gladiolus blooms all season long.
Deadheading and Staking Gladiolus for Maximum Blooms
To encourage repeat blooming and maintain the overall health of your gladiolus plants, deadheading and staking are essential techniques to master. By incorporating these simple practices into your gladiolus care routine, you can enjoy a longer blooming period and more vibrant flowers.
Deadheading involves removing the faded flowers from the plant, which helps to redirect the energy from seed production to flower production. To deadhead gladiolus, simply snip off the wilted flowers at the base of the stem, making sure not to damage the surrounding foliage. This process can be repeated throughout the blooming period to encourage continuous flowering.
Tall gladiolus varieties often require staking to prevent them from toppling over in the wind. To stake your gladiolus, drive a stake into the ground near the base of the plant, and gently tie the stem to the stake using a soft material like twine or cloth. Make sure the tie is not too tight, as this can damage the stem. Staking also helps to keep the plant upright, making it easier to deadhead and enjoy the blooms.
When learning how to grow gladiolus bulbs, it’s essential to understand the importance of deadheading and staking. By incorporating these simple techniques into your gladiolus care routine, you can enjoy a longer blooming period, more vibrant flowers, and healthier plants. Remember to deadhead regularly and stake tall varieties to ensure maximum blooms and a stunning display of color in your garden.
In addition to deadheading and staking, providing optimal growing conditions and nourishing your gladiolus with fertilizers and mulch can also help to promote healthy growth and blooming. By combining these techniques, you can create a thriving gladiolus garden that will provide beauty and enjoyment for months to come.

Aftercare and Storage of Gladiolus Bulbs for Future Blooms
Once the blooming period has ended, it’s essential to provide proper aftercare and storage for your gladiolus bulbs to ensure they remain healthy and productive for future seasons. By following these simple steps, you can enjoy repeat blooms and a thriving gladiolus garden.
After the blooming period, cut back the foliage to within an inch or two of the ground. This helps to direct the energy from the leaves to the bulb, allowing it to recharge for the next growing season. Allow the foliage to die back naturally, which can take several weeks to a few months.
Once the foliage has died back, carefully dig up the gladiolus bulbs, making sure to handle them gently to avoid damage. Dry the bulbs in a warm, dry place with good air circulation, such as a garage or shed. This helps to prevent rot and disease from developing.
Store the dried gladiolus bulbs in a paper bag or breathable container, such as a cardboard box or mesh bag. Keep the bulbs in a cool, dry place, away from direct sunlight and moisture. Check on the bulbs periodically to ensure they remain dry and free from mold or mildew.
By following these simple steps, you can enjoy a thriving gladiolus garden year after year. Remember to plant the stored bulbs in the spring, when the soil has warmed up and the threat of frost has passed. With proper care and storage, your gladiolus bulbs will continue to thrive, providing beautiful blooms and a stunning display of color in your garden. When learning how to grow gladiolus bulbs, it’s essential to understand the importance of aftercare and storage, as this can make all the difference in the health and productivity of your plants.