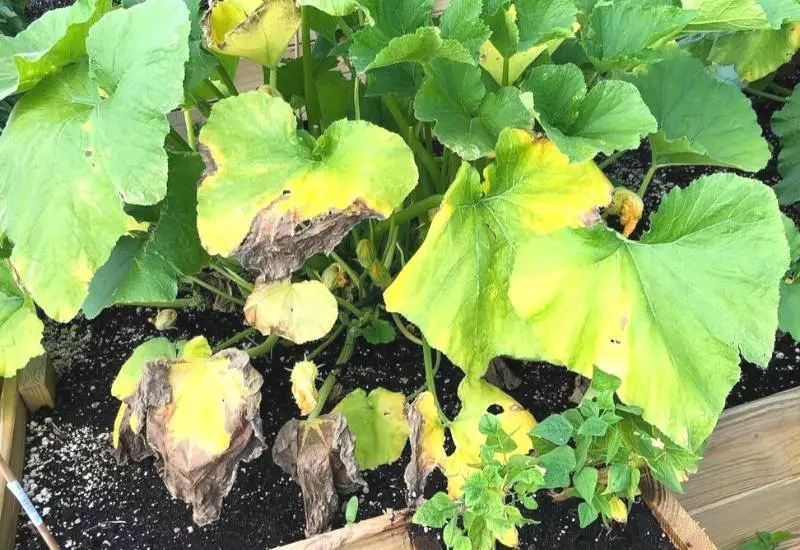
Preparing the Perfect Soil for Yellow Squash
Soil quality is a crucial factor in growing yellow squash, as it directly affects the plant’s ability to absorb nutrients and water. To create an ideal environment for your yellow squash, it’s essential to prepare the soil before planting. The first step is to test the pH level of your soil, as yellow squash prefers a slightly acidic to neutral soil pH, ranging from 6.0 to 7.0. If your soil pH is too high or too low, you can amend it with lime or sulfur to adjust the pH level.
In addition to pH, yellow squash requires a balanced diet of nutrients, including nitrogen, phosphorus, and potassium. You can add organic matter such as compost or well-rotted manure to the soil to provide these essential nutrients. It’s also important to ensure good drainage, as yellow squash is susceptible to root rot in waterlogged soil. To improve drainage, you can add a 2-inch layer of organic matter or perlite to the soil.
Before planting, it’s also essential to remove any debris, rocks, or weeds that can compete with your yellow squash for water and nutrients. You can use a garden fork or tiller to loosen the soil to a depth of 8-10 inches, and then rake the soil to create a smooth, even surface. By preparing the perfect soil for your yellow squash, you’ll be rewarded with a healthy and productive crop.
When learning how to grow yellow squash, it’s essential to remember that soil preparation is a critical step in the process. By taking the time to prepare your soil, you’ll be creating an ideal environment for your yellow squash to thrive. With the right soil conditions, you’ll be able to enjoy a bountiful harvest of delicious and nutritious yellow squash.
Choosing the Right Yellow Squash Variety for Your Garden
With so many varieties of yellow squash to choose from, selecting the right one for your garden can be a daunting task. However, by considering a few key factors, you can make an informed decision and grow a bountiful crop of delicious yellow squash. When learning how to grow yellow squash, it’s essential to choose a variety that is well-suited to your climate, available space, and desired harvest period.
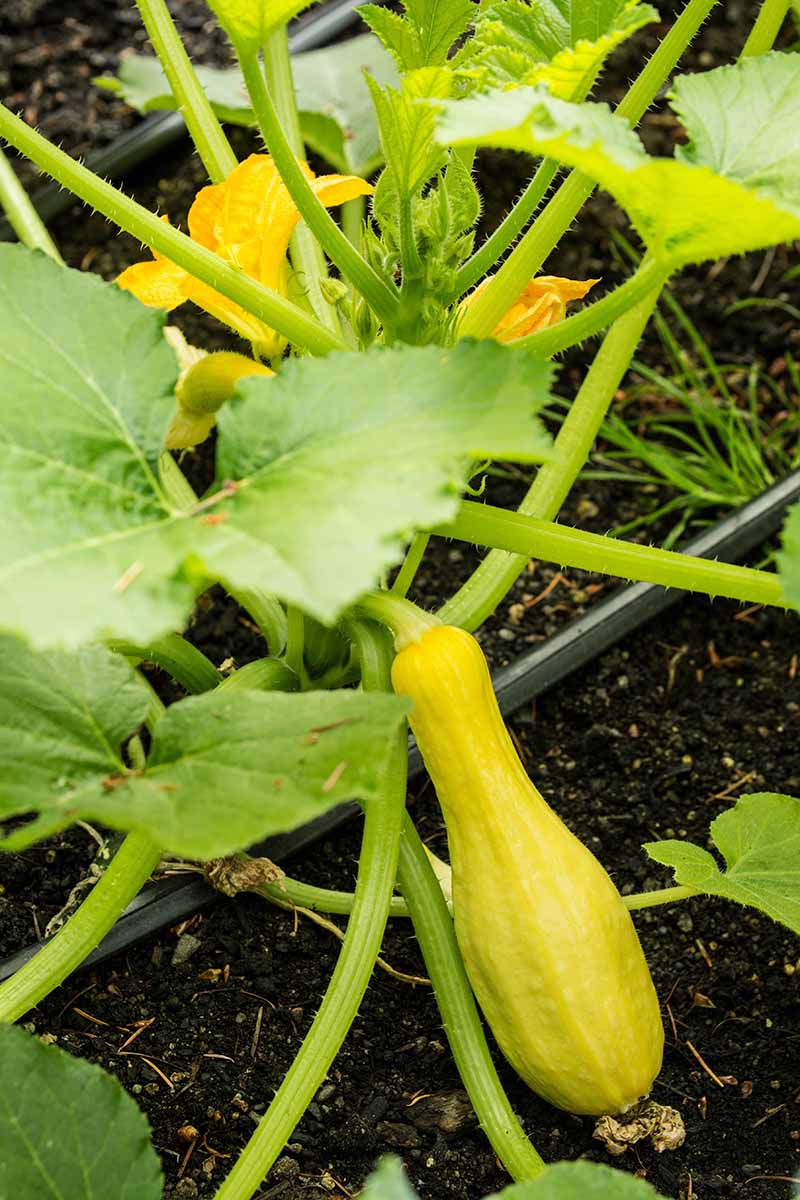
One popular variety of yellow squash is ‘Crookneck’, which is known for its distinctive curved shape and sweet, tender flesh. This variety is ideal for gardens with warm weather and well-draining soil. Another popular variety is ‘Straightneck’, which has a straight, cylindrical shape and a slightly sweeter flavor than ‘Crookneck’. This variety is well-suited to gardens with cooler weather and more moist soil.
For gardeners with limited space, ‘Pattypan’ is a great option. This variety produces small, round fruits that are perfect for grilling or sautéing. ‘Pattypan’ is also a great choice for container gardens, as it is compact and produces a high yield. Other varieties of yellow squash, such as ‘Yellow Acorn’ and ‘Golden Crookneck’, offer similar characteristics and can be chosen based on personal preference.
When selecting a variety of yellow squash, it’s also essential to consider the days to maturity. This refers to the number of days it takes for the squash to mature from sowing the seeds. Some varieties, such as ‘Crookneck’, have a shorter days to maturity (around 35-40 days), while others, such as ‘Straightneck’, take longer (around 45-50 days). By choosing a variety with a days to maturity that fits your desired harvest period, you can ensure a bountiful crop of delicious yellow squash.
By considering these factors and choosing the right variety of yellow squash for your garden, you’ll be well on your way to growing a successful crop. Whether you’re a seasoned gardener or just starting out, learning how to grow yellow squash can be a fun and rewarding experience.
When and How to Plant Yellow Squash Seeds for Optimal Growth
Planting yellow squash seeds at the right time and in the right conditions is crucial for optimal growth and a bountiful harvest. When learning how to grow yellow squash, it’s essential to understand the ideal time of year, soil temperature, and spacing requirements for planting.
In most regions, the ideal time to plant yellow squash seeds is in late spring to early summer, when the soil has warmed up to at least 60°F (15°C). This allows the seeds to germinate and the seedlings to grow rapidly, taking advantage of the warm weather and long days. In areas with a shorter growing season, it’s possible to start yellow squash seeds indoors 2-3 weeks before the last frost date and then transplant them outside when the weather warms up.
When planting yellow squash seeds directly in the garden, it’s essential to space them correctly to prevent overcrowding and promote healthy growth. The ideal spacing for yellow squash is 3-4 feet (90-120 cm) apart, with rows spaced 6-8 feet (180-240 cm) apart. This allows for good air circulation and sunlight penetration, reducing the risk of disease and promoting healthy growth.
Another option for planting yellow squash is to start the seeds indoors and then transplant them outside when the weather warms up. This method can give the seedlings a head start on the growing season and allow for more control over the growing conditions. When starting yellow squash seeds indoors, it’s essential to use a good quality potting mix and provide adequate light and warmth. Once the seedlings have 2-3 sets of leaves, they can be transplanted outside into larger containers or directly into the garden.
Regardless of whether you choose to plant yellow squash seeds directly in the garden or start them indoors, it’s essential to provide the right conditions for optimal growth. This includes full sun, well-draining soil, and adequate moisture. By following these tips and guidelines, you can successfully grow yellow squash and enjoy a bountiful harvest of delicious and nutritious fruit.
Providing the Right Conditions for Yellow Squash Growth
Yellow squash is a warm-season crop that requires specific conditions to grow and thrive. When learning how to grow yellow squash, it’s essential to understand the importance of sunlight, water, and temperature for optimal growth.
Yellow squash needs full sun to produce a bountiful harvest, so it’s essential to choose a location that receives direct sunlight for at least 6 hours a day. The ideal temperature for yellow squash growth is between 65°F (18°C) and 95°F (35°C), with an optimal temperature of around 85°F (29°C). Temperatures above 100°F (38°C) can lead to sunscald and reduced fruit production.
Water is also crucial for yellow squash growth, and the plants require consistent moisture to produce a healthy crop. The ideal watering schedule for yellow squash is to provide about 1 inch (2.5 cm) of water per week, either through rainfall or irrigation. It’s essential to avoid overwatering, which can lead to root rot and other problems.
In addition to sunlight and water, yellow squash also requires well-draining soil to grow. The ideal soil pH for yellow squash is between 6.0 and 7.0, and the soil should be rich in organic matter to provide nutrients for the plants. By providing the right conditions for yellow squash growth, you can ensure a healthy and productive crop.
It’s also important to note that yellow squash is a warm-season crop and can be sensitive to frost. In areas with a short growing season, it’s essential to wait until the soil has warmed up and the risk of frost has passed before planting yellow squash. By following these guidelines and providing the right conditions for growth, you can successfully grow yellow squash and enjoy a bountiful harvest of delicious and nutritious fruit.
Supporting Yellow Squash Plants for Maximum Yield
Yellow squash plants are climbing vines that require support to grow upright and produce a maximum yield. When learning how to grow yellow squash, it’s essential to provide the right support structures to help the plants thrive.
One of the most common support structures for yellow squash is a trellis. A trellis provides a framework for the vines to climb, keeping them off the ground and promoting healthy growth. You can purchase a trellis or make your own using materials like wood or metal.
Another option for supporting yellow squash plants is a cage. A cage is a circular or square structure that surrounds the plant, providing support for the vines as they grow. Cages are easy to set up and can be made from materials like chicken wire or hardware cloth.
In addition to providing support structures, it’s also essential to train the vines to climb. This can be done by gently twining the vines around the trellis or cage. As the vines grow, they will naturally climb up the support structure, producing a bountiful harvest of yellow squash.
Pruning is also an essential part of supporting yellow squash plants. Pruning helps to promote healthy growth, increase fruit production, and prevent disease. You can prune your yellow squash plants by removing any weak or spindly growth, and trimming back the tips of the vines to encourage branching.
By providing the right support structures and training the vines to climb, you can help your yellow squash plants grow upright and produce a maximum yield. With a little care and attention, you can enjoy a bountiful harvest of delicious and nutritious yellow squash.
Common Pests and Diseases Affecting Yellow Squash and How to Manage Them
Yellow squash is a popular and nutritious vegetable, but it can be susceptible to various pests and diseases. When learning how to grow yellow squash, it’s essential to be aware of these potential issues and take steps to prevent and control them.
Aphids are one of the most common pests that can affect yellow squash. These small, soft-bodied insects feed on the plant’s sap, causing curled or distorted leaves. To manage aphids, use neem oil or insecticidal soap, and introduce natural predators like ladybugs or lacewings.
Powdery mildew is a fungal disease that can cause a white, powdery coating on the leaves of yellow squash. To prevent powdery mildew, provide good air circulation, water at the base of the plant, and avoid overhead watering. If the disease is already present, use a fungicide specifically designed for powdery mildew.
Fusarium wilt is another common disease that can affect yellow squash. This fungal disease causes yellowing or wilting of the leaves, and can be fatal to the plant. To prevent fusarium wilt, use crop rotation, remove infected plants, and treat the soil with a fungicide.
Other pests and diseases that can affect yellow squash include squash bugs, cucumber beetles, and bacterial leaf spot. To manage these issues, use a combination of cultural controls, biological controls, and chemical controls.
Cultural controls include practices like crop rotation, sanitation, and irrigation management. Biological controls involve introducing natural predators or parasites to control pest populations. Chemical controls involve using pesticides or fungicides specifically designed for the target pest or disease.
Integrated pest management (IPM) is a holistic approach to managing pests and diseases. IPM involves using a combination of cultural, biological, and chemical controls to minimize the use of chemical pesticides and maintain a healthy ecosystem.
By being aware of the common pests and diseases that can affect yellow squash, and taking steps to prevent and control them, you can enjoy a healthy and productive crop of delicious and nutritious yellow squash.
Harvesting Yellow Squash at the Right Time for Maximum Flavor and Nutrition
Harvesting yellow squash at the right time is crucial for maximum flavor and nutrition. When learning how to grow yellow squash, it’s essential to understand the ideal size, color, and texture of the fruit to determine when it’s ready to be picked.
The ideal size of yellow squash varies depending on the variety, but most types are ready to be harvested when they are between 6 and 8 inches (15-20 cm) in length and 1-2 inches (2.5-5 cm) in diameter. The fruit should be a bright yellow color and have a slightly soft texture.
To check for readiness, gently grasp the fruit and twist it slightly. If it comes off the plant easily, it’s ready to be harvested. If not, wait a few more days and check again.
When harvesting yellow squash, use a sharp knife or pruning shears to cut the fruit from the plant. Leave about 1 inch (2.5 cm) of stem attached to the fruit to prevent moisture from entering the plant and causing rot.
It’s also essential to harvest yellow squash regularly to encourage the plant to produce more fruit. Yellow squash is a warm-season crop, and it will continue to produce fruit throughout the growing season if it’s harvested regularly.
By harvesting yellow squash at the right time, you can enjoy a bountiful crop of delicious and nutritious fruit. Whether you’re using it in recipes, storing it for later use, or preserving it through canning or freezing, yellow squash is a versatile and rewarding crop to grow.
Tips for Enjoying Your Homegrown Yellow Squash
Now that you’ve successfully grown your yellow squash, it’s time to enjoy the fruits of your labor Here are some tips for using and enjoying your homegrown yellow squash:
Recipe Ideas: Yellow squash is a versatile ingredient that can be used in a variety of dishes. Try grilling or sautéing it as a side dish, or use it in soups, stews, and casseroles. You can also use it in baked goods, such as bread and muffins.
Storage Tips: To keep your yellow squash fresh for a longer period, store it in a cool, dry place. You can also store it in the refrigerator to keep it fresh for up to a week.
Preservation Methods: If you have a bountiful harvest of yellow squash, you may want to consider preserving some of it for later use. You can freeze, can, or dehydrate yellow squash to enjoy it throughout the year.
Freezing: To freeze yellow squash, simply chop it up and place it in an airtight container or freezer bag. Frozen yellow squash is perfect for using in soups, stews, and casseroles.
Canning: To can yellow squash, you’ll need to follow a tested canning recipe and procedure. Canned yellow squash is perfect for using in recipes or as a side dish.
Dehydrating: To dehydrate yellow squash, simply slice it up and place it in a dehydrator or oven on the lowest temperature setting. Dehydrated yellow squash is perfect for snacking or using in recipes.
By following these tips, you can enjoy your homegrown yellow squash all year round. Whether you’re using it in recipes, storing it for later use, or preserving it through canning or freezing, yellow squash is a delicious and nutritious addition to any meal.


