Materials Needed: A Step-by-Step Guide to Gathering Your Supplies
To create a self-watering planter from a plastic bottle, you’ll need a few simple materials. These include:
- Plastic bottles (2-liter or 1.5-liter bottles work well)
- Scissors or a craft knife
- Glue (hot glue or epoxy work well)
- Water
- Soil and plants of your choice
When sourcing your materials, consider the following tips:
Choose plastic bottles that are clean and dry. Avoid using bottles that have been used for chemicals or other substances that may contaminate your soil and plants.
Select scissors or a craft knife that are sharp and suitable for cutting plastic.
Use a glue that is suitable for bonding plastic and other materials. Hot glue and epoxy are good options.
Use water that is clean and free of contaminants.
Select soil and plants that are suitable for the type of planter you are creating. Consider using a well-draining potting mix and plants that prefer moist soil.
By gathering the right materials, you’ll be well on your way to creating a functional and sustainable self-watering planter from a plastic bottle.
Designing Your Planter: Tips for Creating the Perfect Self-Watering System
When it comes to designing a self-watering planter from a plastic bottle, there are several factors to consider. The shape, size, and material of the bottle can all impact the effectiveness of the planter. Here are some tips for designing a functional self-watering system:
Choose a bottle with a wide mouth: A bottle with a wide mouth is easier to clean and maintain than one with a narrow mouth. It also allows for better air circulation and makes it easier to add soil and plants.
Select a bottle with a sturdy material: The material of the bottle should be sturdy enough to support the weight of the soil and plants. Avoid using bottles that are too thin or flimsy.
Consider the size of the bottle: The size of the bottle will depend on the type of plants you want to use. A larger bottle can accommodate more soil and plants, but may be more difficult to handle.
Think about the shape of the bottle: The shape of the bottle can impact the way the water flows through the planter. A bottle with a curved shape can help to distribute the water more evenly.
Some popular designs for self-watering planters include:
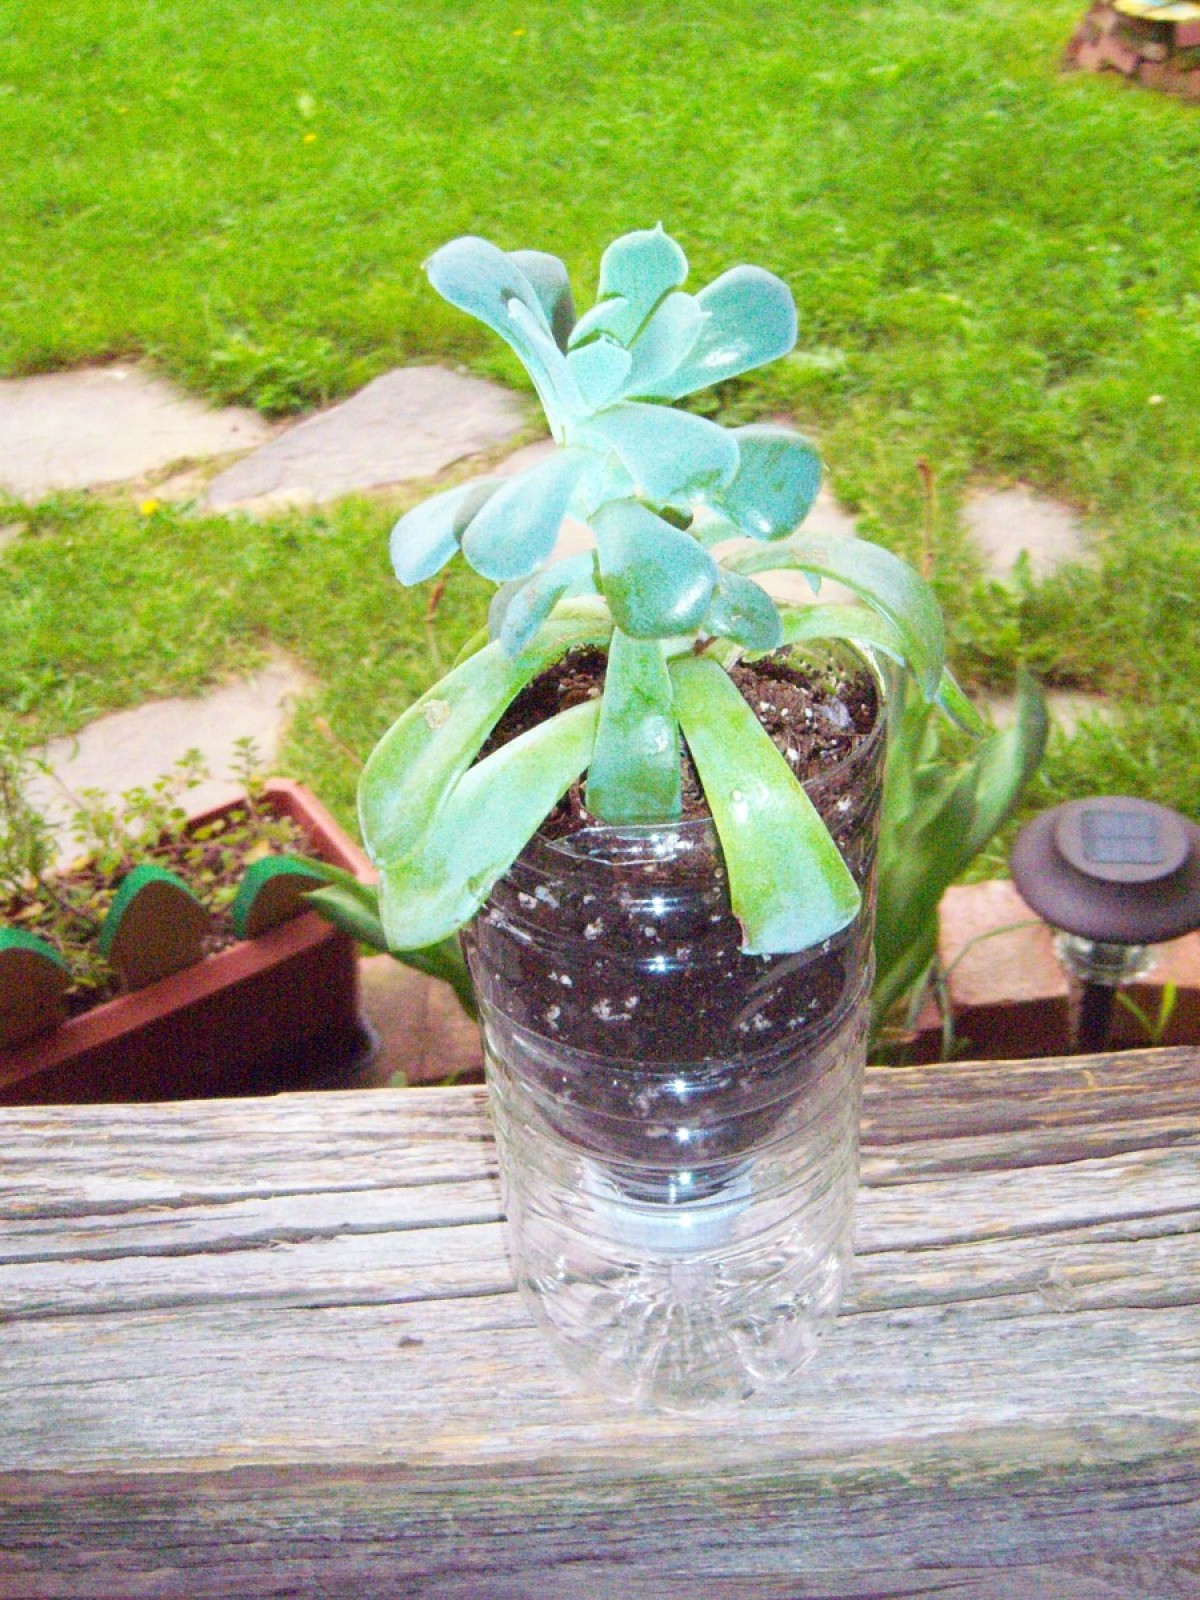
- The “bottle within a bottle” design, where a smaller bottle is placed inside a larger one to create a water reservoir.
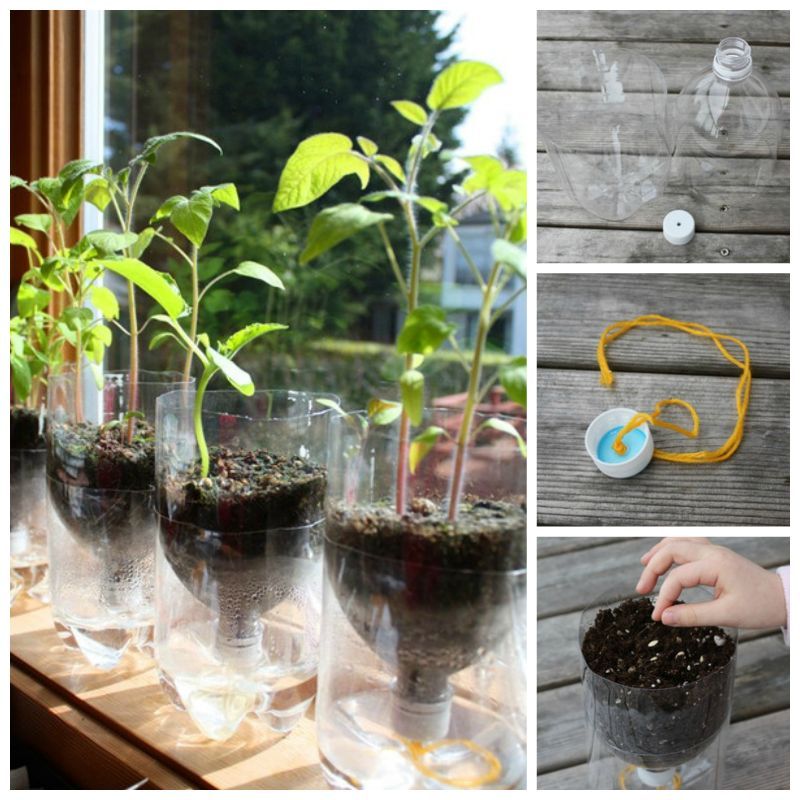
- The “wick system” design, where a wick is used to draw water from the reservoir to the soil.
- The “floating water” design, where the water reservoir is placed at the bottom of the planter and the soil and plants are placed on top.
Each of these designs has its own benefits and drawbacks, and the best design for you will depend on your specific needs and preferences.
Cutting and Preparing the Bottle: A Step-by-Step Tutorial
Cutting and preparing the plastic bottle is a crucial step in creating a self-watering planter. Here’s a step-by-step guide to help you do it safely and effectively:
Step 1: Clean and dry the bottle
Before you start cutting the bottle, make sure it’s clean and dry. Remove any labels and residue, and wash the bottle with soap and water. This will ensure that your planter is free from any contaminants and debris.
Step 2: Cut the bottle in half
Use a sharp utility knife or scissors to cut the bottle in half. You can cut it horizontally or vertically, depending on the design you want to create. Make sure to cut slowly and carefully to avoid any accidents.
Step 3: Create a hole for the watering system
Use a drill or a sharp object to create a hole in the bottom half of the bottle. This hole will serve as the watering system, allowing you to add water to the planter without having to remove the soil and plants.
Step 4: Cut a small hole for the wick
If you’re using a wick system, cut a small hole in the side of the bottle, just above the watering hole. This hole will allow the wick to draw water from the reservoir to the soil.
Step 5: Smooth out the edges
Use a file or sandpaper to smooth out the edges of the bottle. This will help prevent any sharp edges from damaging the soil or plants.
Step 6: Prepare the bottle for assembly
Once you’ve cut and prepared the bottle, it’s ready for assembly. Make sure to follow the instructions carefully to ensure that your planter is functional and effective.
By following these steps, you can create a self-watering planter that’s both functional and sustainable. Remember to always use caution when working with sharp objects and to follow proper safety precautions.
Assembling the Planter: A Guide to Creating a Functional Self-Watering System
Assembling the planter is a crucial step in creating a functional self-watering system. Here’s a step-by-step guide to help you assemble the planter:
Step 1: Attach the water reservoir
Take the bottom half of the plastic bottle and attach it to the top half using glue or tape. Make sure the hole you created for the watering system is facing downwards.
Step 2: Create a watering system
Take a piece of string or twine and tie it around the neck of the bottle, leaving a small loop at the top. This loop will serve as the watering system, allowing you to add water to the planter without having to remove the soil and plants.
Step 3: Add soil and plants
Fill the planter with soil, leaving about an inch at the top for watering. Plant your chosen plants in the soil, making sure to leave enough space for growth.
Step 4: Add water to the reservoir
Fill the water reservoir with water, making sure not to overfill it. The water level should be below the soil level to prevent waterlogging.
Step 5: Monitor and adjust
Monitor the water level in the reservoir and adjust as needed. Make sure the soil is consistently moist but not waterlogged.
By following these steps, you can create a functional self-watering planter that will help your plants thrive. Remember to always use caution when working with sharp objects and to follow proper safety precautions.
When it comes to how to make water bottles for plants, assembling the planter is a crucial step. By following these steps, you can create a planter that will help your plants grow and thrive.
Tips for Using Your Upcycled Planter: Maximizing Water Efficiency and Plant Growth
Now that you have created your upcycled planter, it’s time to use it effectively. Here are some tips to help you maximize water efficiency and plant growth:
Monitor water levels: Check the water level in the reservoir regularly to ensure that it’s not too high or too low. Adjust the watering system as needed to maintain the optimal water level.
Adjust the watering system: Depending on the type of plants you are growing, you may need to adjust the watering system to provide more or less water. Experiment with different watering schedules to find what works best for your plants.
Optimize plant growth: Make sure to provide your plants with enough light, nutrients, and pruning to promote healthy growth. Use a well-draining potting mix and fertilize your plants regularly to ensure they receive the nutrients they need.
Use a mulch: Mulch can help retain moisture in the soil and reduce evaporation. Use a thin layer of organic mulch such as bark chips or straw to cover the soil surface.
Keep the planter clean: Regularly clean the planter to prevent the buildup of debris and bacteria. Use a soft brush to remove any debris from the watering system and reservoir.
By following these tips, you can maximize water efficiency and plant growth in your upcycled planter. Remember to always use caution when working with sharp objects and to follow proper safety precautions.
When it comes to how to make water bottles for plants, using your upcycled planter effectively is crucial. By following these tips, you can create a sustainable and efficient gardening system that promotes healthy plant growth.
Common Mistakes to Avoid: Troubleshooting Your Upcycled Planter
When creating and using an upcycled planter, there are several common mistakes to avoid. Here are some troubleshooting tips to help you identify and fix any issues that may arise:
Waterlogging: One of the most common mistakes is overwatering, which can lead to waterlogging. Check the water level in the reservoir regularly and adjust the watering system as needed to prevent waterlogging.
Root bound: If the roots of your plants become too large for the planter, it can cause the plants to become root bound. Check the roots regularly and transplant the plants into a larger planter if necessary.
Pest infestations: Pests such as aphids, whiteflies, and spider mites can infest your plants. Check your plants regularly for signs of pests and treat them promptly if necessary.
Incorrect soil mix: Using the wrong soil mix can cause problems with drainage and nutrient availability. Use a well-draining potting mix that is specifically designed for the type of plants you are growing.
Insufficient light: Most plants require adequate light to photosynthesize and grow. Make sure to place your planter in a location that receives sufficient light for the type of plants you are growing.
By avoiding these common mistakes, you can create a healthy and thriving upcycled planter that will provide you with fresh produce for months to come. Remember to always use caution when working with sharp objects and to follow proper safety precautions.
When it comes to how to make water bottles for plants, troubleshooting common mistakes is crucial. By following these tips, you can create a sustainable and efficient gardening system that promotes healthy plant growth.
Conclusion: The Benefits of Upcycling Plastic Bottles for Your Plants
Upcycling plastic bottles into self-watering planters is a creative and sustainable way to reduce waste and promote healthy plant growth. By following the steps outlined in this article, you can create a functional and efficient planter that will provide you with fresh produce for months to come.
The benefits of upcycling plastic bottles into self-watering planters are numerous. Not only does it reduce waste and promote sustainability, but it also saves you money on buying traditional planters. Additionally, self-watering planters are perfect for busy gardeners or those who tend to forget to water their plants.
When it comes to how to make water bottles for plants, upcycling plastic bottles is a great option. By using plastic bottles, you can create a planter that is both functional and eco-friendly. Plus, it’s a great way to get creative and think outside the box.
In conclusion, upcycling plastic bottles into self-watering planters is a great way to promote sustainability and healthy plant growth. By following the steps outlined in this article, you can create a functional and efficient planter that will provide you with fresh produce for months to come. So why not give it a try and see the benefits for yourself?
By upcycling plastic bottles into self-watering planters, you can:
- Reduce waste and promote sustainability
- Save money on buying traditional planters
- Create a functional and efficient planter that promotes healthy plant growth
- Get creative and think outside the box
So, what are you waiting for? Start upcycling plastic bottles into self-watering planters today and see the benefits for yourself!


