Understanding Coffee Plant Requirements
Coffee plants require a specific set of conditions to thrive, and understanding these requirements is crucial for successful cultivation. Climate, soil, and light conditions are the three primary factors that affect coffee plant growth and coffee production. Coffee plants typically require a subtropical climate with average temperatures ranging from 60°F to 80°F (15°C to 27°C). They also need well-defined wet and dry seasons, with the wet season coinciding with the plant’s active growth phase.

Click Image to Find Garden Products
In terms of soil, coffee plants prefer acidic to neutral soil pH, ranging from 5.5 to 6.5. The soil should also be rich in organic matter, with a mix of sand, silt, and clay. Coffee plants require partial shade, especially when they’re young, and consistent moisture levels. However, overwatering can be detrimental to the plant’s health, so it’s essential to strike a balance between moisture and drainage.
When considering how to plant coffee beans, it’s essential to choose a location that meets these requirements. If you’re growing coffee in a container, make sure it’s large enough to accommodate the plant’s mature size and has good drainage holes. By providing your coffee plant with the right conditions, you’ll be well on your way to growing a healthy and productive plant.
It’s also important to note that coffee plants are sensitive to extreme temperatures, wind, and frost. If you live in an area with harsh winters, you may need to provide protection for your plant or bring it indoors during the winter months. By understanding and meeting the specific requirements of your coffee plant, you’ll be able to enjoy a bountiful harvest and a delicious cup of homegrown coffee.
Preparing the Perfect Environment for Coffee Seed Germination
Once you have a good understanding of the basic requirements for growing coffee plants, it’s time to prepare the perfect environment for coffee seed germination. This is a critical step in the process of how to plant coffee beans, as it will determine the success of your seedlings. To create a suitable environment for germination, you’ll need to provide the right temperature, humidity, and light conditions.
The ideal temperature for coffee seed germination is between 70°F to 80°F (21°C to 27°C). You can achieve this by placing the seeds in a warm location, such as a greenhouse or a sunny windowsill. However, make sure the temperature doesn’t exceed 85°F (29°C), as this can inhibit germination.
Humidity is also crucial for coffee seed germination. You can create a humid environment by covering the seeds with a clear plastic bag or a cloche. This will help maintain a consistent level of moisture and promote germination. Make sure to check the seeds regularly to ensure they’re not too wet or dry.
Light is also an essential factor in coffee seed germination. While coffee plants prefer partial shade, seeds require indirect light to germinate. You can provide this by placing the seeds near a sunny windowsill or under grow lights. Avoid direct sunlight, as it can cause the seeds to overheat and inhibit germination.
In addition to temperature, humidity, and light, you’ll also need to prepare the soil for germination. Use a well-draining seed starting mix and moisten it with water. Plant the seeds about ¼ inch deep and 1-2 inches apart. Cover the seeds with a thin layer of soil and water gently.
By providing the right environment for coffee seed germination, you’ll be able to promote healthy growth and increase the chances of successful germination. This is a critical step in the process of how to plant coffee beans, and it will set the foundation for a healthy and productive coffee plant.
How to Plant Coffee Beans: A Step-by-Step Process
Now that you have prepared the perfect environment for coffee seed germination, it’s time to learn how to plant coffee beans. This step-by-step guide will walk you through the process of preparing the seeds, sowing, and transplanting.
Step 1: Preparing the Seeds
Before planting, make sure to soak the coffee seeds in water for 24 hours. This will help to soften the seed coat and encourage germination. After soaking, remove the seeds from the water and gently scrub them with a soft brush to remove any remaining pulp.
Step 2: Sowing the Seeds
Fill a seed starting tray or small pots with a well-draining seed starting mix. Plant the seeds about ¼ inch deep and 1-2 inches apart. Cover the seeds with a thin layer of soil and water gently. Make sure the soil is consistently moist but not waterlogged.
Step 3: Transplanting the Seedlings
Once the seedlings have 2-3 sets of leaves, it’s time to transplant them into larger pots or directly into the garden. Choose a location with partial shade and well-draining soil. Dig a hole that is twice as wide and just as deep as the pot. Gently remove the seedling from the pot and place it in the hole. Fill the hole with soil and water well.
Step 4: Caring for the Seedlings
After transplanting, make sure to provide the seedlings with consistent moisture and fertilization. Keep the soil consistently moist but not waterlogged. Fertilize the seedlings with a balanced fertilizer once a month. Prune the seedlings regularly to encourage bushy growth and prevent them from becoming leggy.
By following these steps, you’ll be able to successfully plant coffee beans and give them the best chance to grow into healthy and productive coffee plants. Remember to be patient, as coffee plants can take several years to mature.
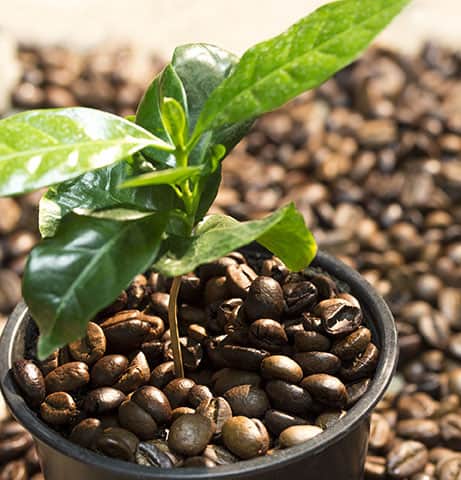
Learning how to plant coffee beans is just the first step in the process of growing your own coffee. With proper care and maintenance, you’ll be able to enjoy a bountiful harvest and a delicious cup of homegrown coffee.

Coffee Plant Care: Tips for Optimal Growth and Development
Coffee plants require regular maintenance to ensure optimal growth and development. Proper care includes watering, fertilizing, pruning, and pest management. By following these tips, you’ll be able to keep your coffee plants healthy and thriving.
Watering: Coffee plants prefer well-draining soil and consistent moisture. Water your plants when the top inch of soil feels dry to the touch. Avoid overwatering, which can lead to root rot and other problems.
Fertilizing: Feed your coffee plants with a balanced fertilizer during the growing season (spring and summer). Dilute the fertilizer to half the recommended strength to avoid burning the roots.
Pruning: Prune your coffee plants regularly to maintain a bushy shape and encourage fruiting. Remove any dead or damaged leaves or branches, and cut back the plant to about one-third of its height after harvesting.
Pest Management: Keep an eye out for pests like mealybugs, spider mites, and scale. Use organic pest control methods whenever possible, such as neem oil or insecticidal soap.
Soil Care: Coffee plants prefer acidic soil with a pH between 5.5 and 6.5. Test your soil regularly and adjust the pH as needed. Add organic matter like compost or manure to improve soil fertility and structure.
Support: Coffee plants can grow quite large, so provide support with a trellis or stake to keep them upright. This will also help to promote better fruiting and air circulation.
Monitoring: Regularly monitor your coffee plants for signs of stress, disease, or pests. Take action quickly to prevent problems from spreading and to ensure optimal growth and development.
By following these coffee plant care tips, you’ll be able to keep your plants healthy and thriving. Remember to be patient, as coffee plants can take several years to mature. With proper care and maintenance, you’ll be able to enjoy a bountiful harvest and a delicious cup of homegrown coffee.
:strip_icc()/GettyImages-668595976-b27d28de93b04809a99cd29d65768720.jpg)
Common Challenges and Solutions for Growing Coffee at Home
While growing coffee at home can be a rewarding experience, it’s not without its challenges. Common issues faced by coffee plant growers include pests, diseases, and nutrient deficiencies. In this section, we’ll discuss some of the most common challenges and provide solutions and troubleshooting tips to help you overcome them.
Pests: Coffee plants are susceptible to pests like mealybugs, spider mites, and scale. To prevent infestations, inspect your plants regularly and use organic pest control methods whenever possible. Neem oil and insecticidal soap are effective against many common pests.
Diseases: Coffee plants are also prone to diseases like coffee leaf rust and coffee berry disease. To prevent the spread of disease, remove any infected leaves or branches, and treat the plant with a fungicide. Practice good hygiene by washing your hands before handling the plants.
Nutrient Deficiencies: Coffee plants require a balanced diet of nutrients to thrive. Common nutrient deficiencies include nitrogen, iron, and magnesium. Use a balanced fertilizer and adjust the pH of your soil as needed to ensure optimal nutrient uptake.
Temperature Fluctuations: Coffee plants prefer temperatures between 60°F and 80°F (15°C and 27°C). Avoid placing your plants near heating or cooling vents, fireplaces, or drafty windows.
Humidity: Coffee plants prefer a humid environment, but high humidity can lead to disease. Use a humidifier to maintain a humidity level of 50-60%.
Light: Coffee plants prefer bright, indirect light. Avoid placing your plants in direct sunlight, which can cause leaf scorch.
By being aware of these common challenges and taking steps to prevent them, you can ensure the health and success of your coffee plants. Remember to monitor your plants regularly and take action quickly to address any issues that arise.
With proper care and attention, you can overcome these challenges and enjoy a bountiful harvest of delicious homegrown coffee. Whether you’re a seasoned gardener or just starting out, growing coffee at home can be a fun and rewarding experience.

Coffee Plant Varieties: Choosing the Best One for Your Needs
When it comes to growing coffee at home, choosing the right variety of coffee plant is crucial. There are several varieties to choose from, each with its own unique characteristics, advantages, and disadvantages. In this section, we’ll introduce you to some of the most popular coffee plant varieties and help you choose the best one for your needs.
Arabica: Arabica is considered to be of higher quality and has a more delicate flavor than Robusta. It is more sensitive to temperature and humidity, but produces a more complex and nuanced cup. Arabica is a good choice for those who want a high-quality cup of coffee and are willing to provide the necessary care and attention.
Robusta: Robusta is a more robust and easier to grow variety of coffee plant. It is less sensitive to temperature and humidity, but produces a bolder and more bitter cup. Robusta is a good choice for those who want a low-maintenance coffee plant and don’t mind a stronger flavor.
Liberica: Liberica is a rare and lesser-known variety of coffee plant. It has a distinctive flavor with notes of fruit and spice, and is known for its high quality. Liberica is a good choice for those who want to try something new and unique.
Excelsa: Excelsa is a hybrid of Liberica and Arabica, and is known for its balanced flavor and medium body. It is a good choice for those who want a high-quality cup of coffee without the sensitivity of Arabica.
When choosing a coffee plant variety, consider factors such as climate, available space, and desired flavor profile. Make sure to research the specific needs of the variety you choose, and provide the necessary care and attention to ensure optimal growth and production.
By choosing the right variety of coffee plant, you can ensure a successful and rewarding growing experience. Whether you’re a seasoned gardener or just starting out, growing coffee at home can be a fun and rewarding experience.
Harvesting and Processing Your Homegrown Coffee
After months of careful cultivation, your coffee plants are finally ready to be harvested. Harvesting and processing your homegrown coffee is an exciting step in the journey from seed to cup. In this section, we’ll guide you through the process of harvesting and processing your coffee cherries, including pulping, fermenting, and drying.
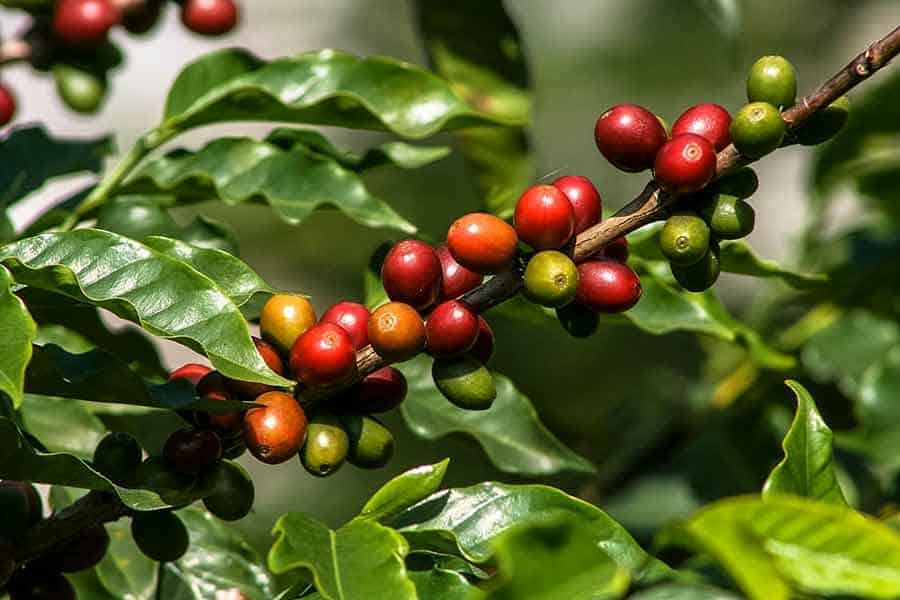
Harvesting: Coffee cherries are typically ready to be harvested 7-9 months after flowering. The cherries will turn from green to yellow, orange, or red, depending on the variety. Use scissors or a sharp knife to snip the cherries from the plant, leaving a small piece of stem attached.
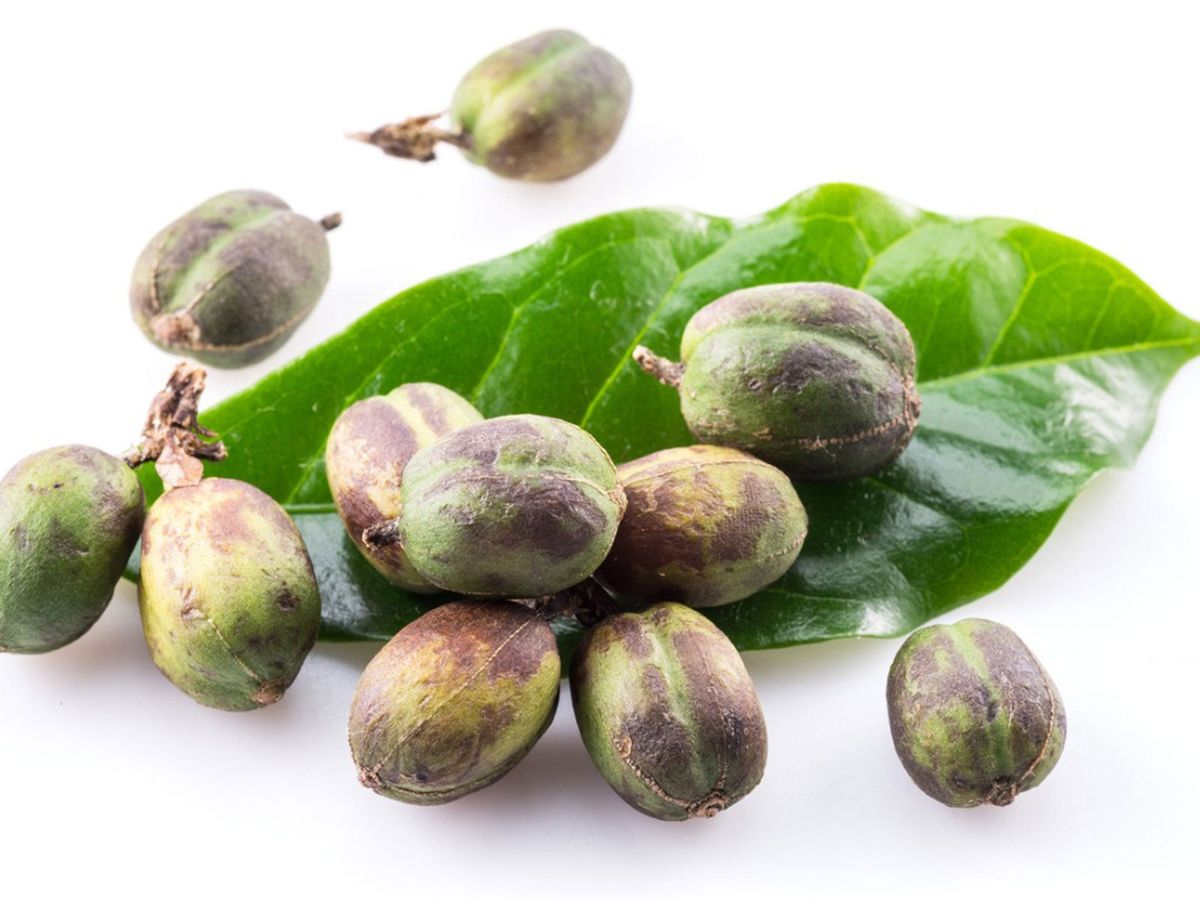
Pulping: After harvesting, remove the outer skin and pulp of the cherry using a pulping machine or a manual pulper. This will help to break down the mucilage and release the coffee beans.
Fermenting: Transfer the pulped coffee cherries to a fermentation tank or a container with a lid. Allow the mixture to ferment for 24-48 hours, stirring occasionally. This will help to break down the mucilage and develop the flavor and aroma of the coffee.
Drying: After fermentation, transfer the coffee beans to a drying surface, such as a patio or a drying bed. Allow the beans to dry to a moisture level of 11%, either by sun drying or using a machine dryer.
Sorting and Grading: Once the coffee beans are dry, sort and grade them by size and quality. Remove any defective or damaged beans to ensure the highest quality.
By following these steps, you’ll be able to harvest and process your homegrown coffee with ease. Remember to be patient and take your time, as the quality of your coffee will depend on the care and attention you give it during this process.
With your freshly harvested and processed coffee beans, you’re now ready to roast and brew your perfect cup. In the next section, we’ll guide you through the process of roasting and brewing your homegrown coffee.
/GettyImages-936840910-5c8ea8b2c9e77c0001ff0ae6.jpg)
Roasting and Brewing Your Freshly Harvested Coffee
With your freshly harvested and processed coffee beans, you’re now ready to roast and brew your perfect cup. Roasting brings out the unique flavors and aromas of your coffee, while brewing allows you to enjoy the fruits of your labor.
Roasting Methods: There are several roasting methods to choose from, including light, medium, and dark roasts. Light roasts preserve the coffee’s natural acidity and flavor, while dark roasts bring out a richer, more bitter flavor. Experiment with different roasting methods to find your perfect cup.
Roasting Techniques: You can roast your coffee beans using a variety of techniques, including air roasting, drum roasting, and pan roasting. Air roasting uses hot air to roast the beans, while drum roasting uses a rotating drum to roast the beans. Pan roasting uses a pan to roast the beans over an open flame.
Brewing Techniques: There are several brewing techniques to choose from, including drip brewing, French press, and pour-over. Drip brewing uses a machine to slowly drip hot water over the coffee grounds, while French press uses a manual press to steep the coffee grounds in hot water. Pour-over uses a manual pour-over dripper to slowly pour hot water over the coffee grounds.
Experimenting with Roasting and Brewing: Don’t be afraid to experiment with different roasting and brewing techniques to find your perfect cup. Try different roasting methods, brewing techniques, and coffee-to-water ratios to find the combination that works best for you.
Enjoying Your Perfect Cup: With your freshly roasted and brewed coffee, you can now enjoy the fruits of your labor. Take a moment to appreciate the unique flavors and aromas of your coffee, and enjoy the satisfaction of knowing that you grew and harvested it yourself.
By following these steps, you’ll be able to roast and brew your freshly harvested coffee with ease. Remember to experiment and have fun with the process, and don’t be afraid to try new things. Happy roasting and brewing!
