Choosing the Perfect Location for Your Hollyhocks
When it comes to planting hollyhocks, selecting the right location is crucial for optimal growth and blooming. Hollyhocks require full sun to partial shade, so choose a spot that receives at least six hours of direct sunlight per day. However, if you live in a warmer climate, providing some afternoon shade can help prevent scorching of the leaves.
In addition to sunlight, hollyhocks need well-draining soil to thrive. Avoid planting in low-lying areas where water may collect, as this can lead to root rot and other problems. If your soil is heavy clay or prone to waterlogging, consider raising the bed by 6-8 inches to improve drainage.
To assess your garden’s conditions, take a walk around your yard and observe the sunlight patterns throughout the day. Note the areas that receive the most sunlight and have well-draining soil. You can also test the pH level of your soil using a DIY kit or by sending a sample to a lab for analysis. Hollyhocks prefer a slightly acidic to neutral soil pH, ranging from 6.0 to 7.0.
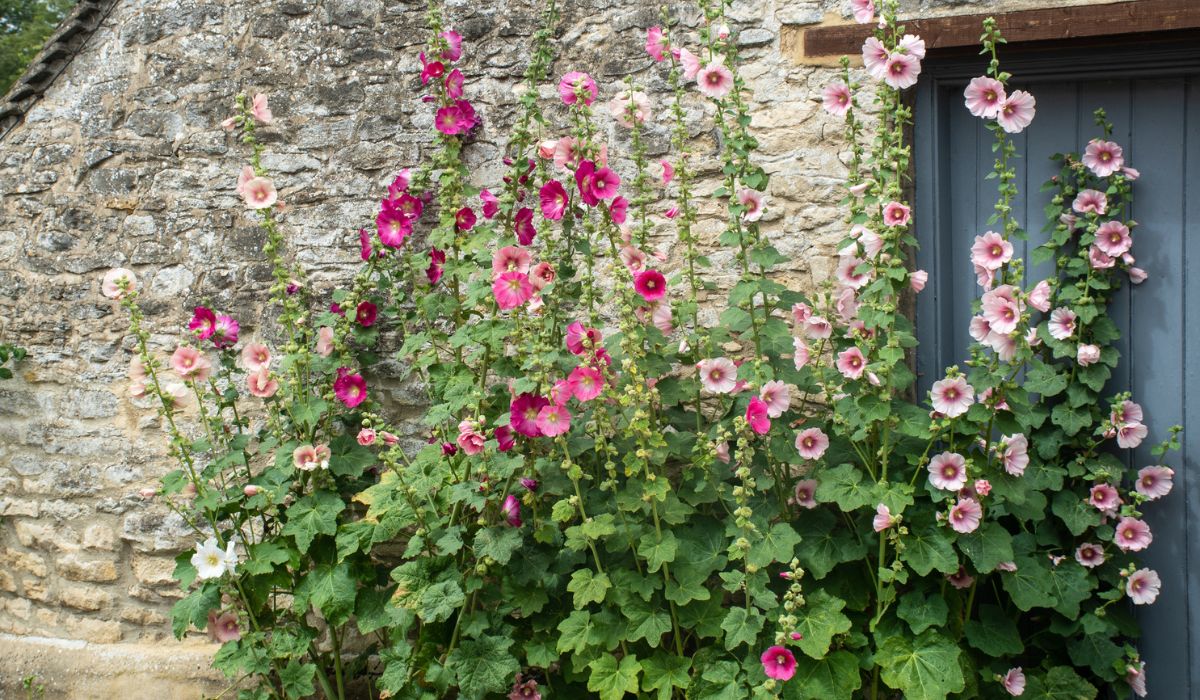
Once you’ve identified the perfect location, mark out the area where you’ll be planting your hollyhocks. Consider the mature size of the plants, which can grow up to 8 feet tall and 2 feet wide. Leave enough space between each plant to allow for good air circulation and easy access for maintenance.
By choosing the right location for your hollyhocks, you’ll be setting them up for success and enjoying their beautiful blooms for years to come. In the next section, we’ll discuss how to prepare the soil for planting.
Preparing the Soil for Hollyhock Planting
Before planting hollyhocks, it’s essential to prepare the soil to provide the best possible growing conditions. Hollyhocks prefer a rich, fertile soil that drains well and has a slightly acidic to neutral pH. To achieve this, start by removing any debris, rocks, and weeds from the planting area.
Next, add a 2-inch layer of organic matter such as compost or well-rotted manure to the soil. This will help improve the soil’s structure, fertility, and drainage. If your soil is heavy clay or sandy, mix in some organic matter to improve its texture.
If your soil test reveals a pH level that’s too high or too low, adjust it accordingly. Hollyhocks prefer a slightly acidic to neutral soil pH, ranging from 6.0 to 7.0. You can add lime to raise the pH or sulfur to lower it.
In addition to adjusting the pH, consider adding a balanced fertilizer to the soil. A 10-10-10 NPK fertilizer will provide the necessary nutrients for healthy growth and blooming. Follow the instructions on the fertilizer package for application rates and timing.
Once you’ve prepared the soil, it’s ready for planting. If you’re planting hollyhock seeds, sow them directly in the garden in the spring or fall, about 1/4 inch deep and 1-2 inches apart. If you’re planting seedlings, space them 12-18 inches apart and water well after planting.
By preparing the soil properly, you’ll be giving your hollyhocks the best possible start in life. In the next section, we’ll discuss how to plant hollyhock seeds or seedlings, including sowing seeds indoors or directly in the garden, and transplanting seedlings.
How to Plant Hollyhock Seeds or Seedlings
Now that you’ve prepared the soil and chosen the perfect location, it’s time to plant your hollyhocks. You can start hollyhocks from seeds or seedlings, and both methods have their advantages. Here’s a step-by-step guide on how to plant hollyhock seeds or seedlings:
**Sowing Seeds Indoors:** Start by sowing hollyhock seeds indoors 6-8 weeks before the last frost date in your area. Fill a seed starting tray with a good quality potting mix, and sow the seeds about 1/4 inch deep. Water gently and provide adequate light. Keep the soil warm, around 70-80°F (21-27°C), until germination.
**Sowing Seeds Directly in the Garden:** If you prefer to sow seeds directly in the garden, wait until the soil has warmed up to at least 60°F (15°C). Sow the seeds about 1/4 inch deep and 1-2 inches apart. Water gently and keep the soil consistently moist during the first few weeks after sowing.
**Transplanting Seedlings:** If you’re starting with seedlings, wait until they have 2-3 sets of leaves before transplanting them into the garden. Harden off the seedlings by gradually exposing them to outdoor conditions over the course of 7-10 days. Then, dig a hole that’s the same depth as the pot and twice as wide. Gently remove the seedling from its pot and place it in the hole. Water well and provide support if necessary.
**Spacing and Depth:** Plant hollyhock seedlings 12-18 inches apart, depending on the variety. Plant them at the same depth as they were in the pot, and water well after planting. If you’re sowing seeds directly in the garden, thin them out to 12-18 inches apart as they grow.
**Watering:** Keep the soil consistently moist during the first few weeks after planting. As the plants grow, reduce watering to about 1 inch per week. Avoid overwatering, which can lead to root rot and other problems.
By following these steps, you’ll be able to successfully plant your hollyhocks and enjoy their beautiful blooms for years to come. In the next section, we’ll discuss how to care for your newly planted hollyhocks, including watering, fertilizing, and pruning.
Caring for Your Newly Planted Hollyhocks
Caring for your newly planted hollyhocks is crucial to ensure they establish themselves well and thrive in their new environment. Here are some tips to help you provide the best care for your hollyhocks:
**Watering:** Keep the soil consistently moist during the first few weeks after planting. Water your hollyhocks deeply once or twice a week, depending on weather conditions. Avoid overwatering, which can lead to root rot and other problems.
**Fertilizing:** Feed your hollyhocks with a balanced fertilizer once a month. You can use a water-soluble fertilizer or a slow-release fertilizer. Follow the instructions on the fertilizer package for application rates and timing.
**Pruning:** Prune your hollyhocks regularly to encourage bushy growth and prevent them from becoming leggy. Remove any dead or damaged leaves or stems, and cut back the plant to about one-third of its height after blooming.
**Support:** Provide support for your hollyhocks as they grow taller. You can use stakes or a trellis to keep them upright and prevent them from toppling over in the wind. Tie the stems to the support using twine or a soft material to avoid damaging the plant.
**Mulching:** Mulch around the base of your hollyhocks to retain moisture, suppress weeds, and regulate soil temperature. Use a thin layer of organic mulch such as bark chips or straw, and keep it a few inches away from the plant stem.
**Pest and Disease Control:** Keep an eye out for pests and diseases that can affect your hollyhocks, such as aphids, slugs, and powdery mildew. Use organic or chemical controls as needed to prevent infestations and infections.
By following these care tips, you’ll be able to help your hollyhocks establish themselves well and thrive in their new environment. In the next section, we’ll discuss common mistakes to avoid when planting hollyhocks, and how to troubleshoot common problems.
Common Mistakes to Avoid When Planting Hollyhocks
While planting hollyhocks can be a rewarding experience, there are some common mistakes to avoid in order to ensure the best possible results. Here are some of the most common mistakes to watch out for:
**Planting in Poorly Draining Soil:** Hollyhocks don’t like wet feet, so make sure to plant them in well-draining soil. If your soil is heavy clay or prone to waterlogging, consider raising the bed or adding organic matter to improve drainage.
**Not Providing Enough Support:** Hollyhocks can grow quite tall, so make sure to provide support for the plants as they grow. Use stakes or a trellis to keep the plants upright and prevent them from toppling over in the wind.
**Neglecting to Deadhead Spent Blooms:** Deadheading spent blooms is essential to encourage repeat flowering and prevent the plants from putting energy into seed production. Remove spent blooms as soon as they fade, and make sure to dispose of them properly to prevent the spread of disease.
**Not Watering Enough:** Hollyhocks need consistent moisture, especially during the first few weeks after planting. Make sure to water them regularly, but avoid overwatering, which can lead to root rot and other problems.
**Not Fertilizing:** Hollyhocks are heavy feeders and need regular fertilization to promote healthy growth and blooming. Use a balanced fertilizer and follow the instructions on the package for application rates and timing.
**Not Pruning:** Pruning is essential to encourage bushy growth and prevent the plants from becoming leggy. Remove any dead or damaged leaves or stems, and cut back the plant to about one-third of its height after blooming.
By avoiding these common mistakes, you can help ensure the best possible results when planting hollyhocks. In the next section, we’ll discuss pest and disease management for hollyhocks, including how to prevent and control infestations.
Pest and Disease Management for Hollyhocks
Hollyhocks are generally a hardy and disease-resistant plant, but they can still be susceptible to certain pests and diseases. Here are some common problems to watch out for and how to manage them:
**Aphids:** Aphids are small, soft-bodied insects that can feed on hollyhock sap, causing curled or distorted leaves. To control aphids, use neem oil or insecticidal soap, and make sure to spray the undersides of the leaves where aphids tend to congregate.
**Slugs:** Slugs can chew holes in hollyhock leaves and flowers, especially at night. To control slugs, use copper tape or crushed eggshells around the plants, and hand-pick slugs at night.
**Powdery Mildew:** Powdery mildew is a fungal disease that can cause a white, powdery coating on hollyhock leaves. To control powdery mildew, use a fungicide specifically designed for powdery mildew, and make sure to remove any infected leaves or stems.
**Rust:** Rust is a fungal disease that can cause orange or yellow spots on hollyhock leaves. To control rust, use a fungicide specifically designed for rust, and make sure to remove any infected leaves or stems.
**Prevention:** To prevent pests and diseases from affecting your hollyhocks, make sure to provide optimal growing conditions, including full sun, well-draining soil, and adequate water. Also, avoid overwatering, which can lead to root rot and other problems.
**Organic Controls:** In addition to chemical controls, there are many organic methods for managing pests and diseases on hollyhocks. These include using neem oil, insecticidal soap, and diatomaceous earth, as well as introducing beneficial insects such as ladybugs and lacewings.
By following these tips, you can help keep your hollyhocks healthy and pest- and disease-free. In the next section, we’ll discuss how to encourage hollyhock blooms and foliage, including providing optimal growing conditions, fertilizing, and pruning.
Encouraging Hollyhock Blooms and Foliage
Hollyhocks are known for their stunning blooms and lush foliage, but they can be finicky when it comes to producing flowers. Here are some tips to encourage hollyhock blooms and foliage:
**Optimal Growing Conditions:** Hollyhocks need full sun to partial shade and well-draining soil to produce plenty of blooms. Make sure to provide your hollyhocks with at least 6 hours of direct sunlight per day and soil that drains well.
**Fertilizing:** Feed your hollyhocks with a balanced fertilizer once a month to promote healthy growth and blooming. You can also use a high-phosphorus fertilizer to encourage blooming.
**Pruning:** Prune your hollyhocks regularly to encourage bushy growth and prevent them from becoming leggy. Remove any dead or damaged leaves or stems, and cut back the plant to about one-third of its height after blooming.
**Deadheading:** Deadheading is the process of removing spent blooms to promote repeat flowering. Remove spent blooms as soon as they fade, and make sure to dispose of them properly to prevent the spread of disease.
**Support:** Provide support for your hollyhocks as they grow taller. Use stakes or a trellis to keep the plants upright and prevent them from toppling over in the wind.
**Mulching:** Mulch around the base of your hollyhocks to retain moisture, suppress weeds, and regulate soil temperature. Use a thin layer of organic mulch such as bark chips or straw, and keep it a few inches away from the plant stem.
By following these tips, you can encourage your hollyhocks to produce plenty of blooms and lush foliage. In the next section, we’ll discuss the joys of harvesting hollyhock blooms, including using them in floral arrangements, as a cut flower, or as a dried flower.
Enjoying Your Hollyhock Harvest
After months of care and attention, your hollyhocks are finally in bloom. Now it’s time to enjoy the fruits of your labor and harvest those beautiful blooms. Here are some ways to enjoy your hollyhock harvest:
**Using Hollyhocks in Floral Arrangements:** Hollyhocks make a stunning addition to any floral arrangement. Simply cut the stems at an angle, remove any leaves that will be below the waterline, and place them in a vase with some greenery and other flowers.
**Using Hollyhocks as a Cut Flower:** Hollyhocks can be used as a cut flower in bouquets and arrangements. Simply cut the stems at an angle, remove any leaves that will be below the waterline, and place them in a vase with some water.
**Drying Hollyhock Blooms:** Hollyhock blooms can be dried and used in craft projects or as a decoration. Simply tie the stems together in small bunches and hang them upside down in a warm, dry place. Once the blooms are dry, you can use them in potpourri, wreaths, or other craft projects.
**Using Hollyhocks in Craft Projects:** Hollyhock blooms can be used in a variety of craft projects, such as making potpourri, wreaths, or other decorations. Simply dry the blooms as described above, and then use them in your craft project.
**Preserving Hollyhock Blooms:** Hollyhock blooms can be preserved using a variety of methods, such as pressing, drying, or freezing. Simply choose the method that works best for you, and follow the instructions to preserve your hollyhock blooms.
By enjoying your hollyhock harvest, you can appreciate the beauty and fragrance of these stunning flowers. Whether you use them in floral arrangements, as a cut flower, or in craft projects, hollyhocks are sure to bring joy and beauty to your life.


