The Magic of Curly Spider Plants
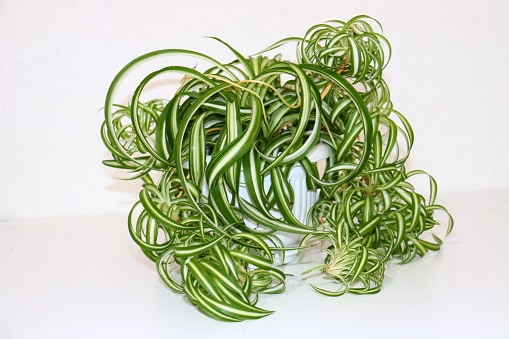
The curly spider plant, with its delicate, curly leaves and creeping stems, is a popular choice for indoor gardening. This low-maintenance plant is perfect for beginners and experienced gardeners alike, requiring minimal care to thrive. One of the key benefits of the curly spider plant is its ability to purify the air, making it an excellent addition to homes, offices, and other indoor spaces. By learning how to propagate curly spider plants, you can easily share this beautiful plant with friends and family, or create new plants to add to your own collection. With its unique features and air-purifying properties, it’s no wonder the curly spider plant is a favorite among indoor gardeners.
Why Propagate Your Curly Spider Plant?
Propagating curly spider plants offers numerous benefits for indoor gardeners. One of the most significant advantages is the ability to share plants with friends and family, spreading the joy of indoor gardening. By learning how to propagate curly spider plants, you can create new plants for free, allowing you to expand your indoor garden without incurring additional costs. Additionally, propagating curly spider plants helps preserve the parent plant’s unique characteristics, ensuring that the new plants retain the same beautiful, curly leaves and air-purifying properties. Furthermore, propagating curly spider plants allows you to control the growing conditions, ensuring that the new plants receive the optimal care they need to thrive. With the ability to create new plants at will, you can experiment with different potting arrangements, lighting conditions, and fertilization schedules, taking your indoor gardening skills to the next level.

How to Prepare Your Curly Spider Plant for Propagation
Before attempting to propagate your curly spider plant, it’s essential to prepare the parent plant to ensure optimal health and increase the chances of successful propagation. One of the most critical steps is pruning, which helps to encourage bushy growth and promotes the development of offsets. Remove any dead or damaged leaves or stems, and trim back long stems to encourage branching. Fertilizing your curly spider plant is also crucial, as it provides the necessary nutrients for healthy growth. Use a balanced, water-soluble fertilizer and follow the manufacturer’s instructions for application. Additionally, make sure the parent plant is receiving adequate light, water, and nutrients, as a healthy plant is more likely to produce healthy offsets. By following these simple steps, you’ll be well on your way to learning how to propagate curly spider plants successfully.
The Art of Stem Cutting Propagation
One of the most popular methods for propagating curly spider plants is through stem cutting. This technique involves cutting a section of stem from the parent plant, removing lower leaves, and rooting the cutting in a new pot. To take a cutting, select a healthy stem with at least two nodes (the joint where a leaf meets the stem). Cut the stem about 2-3 inches below the node using a clean, sharp knife or pruning tool. Remove all lower leaves, leaving only two or three leaves at the top of the cutting. This helps prevent the cutting from drying out and promotes rooting. Prepare the cutting for rooting by dipping the cut end in rooting hormone powder or liquid to stimulate root growth. By following these simple steps, you’ll be well on your way to learning how to propagate curly spider plants using the stem cutting method.

Rooting Your Curly Spider Plant Cuttings
Once you’ve prepared your curly spider plant cuttings, it’s time to root them. This process requires a combination of the right soil, water, and rooting hormone. Start by filling a small pot or propagation tray with a well-draining potting mix. Moisten the soil with water, and then plant the cutting about 1-2 inches deep. Firm the soil gently around the cutting to secure it in place. To promote healthy root growth, apply a rooting hormone powder or liquid to the cut end of the stem. This will help stimulate root development and increase the chances of successful propagation. Water the soil gently but thoroughly, and then place the pot or tray in a warm, bright location with indirect light. Keep the soil consistently moist but not waterlogged, as this can lead to root rot. With a little patience and care, your curly spider plant cuttings should develop a robust root system and begin to grow new leaves and stems. By following these steps, you’ll be well on your way to learning how to propagate curly spider plants and enjoying the many benefits of these beautiful, air-purifying plants.
:max_bytes(150000):strip_icc()/spider-plant-propagation-5087087-07-21751e30755446fca99fa372c9ad0a8c.jpg)
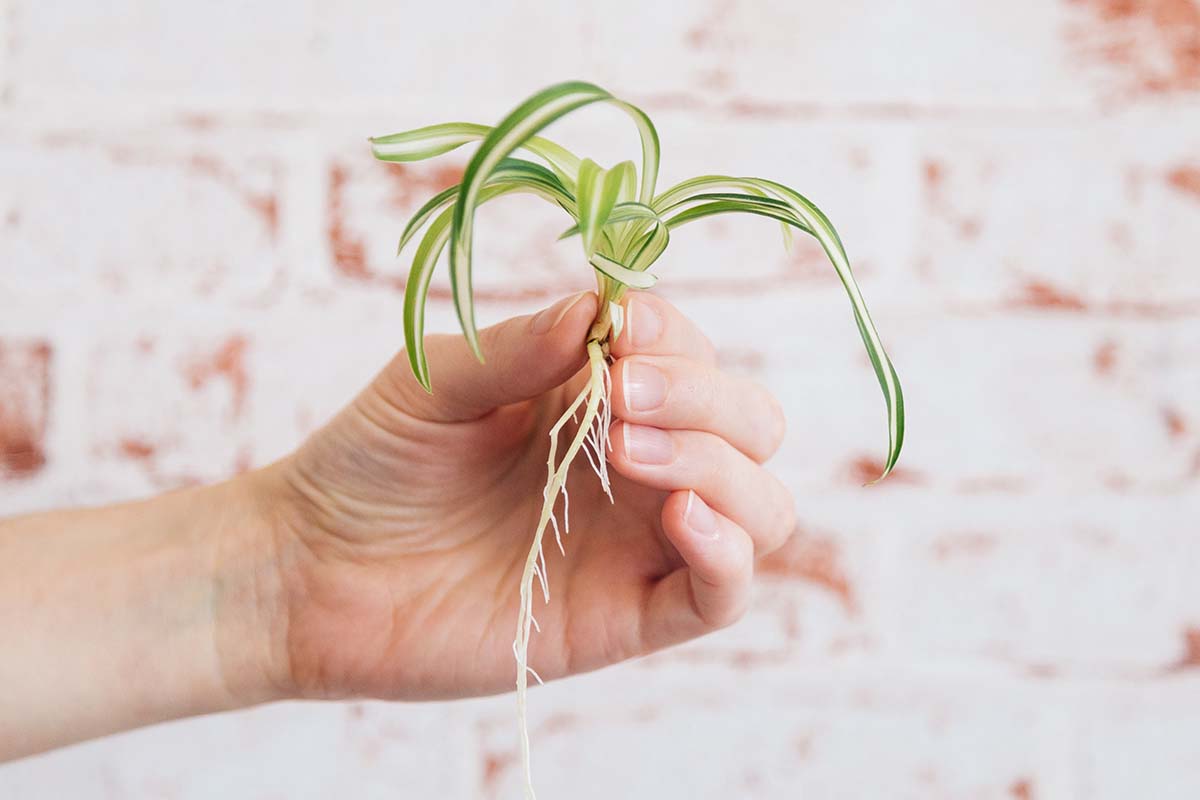
Division Method: Propagating Curly Spider Plants from Offsets
The division method is another effective way to propagate curly spider plants. This method involves separating the offsets, or baby plants, that form around the base of the parent plant. To propagate using the division method, start by gently removing the parent plant from its pot. Inspect the roots and identify the offsets, which should be visible as small plants with their own roots and leaves. Use a sharp, clean knife or pruning tool to separate the offsets from the parent plant, making sure each offset has a sufficient amount of roots and leaves. Pot the new plants in a well-draining potting mix, and water thoroughly. Keep the soil consistently moist but not waterlogged, and provide bright, indirect light. With proper care, the new plants should thrive and begin to produce their own offsets. By learning how to propagate curly spider plants using the division method, you can quickly multiply your plants and share them with friends and family. This method is particularly useful for preserving the unique characteristics of the parent plant, as the offsets will inherit its traits.

Troubleshooting Common Propagation Issues
While propagating curly spider plants can be a rewarding experience, it’s not without its challenges. Common issues that may arise during propagation include root rot, leaf drop, and slow growth. To overcome these problems, it’s essential to identify the causes and take corrective action. Root rot, for instance, can be caused by overwatering or poor drainage. To prevent this, ensure that the soil is well-draining and avoid watering too frequently. Leaf drop can be a sign of underwatering or exposure to extreme temperatures. Check the soil moisture regularly and keep the plants away from drafts or extreme temperatures. Slow growth can be attributed to inadequate light or insufficient nutrients. Provide bright, indirect light and fertilize the plants regularly to promote healthy growth. By being aware of these common issues and taking preventative measures, you can increase your chances of success when learning how to propagate curly spider plants. With patience and practice, you’ll be able to overcome any obstacles and enjoy the many benefits of propagating these beautiful, air-purifying plants.
Caring for Your Newly Propagated Curly Spider Plants
Once you’ve successfully propagated your curly spider plants, it’s essential to provide them with the right care to ensure they thrive. Lighting is a critical factor, and curly spider plants prefer bright, indirect light. Placing them near an east- or west-facing window is ideal. Watering should be done carefully, as these plants are prone to overwatering. Check the soil moisture by sticking your finger into the soil up to the first knuckle. If the soil feels dry, it’s time to water. Fertilization is also crucial, and a balanced, water-soluble fertilizer can be applied during the growing season (spring and summer). By following these simple care guidelines, you’ll be able to enjoy the many benefits of curly spider plants, including their air-purifying properties and low-maintenance requirements. Remember, learning how to propagate curly spider plants is just the first step; providing proper care is essential for their long-term health and success.
:max_bytes(150000):strip_icc()/spider-plant-propagation-5087087-03-e185fcf1c3cf4674a2ec9157da048667.jpg)