Why Take Cuttings from Your Clematis Plant?
Taking cuttings from your clematis plant is an excellent way to share these beautiful flowers with friends and family, create new varieties, and increase your plant collection. By propagating clematis through cuttings, you can enjoy more blooms in your garden and expand your plant palette. This method also allows you to preserve the genetic makeup of your favorite clematis varieties, ensuring that their unique characteristics are passed on to the new plants. Furthermore, taking cuttings is a cost-effective way to acquire new plants, eliminating the need to purchase them from nurseries or gardening stores. With the right techniques and a little patience, you can successfully propagate your clematis plants and enjoy their stunning flowers for years to come.

Click Image to Find Garden Products
Choosing the Right Time and Tools for Clematis Cuttings
The success of taking cuttings from your clematis plant largely depends on the timing and the tools used. The best time to take cuttings from clematis plants is in the spring or early summer, when the plant is actively growing and producing new stems. This period offers the highest chance of successful rooting, as the stems are typically more vigorous and contain more nodes, which are essential for root development.
In terms of tools, you will need the following to take cuttings from your clematis plant:
- Pruning shears or sharp, clean knife: used to cut the stems from the parent plant
- Pot or container: filled with a well-draining rooting medium, such as a mix of peat moss and perlite
- Rooting hormone: a powder or liquid that stimulates root growth and increases the chances of successful propagation
- Water: used to keep the rooting medium consistently moist
- Clear plastic bag or cloche: used to create a humid microclimate and promote root growth
It is essential to use clean and sterile tools when taking cuttings to minimize the risk of infection and disease. By choosing the right time and tools, you can set yourself up for success and increase the chances of propagating healthy and vigorous clematis plants.

Preparing the Parent Plant for Cuttings
Before taking cuttings from your clematis plant, it is essential to prepare the parent plant to ensure it is healthy and vigorous. A well-prepared parent plant will increase the chances of successful propagation and reduce the risk of disease or infection. Here are some steps to follow:
Pruning: Prune your clematis plant about 2-3 weeks before taking cuttings. Remove any dead, diseased, or damaged stems, and cut back the plant to about one-third to one-half of its height. This will encourage new growth and promote the development of healthy stems.
Watering: Make sure the parent plant is well-watered before taking cuttings. Clematis plants prefer moist soil, but ensure the soil is not waterlogged, as this can lead to root rot. Check the soil moisture by inserting your finger into the soil up to the first knuckle. If the soil feels dry, water the plant thoroughly.
Fertilization: Feed your clematis plant with a balanced fertilizer about 1-2 weeks before taking cuttings. This will provide the plant with essential nutrients and promote healthy growth.
Inspection: Inspect the parent plant for any signs of pests or diseases, such as aphids, whiteflies, or powdery mildew. If you notice any issues, treat the plant with insecticidal soap or a fungicide before taking cuttings.
By following these steps, you can ensure your parent clematis plant is healthy and prepared for taking cuttings. This will increase the chances of successful propagation and help you grow new, healthy clematis plants.
How to Take Cuttings from Your Clematis Plant
Taking cuttings from your clematis plant is a straightforward process that requires some basic knowledge and attention to detail. Here’s a step-by-step guide on how to take cuttings from your clematis plant:
Step 1: Identify the Right Stems
Look for healthy, vigorous stems with plenty of nodes. Nodes are the small, swollen areas on the stem where the leaves meet the stem. Cuttings taken from stems with plenty of nodes will have a higher chance of rooting successfully.
Step 2: Cut the Stems Correctly
Using pruning shears or a sharp, clean knife, cut the stems from the parent plant just above a node. Make the cut at a 45-degree angle, and ensure the cut is clean and smooth. Remove any lower leaves that will be below the soil surface, leaving only two or three sets of leaves at the top of the cutting.
Step 3: Prepare the Cuttings for Rooting
Dip the cut end of the stem into a rooting hormone powder or liquid, following the manufacturer’s instructions. This will help stimulate root growth and increase the chances of successful propagation.
Step 4: Plant the Cuttings
Plant the cuttings in a pot or container filled with a well-draining rooting medium, such as a mix of peat moss and perlite. Firm the medium gently around the cutting, and water thoroughly. Make sure the node is buried in the medium, as this is where the roots will develop.
By following these steps, you can successfully take cuttings from your clematis plant and start the process of propagating new plants. Remember to keep the cuttings consistently moist and provide adequate light, and you’ll be on your way to growing new, healthy clematis plants.

Rooting Clematis Cuttings: Tips and Techniques
Rooting clematis cuttings requires careful attention to detail and a controlled environment. Here are some tips and techniques to help you successfully root your clematis cuttings:
Use Rooting Hormone: Rooting hormone is a powder or liquid that stimulates root growth and increases the chances of successful propagation. Dip the cut end of the stem into the rooting hormone, following the manufacturer’s instructions.
Provide Adequate Humidity: Clematis cuttings require high humidity to root successfully. You can create a humid microclimate by covering the pot or container with a clear plastic bag or cloche. Make sure to remove the bag or cloche for a few hours each day to prevent overheating.
Maintain Optimal Temperature: Clematis cuttings prefer temperatures between 65-75°F (18-24°C) to root successfully. Avoid placing the cuttings in areas with direct sunlight or extreme temperatures.
Provide Adequate Light: Clematis cuttings require bright, indirect light to root successfully. Place the cuttings in a location with east- or west-facing windows or under grow lights.
Water Carefully: Water the cuttings carefully, making sure not to overwater. Check the soil moisture by inserting your finger into the soil up to the first knuckle. If the soil feels dry, water the cuttings thoroughly.
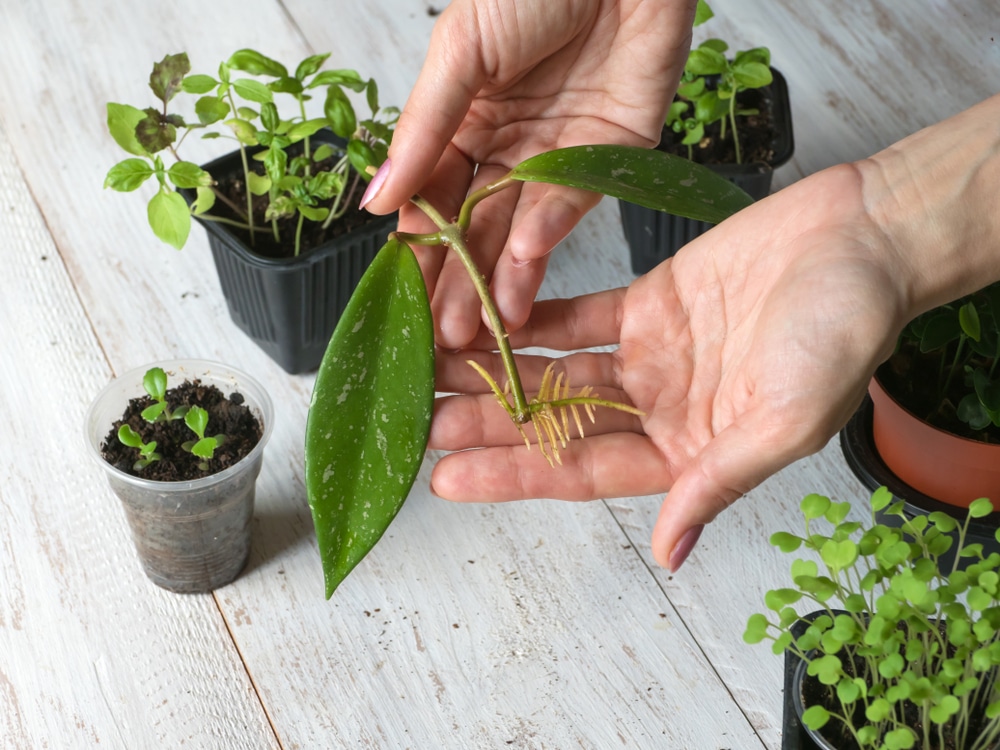
Monitor for Roots: Check the cuttings regularly for roots by gently tugging on the stem. If the stem resists being pulled out of the soil, it has developed roots.
Transplant: Once the cuttings have developed roots, transplant them into individual pots or into a larger container. Harden off the cuttings by gradually exposing them to outdoor conditions over the course of 7-10 days.
By following these tips and techniques, you can successfully root your clematis cuttings and enjoy new, healthy plants. Remember to be patient, as rooting clematis cuttings can take several weeks to several months.
Common Mistakes to Avoid When Taking Clematis Cuttings
When taking clematis cuttings, it’s essential to avoid common mistakes that can reduce the chances of successful propagation. Here are some mistakes to watch out for:
Taking Cuttings Too Late in the Season: Clematis cuttings taken too late in the season may not have enough time to root and establish themselves before the onset of winter. Take cuttings in the spring or early summer for best results.
Not Providing Enough Humidity: Clematis cuttings require high humidity to root successfully. Make sure to provide a humid microclimate by covering the pot or container with a clear plastic bag or cloche.
Not Using Clean Tools: Failing to use clean tools can spread disease and reduce the chances of successful propagation. Use pruning shears or a sharp, clean knife to take cuttings, and make sure to disinfect the tools between cuts.
Not Providing Adequate Light: Clematis cuttings require bright, indirect light to root successfully. Place the cuttings in a location with east- or west-facing windows or under grow lights.
Overwatering: Clematis cuttings are susceptible to root rot if the soil is too wet. Check the soil moisture regularly, and avoid getting water on the leaves or crown of the plant.
Not Monitoring for Pests: Clematis cuttings can be susceptible to pests such as aphids, whiteflies, and spider mites. Monitor the cuttings regularly, and treat any infestations promptly.
By avoiding these common mistakes, you can increase the chances of successful propagation and enjoy healthy, thriving clematis plants.

Caring for Your Newly Rooted Clematis Cuttings
Congratulations on successfully rooting your clematis cuttings Now, it’s essential to provide the right care to ensure they establish themselves successfully. Here are some tips on how to care for your newly rooted clematis cuttings:
Watering: Water your newly rooted clematis cuttings regularly, but make sure not to overwater. Check the soil moisture by inserting your finger into the soil up to the first knuckle. If the soil feels dry, water the cuttings thoroughly.
Fertilizing: Feed your newly rooted clematis cuttings with a balanced fertilizer once a month. This will provide them with essential nutrients to promote healthy growth and development.
Pruning: Prune your newly rooted clematis cuttings regularly to encourage bushy growth and prevent them from becoming leggy. Remove any dead or damaged stems, and cut back the plant to about one-third to one-half of its height.
Providing Support: Clematis plants are climbers, so provide support for your newly rooted cuttings using a trellis or a stake. This will help them grow upright and prevent them from sprawling on the ground.
Monitoring for Pests: Keep an eye out for pests such as aphids, whiteflies, and spider mites. If you notice any infestations, treat the cuttings promptly with insecticidal soap or neem oil.
Hardening Off: Once your newly rooted clematis cuttings have established themselves, it’s time to harden them off. Gradually expose them to outdoor conditions over the course of 7-10 days to prevent shock.
By following these care tips, you can ensure your newly rooted clematis cuttings establish themselves successfully and thrive in their new environment.

Sharing Your Successfully Propagated Clematis Plants
Congratulations on successfully propagating your clematis plants Now, it’s time to share them with friends and family. Here are some tips on how to package and transport your clematis plants safely:
Choose Healthy Plants: Select healthy, vigorous plants with no signs of pests or diseases. This will ensure that the plants you share are of high quality and will thrive in their new environment.
Use Proper Packaging: Use sturdy, well-ventilated packaging materials such as cardboard boxes or paper bags to transport your clematis plants. Make sure to leave enough space between each plant to prevent damage during transport.
Water Carefully: Water your clematis plants carefully before transporting them. Make sure the soil is moist but not waterlogged, as this can cause the roots to rot during transport.
Provide Care Instructions: Provide care instructions to the recipient, including watering, fertilizing, and pruning instructions. This will ensure that the plants receive the proper care and attention they need to thrive.
Consider Local Regulations: Check with local authorities to ensure that you are not violating any regulations or laws when sharing or transporting clematis plants.
Share Your Knowledge: Share your knowledge and experience with others by teaching them how to propagate clematis plants. This will help to spread the joy of gardening and ensure that these beautiful plants continue to thrive.
By following these tips, you can share your successfully propagated clematis plants with friends and family, and help to spread the joy of gardening.