Understanding Orchid Root Development: Why Roots Grow Out of the Pot
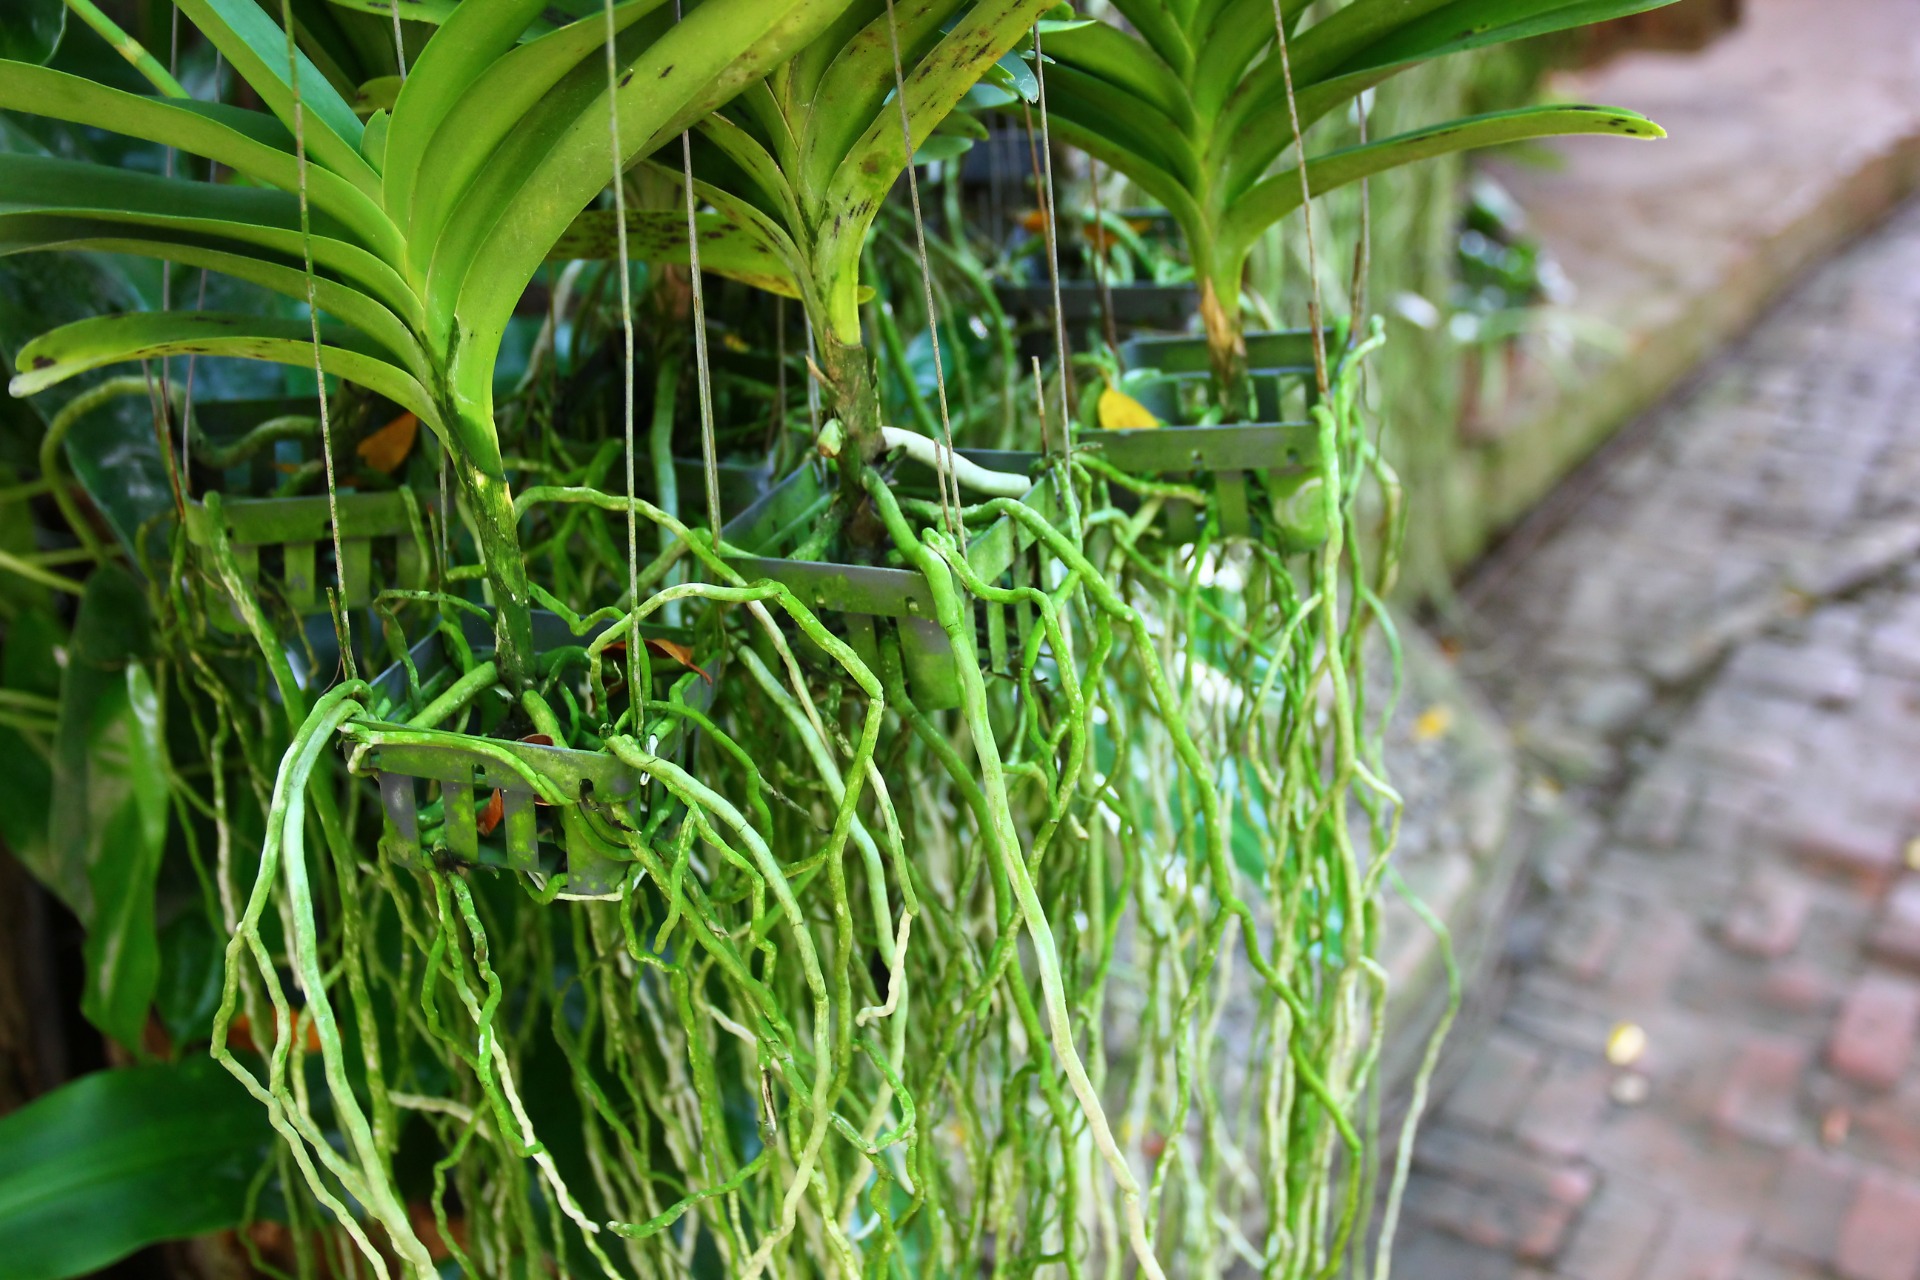
Orchid roots growing out of the pot is a common phenomenon that can be both fascinating and concerning for orchid enthusiasts. To understand why this happens, it’s essential to delve into the natural process of orchid root growth. Orchids have a unique root system that is adapted to their epiphytic lifestyle, where they grow on other plants or surfaces without harming them. Their roots are designed to absorb moisture and nutrients from the air, rather than from the soil.
As orchids grow, their roots naturally seek out more space to expand. In a pot, this can lead to roots growing out of the container in search of more room to breathe. This is especially true if the potting mix is not well-draining or if the orchid is not receiving enough moisture. When roots grow out of the pot, it can be a sign that the orchid needs to be repotted into a larger container or that the potting mix needs to be refreshed.
Proper watering techniques also play a crucial role in preventing roots from growing out of the pot. Over-watering can cause roots to rot, while under-watering can lead to roots growing out of the pot in search of moisture. A well-draining potting mix and a watering schedule that takes into account the orchid’s specific needs can help prevent roots from growing out of the pot.
By understanding the natural process of orchid root growth and taking steps to provide the right environment, orchid enthusiasts can encourage healthy root development and prevent roots from growing out of the pot. This not only promotes healthy growth but also helps to prevent common problems associated with orchid roots, such as root rot and root bound.
Recognizing the Signs of Healthy Root Growth: What to Look For
Healthy orchid roots are essential for the overall health and well-being of the plant. Recognizing the signs of healthy root growth can help orchid enthusiasts identify potential problems early on and take corrective action. So, what should you look for when inspecting your orchid’s roots?
First, check the color of the roots. Healthy orchid roots are typically white or light green in color. If the roots are brown, black, or gray, it may be a sign of root rot or damage. Next, inspect the texture of the roots. Healthy roots should be firm and slightly flexible. If the roots are soft, mushy, or brittle, it may indicate a problem.
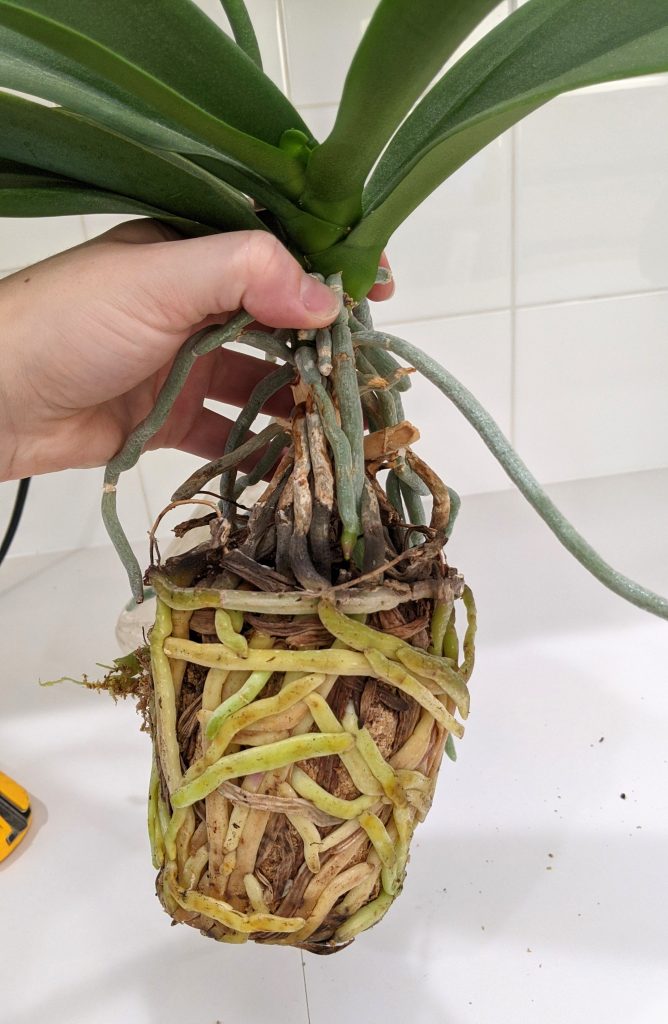
Another important aspect to consider is the growth pattern of the roots. Healthy orchid roots should be growing outward from the plant, rather than circling around the inside of the pot. If the roots are circling, it may be a sign that the plant needs to be repotted into a larger container.
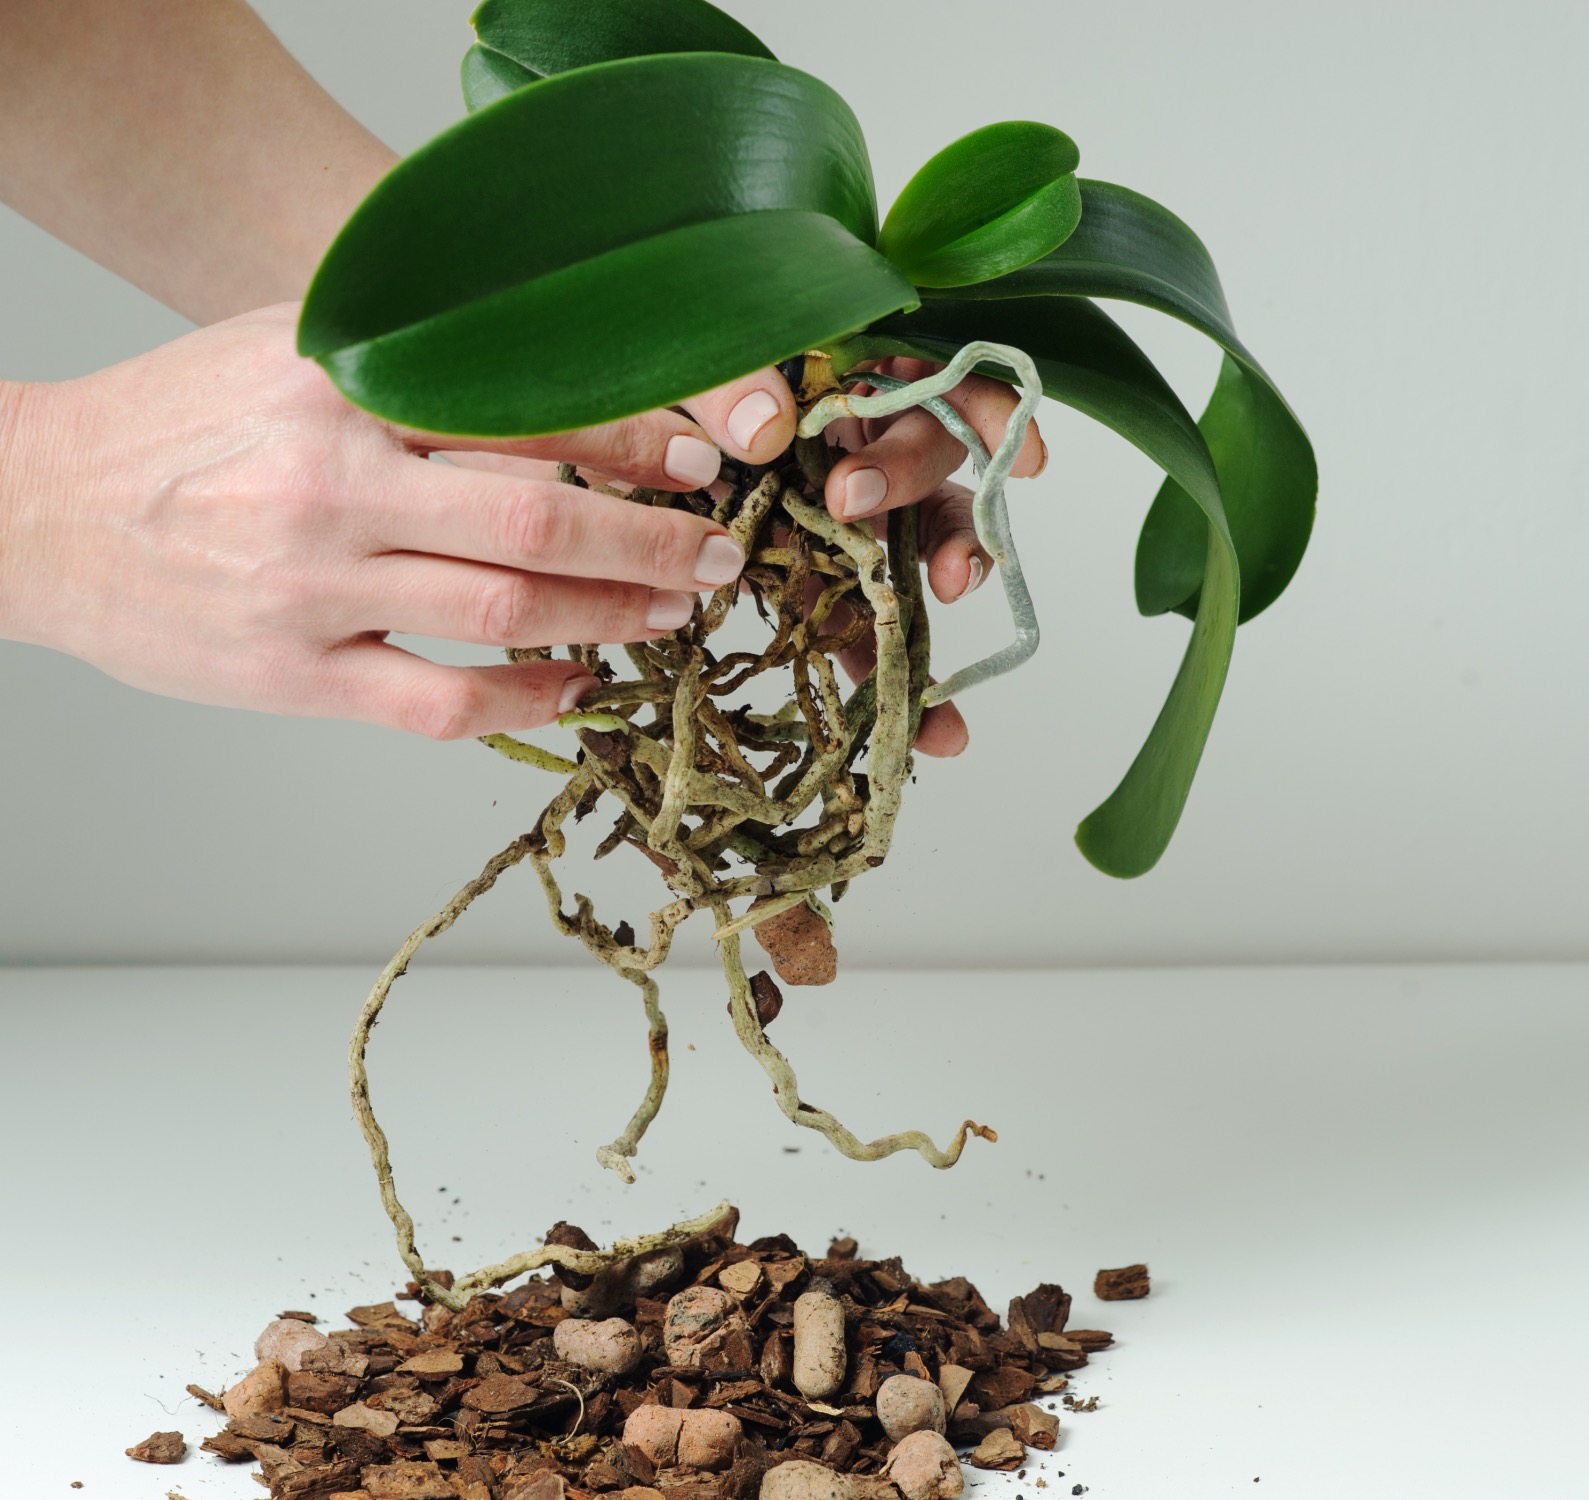
When inspecting the roots, it’s essential to do so gently to avoid damaging the plant. One way to inspect the roots without causing harm is to gently remove the plant from its pot and inspect the roots. Another way is to use a chopstick or pencil to gently probe the soil and inspect the roots.
By recognizing the signs of healthy root growth, orchid enthusiasts can take steps to promote healthy root development and prevent common problems associated with orchid roots, such as root bound and root rot. Remember, healthy roots are essential for healthy orchid growth, so take the time to inspect your orchid’s roots regularly and take corrective action if necessary.
How to Repot an Orchid with Roots Growing Out of the Pot
Repotting an orchid with roots growing out of the pot can be a delicate process, but with the right steps, you can ensure the health and well-being of your plant. Before starting, make sure you have the right materials, including a new pot, potting mix, and a gentle fertilizer.
Step 1: Choose the Right Potting Mix
When selecting a potting mix for your orchid, look for one that is specifically designed for orchids and contains ingredients such as sphagnum moss, perlite, and vermiculite. These ingredients will help to retain moisture, improve drainage, and provide aeration for the roots.
Step 2: Select the Right Pot Size
When choosing a new pot for your orchid, select one that is slightly larger than the previous pot. This will give the roots enough room to grow without becoming too wet or waterlogged. Make sure the pot has drainage holes to prevent water from accumulating in the soil.
Step 3: Remove the Orchid from the Old Pot
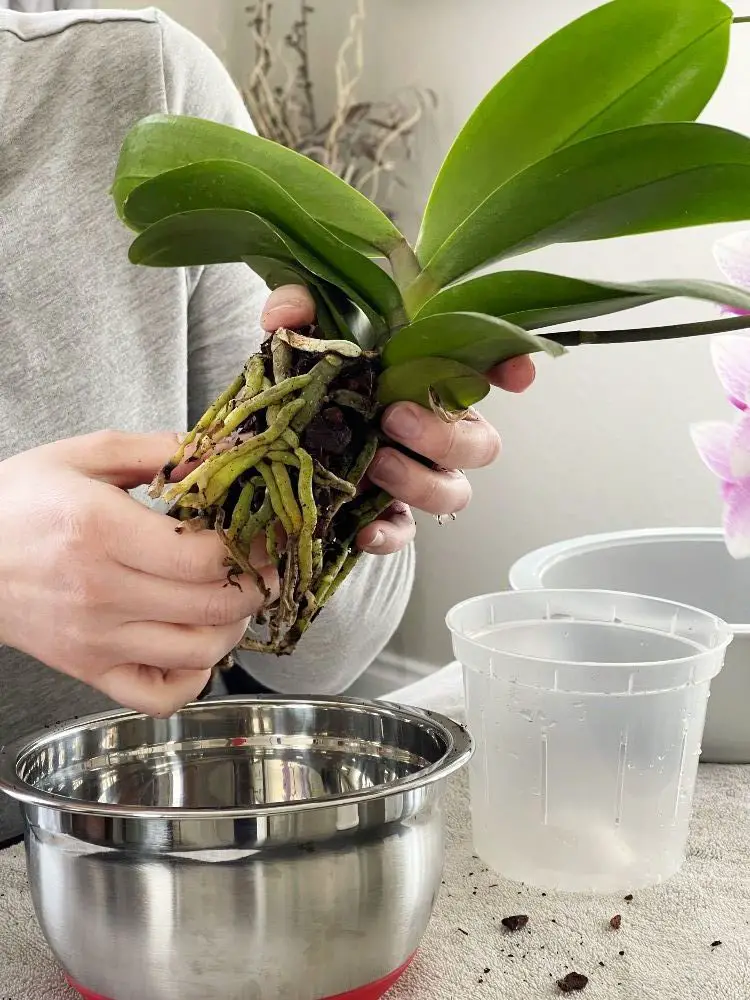
Gently remove the orchid from the old pot, taking care not to damage the roots. If the roots are circling or growing out of the pot, gently tease them apart with your fingers or a blunt instrument.
Step 4: Trim Old Potting Mix
Remove any old potting mix from the roots, taking care not to damage the roots. This will help to prevent the spread of disease and encourage new growth.
Step 5: Plant the Orchid in the New Pot
Plant the orchid in the new pot, making sure the roots are spread out evenly and the plant is secure. Water the plant gently but thoroughly, making sure the potting mix is moist but not waterlogged.
By following these steps, you can successfully repot your orchid with roots growing out of the pot and provide it with the best chance of healthy growth and development.
Preventing Root Bound: Tips for Providing Enough Space
Root bound is a common problem that can occur when orchid roots grow out of the pot and become constricted by the container. This can lead to a range of problems, including reduced growth, decreased flowering, and increased susceptibility to disease. To prevent root bound, it’s essential to provide enough space for the roots to grow.
Pot Size: Choosing the right pot size is critical for preventing root bound. A pot that is too small can cause the roots to become constricted, while a pot that is too large can cause the roots to become waterlogged. A good rule of thumb is to choose a pot that is slightly larger than the previous one, but not so large that the roots become waterlogged.
Pot Shape: The shape of the pot can also play a role in preventing root bound. A pot with a wide mouth and a narrow base can cause the roots to become constricted, while a pot with a narrow mouth and a wide base can provide more space for the roots to grow.
Pot Material: The material of the pot can also affect the growth of the roots. A pot made of a breathable material, such as terra cotta or ceramic, can provide better aeration for the roots than a pot made of a non-breathable material, such as plastic.
Repotting: Regular repotting can also help to prevent root bound. Orchids typically need to be repotted every 1-3 years, depending on the species and growing conditions. When repotting, choose a pot that is slightly larger than the previous one and gently remove any old potting mix from the roots.
By providing enough space for the roots to grow, orchid growers can help to prevent root bound and promote healthy growth and development. Remember, a healthy root system is essential for a healthy orchid, so take the time to provide your orchid with the right environment.
Common Mistakes to Avoid When Dealing with Orchid Roots
When it comes to caring for orchid roots, there are several common mistakes that can be detrimental to the health of the plant. By avoiding these mistakes, orchid growers can help to promote healthy root growth and prevent common problems.
Over-Watering: One of the most common mistakes orchid growers make is over-watering. This can cause the roots to rot, leading to a range of problems, including root bound and root damage. To avoid over-watering, make sure to water your orchid only when the potting mix is dry to the touch.
Under-Watering: On the other hand, under-watering can also be a problem. If the potting mix is too dry for too long, the roots can become damaged, leading to a range of problems, including root bound and root damage. To avoid under-watering, make sure to water your orchid regularly, but not too frequently.
Using the Wrong Potting Mix: Using the wrong potting mix can also be a problem. A potting mix that is too dense or too dry can cause the roots to become constricted, leading to a range of problems, including root bound and root damage. To avoid this, make sure to use a potting mix that is specifically designed for orchids and contains ingredients such as sphagnum moss, perlite, and vermiculite.
Not Repotting Regularly: Not repotting your orchid regularly can also be a problem. Orchids typically need to be repotted every 1-3 years, depending on the species and growing conditions. If you don’t repot your orchid regularly, the roots can become constricted, leading to a range of problems, including root bound and root damage.
By avoiding these common mistakes, orchid growers can help to promote healthy root growth and prevent common problems. Remember, a healthy root system is essential for a healthy orchid, so take the time to provide your orchid with the right environment.
Orchid Root Care: A Guide to Fertilization and Pruning
Fertilization and pruning are two essential components of orchid root care. By providing your orchid with the right nutrients and pruning its roots regularly, you can promote healthy root growth and prevent common problems.
Fertilization: Orchids require a balanced fertilizer that is high in nitrogen, phosphorus, and potassium. A fertilizer with a ratio of 20-20-20 is ideal for most orchids. However, it’s essential to note that over-fertilization can be detrimental to the health of the plant. To avoid over-fertilization, fertilize your orchid only once a month, and make sure to follow the instructions on the fertilizer package.
Pruning: Pruning is an essential part of orchid root care. By pruning your orchid’s roots regularly, you can promote healthy root growth and prevent common problems such as root bound and root damage. To prune your orchid’s roots, use a pair of sterile scissors or pruning shears to carefully trim away any dead or damaged roots.
When to Prune: The best time to prune your orchid’s roots is during the repotting process. This is usually done every 1-3 years, depending on the species and growing conditions. However, if you notice any dead or damaged roots, you can prune them at any time.
How to Prune: To prune your orchid’s roots, start by gently removing the plant from its pot. Then, use a pair of sterile scissors or pruning shears to carefully trim away any dead or damaged roots. Make sure to cut just above a node, as this will help the plant to heal quickly.
By following these tips and techniques, you can promote healthy root growth and prevent common problems associated with orchid roots. Remember, a healthy root system is essential for a healthy orchid, so take the time to provide your orchid with the right care.
Troubleshooting Common Orchid Root Problems
Despite proper care, orchid roots can still encounter problems. In this section, we’ll discuss some common orchid root problems and provide solutions to help you troubleshoot and resolve them.
Root Rot: Root rot is a common problem that can occur when the roots are exposed to too much water or moisture. To prevent root rot, make sure to provide good air circulation and avoid over-watering. If you notice any signs of root rot, such as soft or mushy roots, remove the affected roots and treat the plant with a fungicide.
Root Damage: Root damage can occur when the roots are handled roughly or when the plant is repotted. To prevent root damage, handle the roots gently and avoid repotting the plant too frequently. If you notice any signs of root damage, such as torn or broken roots, remove the affected roots and treat the plant with a rooting hormone.
Pest Infestations: Pest infestations, such as mealybugs or spider mites, can also affect orchid roots. To prevent pest infestations, inspect the plant regularly and treat any infestations promptly. Use insecticidal soap or neem oil to control pest populations and prevent them from spreading to other plants.
Root Bound: Root bound is a common problem that can occur when the roots outgrow the pot. To prevent root bound, repot the plant regularly and provide a pot that is large enough to accommodate the roots. If you notice any signs of root bound, such as circling or growing out of the pot, repot the plant immediately.
By troubleshooting and resolving common orchid root problems, you can help to promote healthy root growth and prevent problems from occurring in the future. Remember, a healthy root system is essential for a healthy orchid, so take the time to monitor and care for your orchid’s roots.
Conclusion: Mastering the Art of Orchid Root Care
Mastering the art of orchid root care requires a combination of knowledge, patience, and attention to detail. By understanding the natural process of orchid root growth, recognizing the signs of healthy root growth, and providing the right environment, you can promote healthy root growth and prevent common problems.
In this article, we’ve discussed the importance of a well-draining potting mix, proper watering techniques, and regular repotting. We’ve also covered common mistakes to avoid when dealing with orchid roots, such as over-watering, under-watering, and using the wrong potting mix.
Additionally, we’ve provided tips on how to fertilize and prune orchid roots without causing damage, and offered solutions to common orchid root problems, including root rot, root damage, and pest infestations.
By implementing the tips and techniques outlined in this article, you can help to promote healthy root growth and prevent common problems associated with orchid roots. Remember, a healthy root system is essential for a healthy orchid, so take the time to provide your orchid with the right care.
With the right knowledge and care, you can enjoy the beauty and elegance of orchids for years to come. Whether you’re a seasoned orchid grower or just starting out, we hope this article has provided you with the information and inspiration you need to master the art of orchid root care.


:max_bytes(150000):strip_icc()/orchid-wont-bloom-1315978-10-e88149a477d44eff93d325299cb1e1c3.jpg)


