Understanding the Basics of Potato Seeds
Potato seeds, also known as seed potatoes, are the primary means of propagating potatoes. Unlike other vegetables, potatoes are not typically grown from true seeds, but rather from small, whole potatoes or pieces of potatoes that have at least one “eye” each. These seed potatoes are specifically designed for planting and are certified disease-free to ensure a healthy crop. When learning how to plant potato seeds, it’s essential to understand the difference between seed potatoes and regular potatoes. Regular potatoes, often found in supermarkets, are not suitable for planting and may not produce a healthy crop.
Seed potatoes are available in various varieties, each with its unique characteristics, such as flavor, texture, and maturity date. When selecting seed potatoes, choose those that are certified disease-free and suitable for your region’s climate. This will help ensure a successful harvest and minimize the risk of disease. By using high-quality seed potatoes, you’ll be well on your way to growing a thriving potato crop.
Before planting potato seeds, it’s crucial to understand the benefits of using certified disease-free seed potatoes. These benefits include reduced risk of disease, improved crop yields, and increased resistance to pests and environmental stresses. By investing in high-quality seed potatoes, you’ll be investing in the success of your potato crop.
When it comes to planting potato seeds, it’s essential to follow proper techniques to ensure a healthy and productive crop. This includes preparing the soil, chitting the seeds, and planting at the right time. By following these steps and using certified disease-free seed potatoes, you’ll be well on your way to growing a successful potato crop.
Preparing the Soil for Optimal Growth
Before planting potato seeds, it’s essential to prepare the soil for optimal growth. Potato cultivation requires a well-draining, loose soil with a pH between 4.5 and 7.0. To achieve this, start by testing your soil pH using a soil testing kit or by sending a sample to a laboratory for analysis. Based on the results, amend the soil pH by adding lime to raise it or elemental sulfur to lower it.
In addition to adjusting the soil pH, add organic matter such as compost or well-rotted manure to improve soil structure and fertility. This will help to increase the soil’s water-holding capacity, aeration, and nutrient availability. Aim to add 2-4 inches of organic matter to the soil and mix it well to a depth of 8-10 inches.
Another critical aspect of soil preparation is creating a well-draining environment. Potatoes are susceptible to waterlogged soil, which can lead to rot and other diseases. To prevent this, ensure that the soil drains well by adding organic matter and creating raised beds if necessary. Raised beds also help to warm the soil faster in the spring, which can improve potato growth.
When preparing the soil for potato cultivation, it’s also essential to consider crop rotation. Potatoes should be rotated with other crops to avoid depleting the soil of nutrients and to reduce the risk of disease. A typical crop rotation for potatoes includes rotating with crops such as corn, wheat, or soybeans.
By preparing the soil correctly, you’ll be able to create an optimal environment for your potato seeds to grow. This will help to ensure a healthy and productive crop, and will also reduce the risk of disease and pests. When learning how to plant potato seeds, it’s essential to remember that soil preparation is a critical step in the process.
How to Chit Your Potato Seeds for Faster Growth
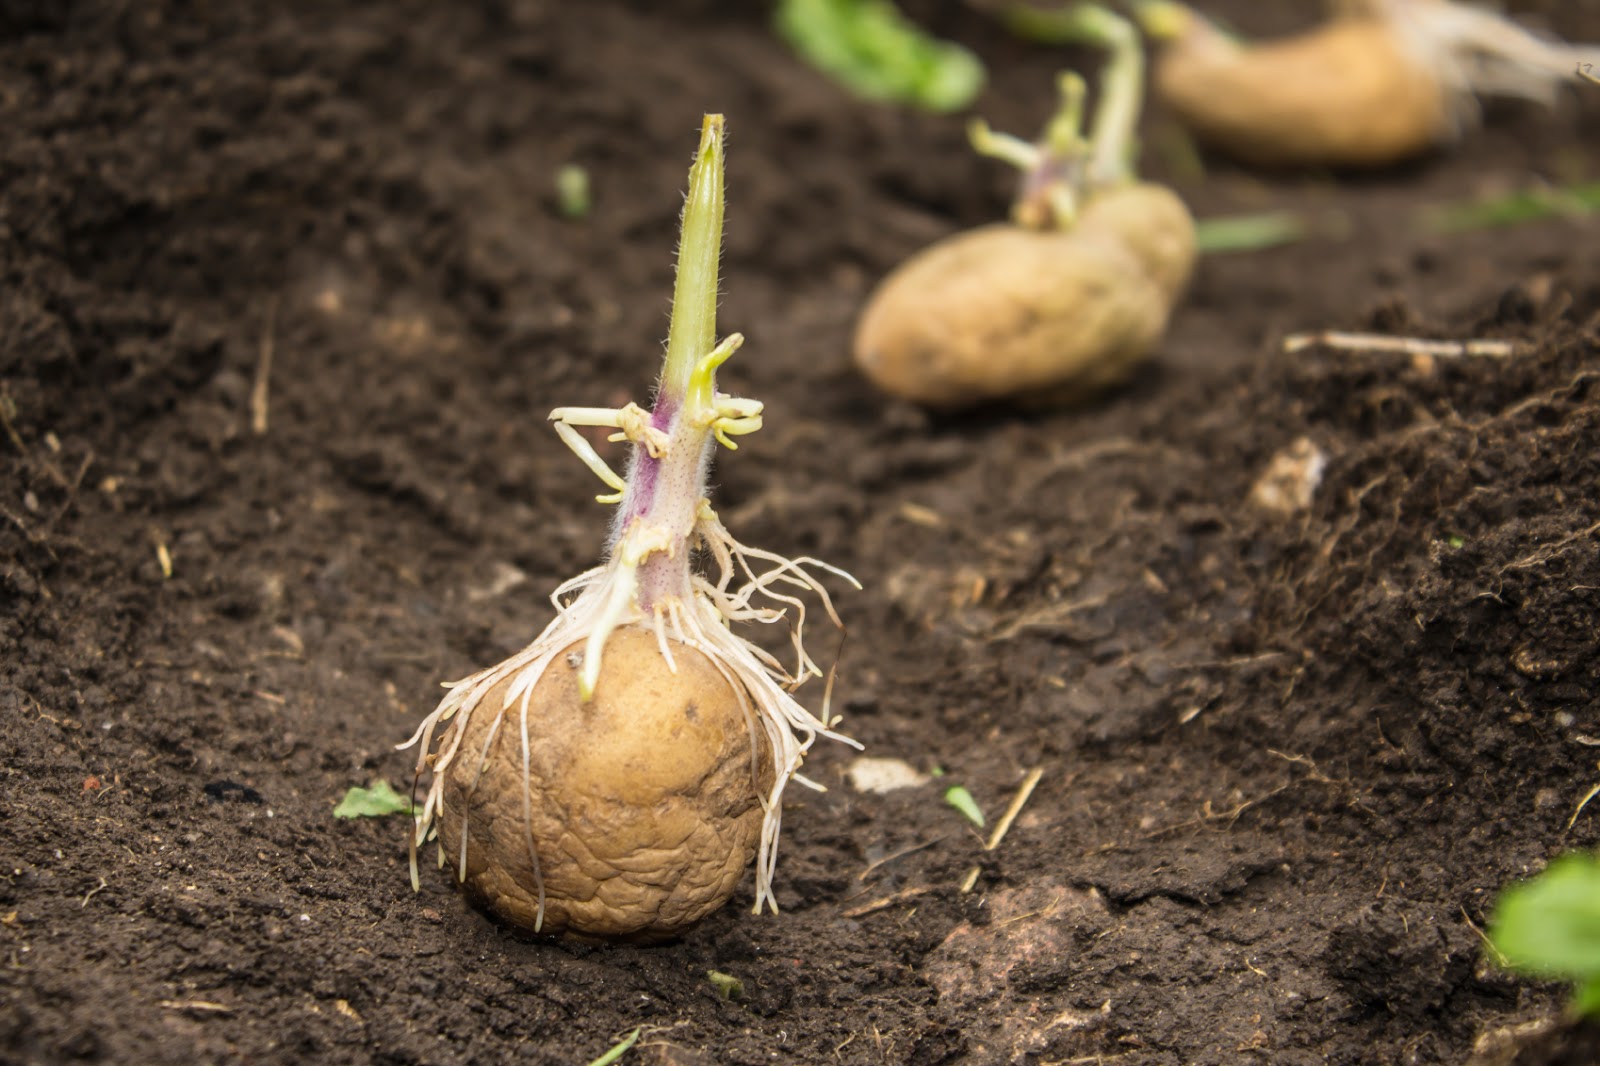
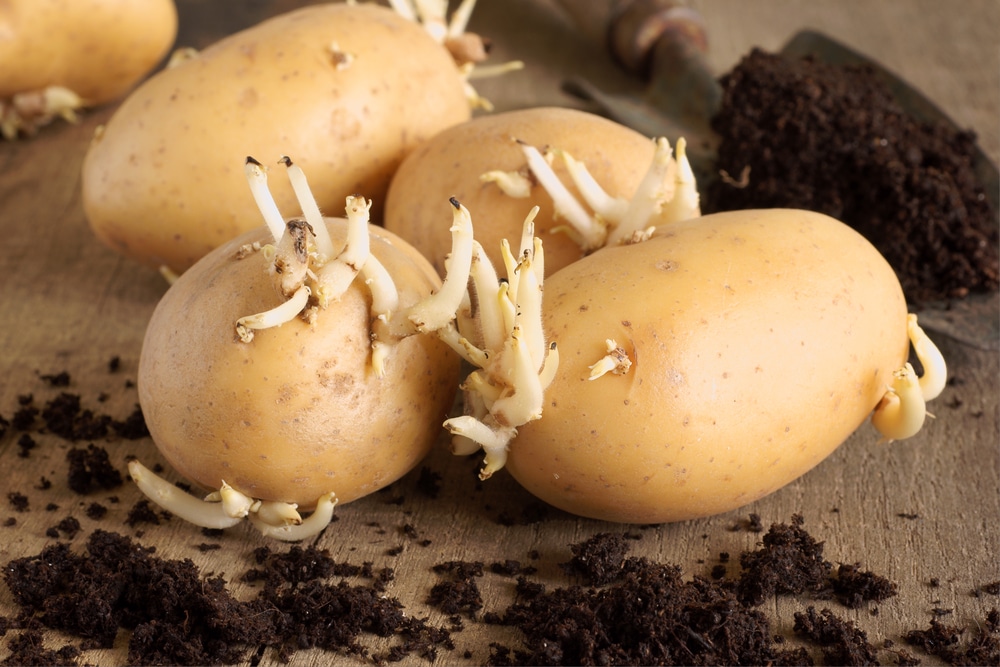
Chitting is the process of pre-sprouting potato seeds before planting them in the ground. This technique can help to speed up the growth of your potato crop and improve yields. To chit your potato seeds, start by placing them in a light, cool place with the “eyes” facing upwards. The ideal temperature for chitting is between 40°F and 50°F (4°C and 10°C).
Allow the seeds to chit for 2-4 weeks, or until you see short, green shoots emerging from the eyes. During this time, make sure to keep the seeds in a humid environment and avoid direct sunlight. You can cover the seeds with a damp cloth or paper towel to maintain humidity.
Once the seeds have chitted, it’s essential to handle them carefully to avoid damaging the delicate shoots. When planting chitted seeds, make sure to plant them at the same depth as they were during the chitting process. This will help to prevent the shoots from becoming leggy and reduce the risk of disease.
Chitting potato seeds can also help to improve the overall health of your crop. By allowing the seeds to pre-sprout, you can reduce the risk of disease and pests, and improve the chances of a successful harvest. When learning how to plant potato seeds, it’s essential to understand the benefits of chitting and how to do it correctly.
Some tips to keep in mind when chitting potato seeds include using a consistent temperature and humidity level, avoiding direct sunlight, and handling the seeds carefully to avoid damage. By following these tips, you can help to ensure a successful chitting process and improve the overall health of your potato crop.
Planting Potato Seeds: A Step-by-Step Guide
Now that you have prepared the soil and chitted your potato seeds, it’s time to plant them. The best time to plant potato seeds depends on your location and climate. In general, it’s best to plant potato seeds in early spring, about 2-4 weeks before the last frost date. This allows the plants to mature before the hot summer weather sets in.
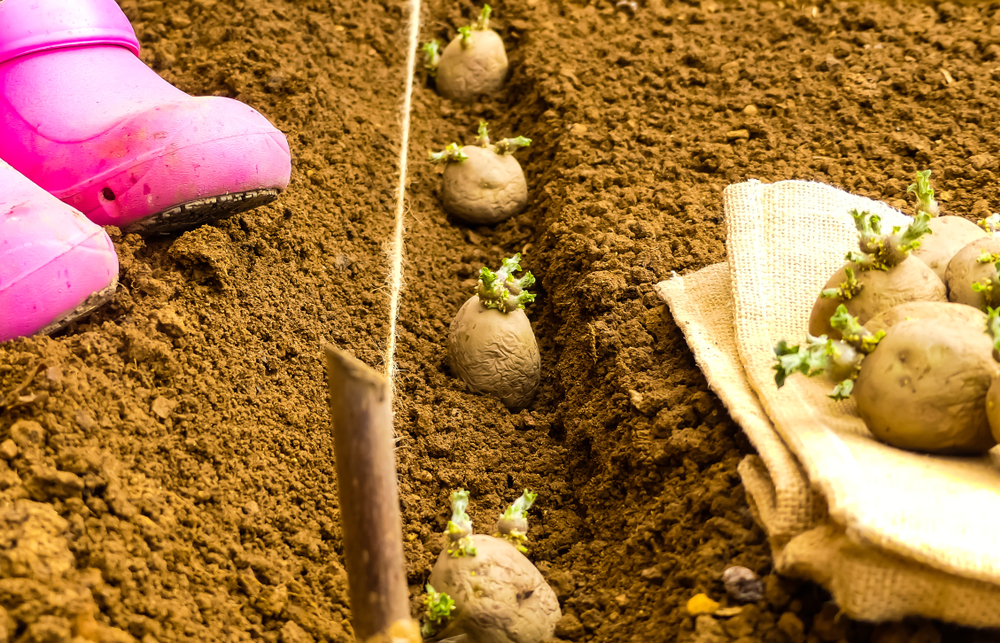
When planting potato seeds, make sure to space them correctly. The ideal spacing for potato seeds is 12-18 inches apart, with the rows spaced 3-4 feet apart. This allows for good air circulation and sunlight penetration, which can help to prevent disease.
Plant the chitted potato seeds at a depth of 2-4 inches, with the “eyes” facing upwards. Cover the seeds with a thin layer of soil and gently firm the soil around them. Water the soil gently but thoroughly after planting.
After planting, it’s essential to hill the soil around the base of the plants. This involves piling up soil around the base of the plants, leaving only a few inches of the leaves exposed. Hilling helps to produce more tubers and can improve yields.
Mulching is also an essential step in planting potato seeds. Mulch helps to retain moisture, suppress weeds, and regulate soil temperature. Apply a 2-3 inch layer of organic mulch, such as straw or wood chips, around the plants.
By following these steps and tips, you can ensure a successful potato crop. Remember to keep the soil consistently moist during the first few weeks after planting, and to provide support for the plants as they grow. With proper care and attention, you can enjoy a bountiful harvest of delicious potatoes.
Caring for Your Potato Crop: Tips and Tricks
Once your potato seeds are planted, it’s essential to provide them with the right care to ensure a healthy and productive crop. One of the most critical aspects of caring for your potato crop is watering. Potatoes need consistent moisture, especially when they’re producing tubers. Aim to provide about 1-2 inches of water per week, either through rainfall or irrigation.
Fertilizing is also crucial for potato growth. Use a balanced fertilizer that’s high in phosphorus, which promotes root development and tuber formation. Avoid over-fertilizing, as this can lead to weak and leggy plants. Instead, focus on providing a steady supply of nutrients throughout the growing season.
Pest management is another essential aspect of caring for your potato crop. Keep an eye out for common pests like aphids, whiteflies, and potato beetles. Use organic or integrated pest management (IPM) methods to control infestations, such as introducing beneficial insects or using neem oil.
Disease management is also critical for potato crops. Keep an eye out for signs of disease like yellowing leaves, black spots, or powdery mildew. Use crop rotation, sanitation, and fungicides to prevent and control disease outbreaks.
Finally, keep an eye out for common problems like nutrient deficiencies, soil compaction, and weather damage. Use soil tests to identify nutrient deficiencies, and adjust your fertilization schedule accordingly. Avoid compacting the soil, which can reduce tuber formation and yield. And be prepared for extreme weather events like droughts, floods, or frosts, which can impact potato growth and yield.
By following these tips and tricks, you can help ensure a healthy and productive potato crop. Remember to stay vigilant and adapt to changing conditions throughout the growing season. With proper care and attention, you can enjoy a bountiful harvest of delicious potatoes.
Common Mistakes to Avoid When Planting Potato Seeds
When planting potato seeds, there are several common mistakes to avoid in order to ensure a healthy and productive crop. One of the most critical mistakes is incorrect soil preparation. If the soil is too dense or lacks organic matter, it can lead to poor drainage and reduced tuber formation. Make sure to test and amend the soil pH, add organic matter, and create a well-draining environment for optimal growth.
Another common mistake is inadequate moisture. Potatoes need consistent moisture, especially when they’re producing tubers. If the soil is too dry, it can lead to reduced yields and poor tuber quality. Make sure to provide about 1-2 inches of water per week, either through rainfall or irrigation.
Poor crop rotation is also a common mistake when planting potato seeds. Potatoes are susceptible to disease and pests, and poor crop rotation can lead to the buildup of these problems. Make sure to rotate your potato crop with other crops, such as corn or wheat, to reduce the risk of disease and pests.
Other common mistakes to avoid when planting potato seeds include planting too deeply, not hilling the soil, and not mulching. Planting too deeply can lead to reduced yields and poor tuber quality, while not hilling the soil can lead to reduced tuber formation. Not mulching can lead to reduced moisture retention and increased soil temperature.
By avoiding these common mistakes, you can help ensure a healthy and productive potato crop. Remember to stay vigilant and adapt to changing conditions throughout the growing season. With proper care and attention, you can enjoy a bountiful harvest of delicious potatoes.
Some additional tips to keep in mind when planting potato seeds include using certified disease-free seed potatoes, planting at the right time, and providing support for the plants as they grow. By following these tips and avoiding common mistakes, you can help ensure a successful potato crop.
Harvesting Your Potato Crop: When and How
Harvesting your potato crop is an exciting time, and it’s essential to do it correctly to ensure the best flavor and texture. The timing of the harvest depends on the variety of potato you’re growing, as well as the weather conditions. Generally, potatoes are ready to harvest about 70-100 days after planting.
To determine if your potatoes are ready to harvest, gently dig around the plants with a fork, being careful not to damage the tubers. If the tubers are the desired size, it’s time to harvest. If not, wait a few more days and check again.
When harvesting potatoes, it’s essential to dig them up carefully to avoid damaging the tubers. Use a fork to loosen the soil around the plants, then lift the tubers out of the ground. Avoid using a shovel or other sharp tools, as they can damage the tubers.
After harvesting, it’s essential to store the potatoes properly to maintain their flavor and texture. Store them in a cool, dark place with good ventilation, such as a basement or root cellar. Keep them away from light, as it can cause the tubers to produce chlorophyll and become green.
For long-term preservation, you can store potatoes in a container filled with sand or sawdust. This will help to keep them cool and dry, and prevent them from rotting. You can also store potatoes in a refrigerator, but be sure to keep them away from apples and other fruits, as they can cause the potatoes to ripen more quickly.
By following these tips, you can enjoy a bountiful harvest of delicious potatoes. Remember to always handle the tubers carefully, and store them properly to maintain their flavor and texture.
Troubleshooting Common Problems with Potato Seeds
When planting potato seeds, several common problems can arise, including poor germination, disease, and pests. To troubleshoot these issues, it’s essential to identify the cause of the problem and take corrective action.
Poor germination can be caused by a variety of factors, including inadequate moisture, poor soil quality, and incorrect planting depth. To address poor germination, ensure that the soil is consistently moist, and the planting depth is correct. You can also try using a soil warming mat to improve germination rates.
Disease is another common problem that can affect potato seeds. Common diseases include late blight, early blight, and scab. To prevent disease, use certified disease-free seed potatoes, and practice good crop rotation. You can also use fungicides to control disease outbreaks.
Pests can also be a problem when planting potato seeds. Common pests include aphids, whiteflies, and potato beetles. To control pests, use integrated pest management (IPM) techniques, such as introducing beneficial insects, using neem oil, and practicing good sanitation.
Other common problems that can arise when planting potato seeds include nutrient deficiencies, soil compaction, and weather damage. To address these issues, ensure that the soil is well-draining, and the plants are receiving adequate nutrients. You can also use mulch to retain moisture and suppress weeds.
By troubleshooting common problems and taking corrective action, you can help ensure a healthy and productive potato crop. Remember to stay vigilant and adapt to changing conditions throughout the growing season.


