Understanding the Calla Lily Life Cycle
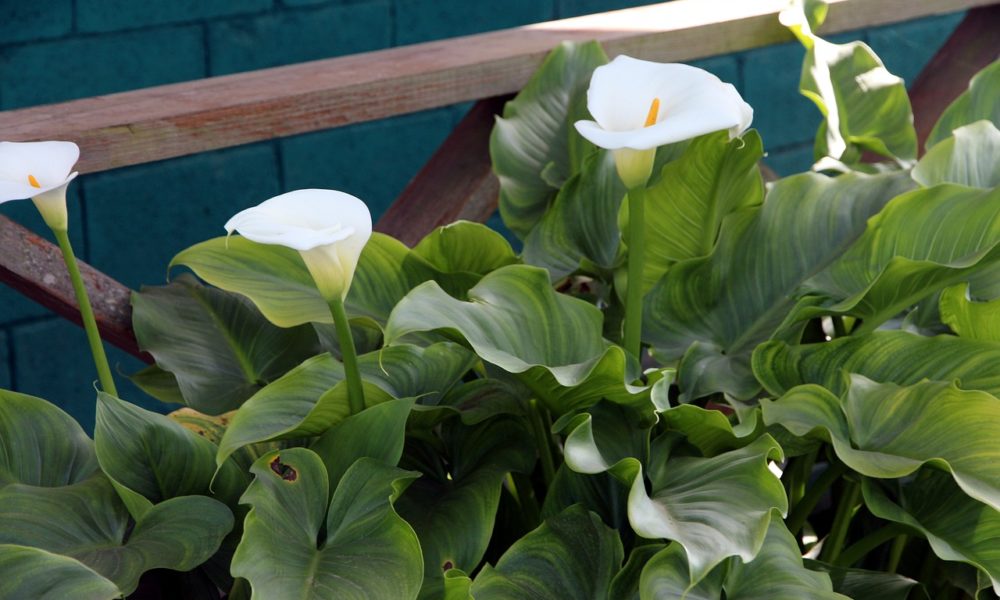
The calla lily, also known as Zantedeschia aethiopica, is a popular and elegant flower that is often used in weddings, bouquets, and other floral arrangements. To understand when calla lilies bloom, it’s essential to grasp the different stages of their life cycle. The life cycle of a calla lily consists of three main stages: planting, growth, and blooming.
The planting stage typically begins in the spring or fall, when the rhizomes are planted in well-draining soil with partial shade. During this stage, the calla lily develops its root system and begins to grow its foliage. The growth stage can last anywhere from 3 to 6 months, depending on factors such as temperature, light, and watering.
As the calla lily grows, it begins to produce a flower spike, which can take several weeks to develop. The blooming stage is the most critical stage of the life cycle, as it determines the quality and quantity of the blooms. Calla lilies typically bloom in the late spring or early summer, around 3 to 4 months after planting. However, the exact timing of when calla lily bloom can vary depending on factors such as climate, soil quality, and light exposure.
Understanding the life cycle of a calla lily is crucial for optimal care and blooming. By providing the right conditions and care during each stage, gardeners can encourage healthy growth and blooming. In the next section, we will discuss how to create the perfect environment for calla lily blooms.
How to Create the Perfect Environment for Calla Lily Blooms
Creating an ideal environment is crucial for calla lily blooms to thrive. To encourage healthy growth and blooming, it’s essential to provide the right conditions for your calla lilies. Lighting, temperature, watering, and fertilization are all critical factors to consider when creating the perfect environment for your calla lilies.
Lighting is one of the most critical factors in creating an ideal environment for calla lily blooms. Calla lilies require bright, indirect light to bloom, but direct sunlight can cause the leaves to become scorched. East- or west-facing windows are ideal for calla lilies, as they provide gentle, indirect light. If you’re growing calla lilies outdoors, choose a location that receives partial shade, especially in warmer climates.
Temperature is also an essential factor in creating an ideal environment for calla lily blooms. Calla lilies prefer temperatures between 65°F to 75°F (18°C to 24°C) during the day and around 55°F (13°C) at night. Avoid placing calla lilies near heating or cooling vents, fireplaces, or drafty windows, as this can cause temperature fluctuations that can affect blooming.
Watering is another critical factor in creating an ideal environment for calla lily blooms. Calla lilies require consistent moisture, especially during the blooming period. However, overwatering can be detrimental to the plant, causing root rot and other problems. Check the soil daily, and water only when the top inch of soil feels dry to the touch.
Fertilization is also essential for promoting healthy calla lily blooms. Use a balanced, water-soluble fertilizer (20-20-20) to feed your calla lilies. Dilute the fertilizer to half the recommended strength to avoid burning the roots. Apply the fertilizer once a month, except during the winter months when the plant is dormant.
By providing the right environment, including lighting, temperature, watering, and fertilization, you can encourage healthy growth and blooming in your calla lilies. In the next section, we’ll discuss the role of light in calla lily blooming and how to optimize lighting conditions for optimal blooms.
The Role of Light in Calla Lily Blooming
Light plays a crucial role in calla lily blooming, and understanding the optimal amount and type of light required is essential for promoting healthy blooms. Calla lilies require bright, indirect light to bloom, but direct sunlight can cause the leaves to become scorched and the flowers to fade.
The optimal amount of light for calla lilies is between 40,000 to 50,000 lux, which is equivalent to the light intensity of a cloudy day. Placing calla lilies near an east- or west-facing window is ideal, as this provides gentle, indirect light. Avoid placing calla lilies in areas with low light, such as basements or north-facing rooms, as this can lead to weak and spindly growth.
In addition to the amount of light, the type of light is also important for calla lily blooming. Calla lilies require a spectrum of light that is rich in blue and red wavelengths, which are essential for photosynthesis and flower production. Fluorescent grow lights can be used to supplement natural light, but make sure to choose a light that is specifically designed for flowering plants.
It’s also important to note that calla lilies have a natural photoperiod, which is the length of time they are exposed to light each day. Calla lilies typically require 12 to 14 hours of light per day to bloom, and reducing the photoperiod can lead to weak and spindly growth.
By providing the optimal amount and type of light, you can promote healthy calla lily blooms and enjoy their beautiful flowers for weeks to come. In the next section, we’ll discuss the importance of watering and humidity in calla lily care, and how to avoid common mistakes that can affect blooming.
Watering and Humidity: The Key to Healthy Calla Lily Blooms
Proper watering and humidity levels are crucial for healthy calla lily blooms. Calla lilies require consistent moisture, especially during the blooming period, but overwatering can be detrimental to the plant. To avoid overwatering, check the soil daily, and water only when the top inch of soil feels dry to the touch.
The ideal humidity level for calla lilies is between 40% to 60%. To maintain this level, you can place the pot on a tray filled with water and pebbles or use a humidifier. Avoid placing calla lilies in areas with low humidity, such as near heating or cooling vents, as this can cause the leaves to become scorched and the flowers to fade.
Underwatering can also affect calla lily blooms, causing the leaves to become wilted and the flowers to drop. To avoid underwatering, make sure to water the plant thoroughly, and avoid getting water on the leaves or flowers to prevent fungal diseases.
It’s also important to note that calla lilies have a natural watering cycle, which is influenced by the temperature and humidity of the environment. In warmer temperatures, calla lilies require more frequent watering, while in cooler temperatures, they require less frequent watering.
By maintaining proper watering and humidity levels, you can promote healthy calla lily blooms and enjoy their beautiful flowers for weeks to come. In the next section, we’ll discuss the role of fertilization and nutrition in promoting healthy calla lily blooms, and provide tips on the best types of fertilizers to use.
Fertilization and Nutrition for Optimal Blooming
Fertilization and nutrition play a crucial role in promoting healthy calla lily blooms. Calla lilies require a balanced diet of nutrients to produce strong, healthy growth and vibrant blooms. A well-balanced fertilizer that contains nitrogen, phosphorus, and potassium (NPK) is essential for optimal blooming.
When choosing a fertilizer for your calla lilies, look for a product that is specifically formulated for flowering plants. A fertilizer with a higher phosphorus content (such as 15-30-15) will promote blooming and root development. Avoid using high-nitrogen fertilizers, as they can promote leaf growth at the expense of blooms.
In addition to fertilization, calla lilies also require other essential nutrients such as iron, magnesium, and calcium. These micronutrients can be provided through the use of a balanced fertilizer or by adding supplements to the soil.
It’s also important to note that calla lilies have different nutritional needs at different stages of their life cycle. During the blooming period, calla lilies require more phosphorus and potassium to promote blooming and root development. After blooming, calla lilies require more nitrogen to promote leaf growth and prepare for the next blooming cycle.
By providing the right fertilization and nutrition, you can promote healthy calla lily blooms and enjoy their beautiful flowers for weeks to come. In the next section, we’ll discuss common mistakes to avoid when growing calla lilies, including inadequate light, overwatering, and poor fertilization.
Common Mistakes to Avoid When Growing Calla Lilies
When growing calla lilies, there are several common mistakes to avoid in order to ensure optimal blooming and plant health. One of the most common mistakes is inadequate light, which can lead to weak and spindly growth. Make sure to provide your calla lilies with bright, indirect light, and avoid placing them in areas with low light.
Overwatering is another common mistake that can be detrimental to calla lily health. Calla lilies require consistent moisture, but overwatering can cause root rot and other problems. Check the soil daily, and water only when the top inch of soil feels dry to the touch.
Poor fertilization is also a common mistake that can affect calla lily blooming. Use a balanced fertilizer that is specifically formulated for flowering plants, and avoid using high-nitrogen fertilizers that can promote leaf growth at the expense of blooms.
Other common mistakes to avoid when growing calla lilies include inadequate humidity, poor air circulation, and exposure to extreme temperatures. By avoiding these common mistakes, you can promote healthy calla lily growth and blooming, and enjoy their beautiful flowers for weeks to come.
In addition to avoiding common mistakes, it’s also important to provide your calla lilies with proper care after they finish blooming. In the next section, we’ll discuss how to care for calla lilies after blooming, including how to deadhead, prune, and store the rhizomes.
How to Care for Calla Lilies After Blooming
After calla lilies finish blooming, it’s essential to provide them with proper care to ensure they remain healthy and continue to produce beautiful flowers. One of the most important steps is to deadhead the flowers, which involves removing the spent blooms to encourage the plant to focus its energy on producing new growth.
Pruning is also an essential step in caring for calla lilies after blooming. Remove any dead or dying leaves or stems to prevent the spread of disease and encourage healthy growth. Cut back the flower stalks to about 3-4 inches from the base of the plant to encourage new growth.
After pruning, allow the calla lily to rest for a few weeks before storing the rhizomes. During this time, reduce watering and fertilization to allow the plant to conserve energy. Once the plant has finished resting, store the rhizomes in a cool, dry place to allow them to recharge for the next growing season.
When storing the rhizomes, make sure to keep them in a breathable container, such as a paper bag or a mesh bag, to prevent moisture from accumulating and causing rot. Store the rhizomes in a cool, dry place, such as a basement or a garage, and avoid exposing them to extreme temperatures or humidity.
By following these steps, you can ensure your calla lilies remain healthy and continue to produce beautiful flowers for years to come. In the next section, we’ll discuss common issues that may affect calla lily blooms, including pests, diseases, and environmental stressors, and provide solutions to these problems.
Troubleshooting Common Issues with Calla Lily Blooms
Despite proper care and attention, calla lily blooms can still be affected by common issues such as pests, diseases, and environmental stressors. One of the most common pests that can affect calla lily blooms is the spider mite, which can cause yellowing or bronzing of the leaves and flowers.
To control spider mites, use a gentle insecticidal soap or neem oil, and make sure to spray the undersides of the leaves and flowers. Another common pest that can affect calla lily blooms is the mealybug, which can cause white, cottony patches on the leaves and stems.
Diseases such as root rot and leaf spot can also affect calla lily blooms. To prevent root rot, make sure to avoid overwatering and provide good air circulation around the plant. To prevent leaf spot, remove any infected leaves or stems, and treat the plant with a fungicide.
Environmental stressors such as extreme temperatures, humidity, and light can also affect calla lily blooms. To prevent damage from extreme temperatures, keep the plant in a location with a consistent temperature between 65-75°F (18-24°C). To prevent damage from extreme humidity, keep the plant in a location with a consistent humidity level between 40-60%.
By being aware of these common issues and taking steps to prevent them, you can ensure that your calla lily blooms remain healthy and vibrant. With proper care and attention, calla lily blooms can be a beautiful and rewarding addition to any garden or indoor space.


